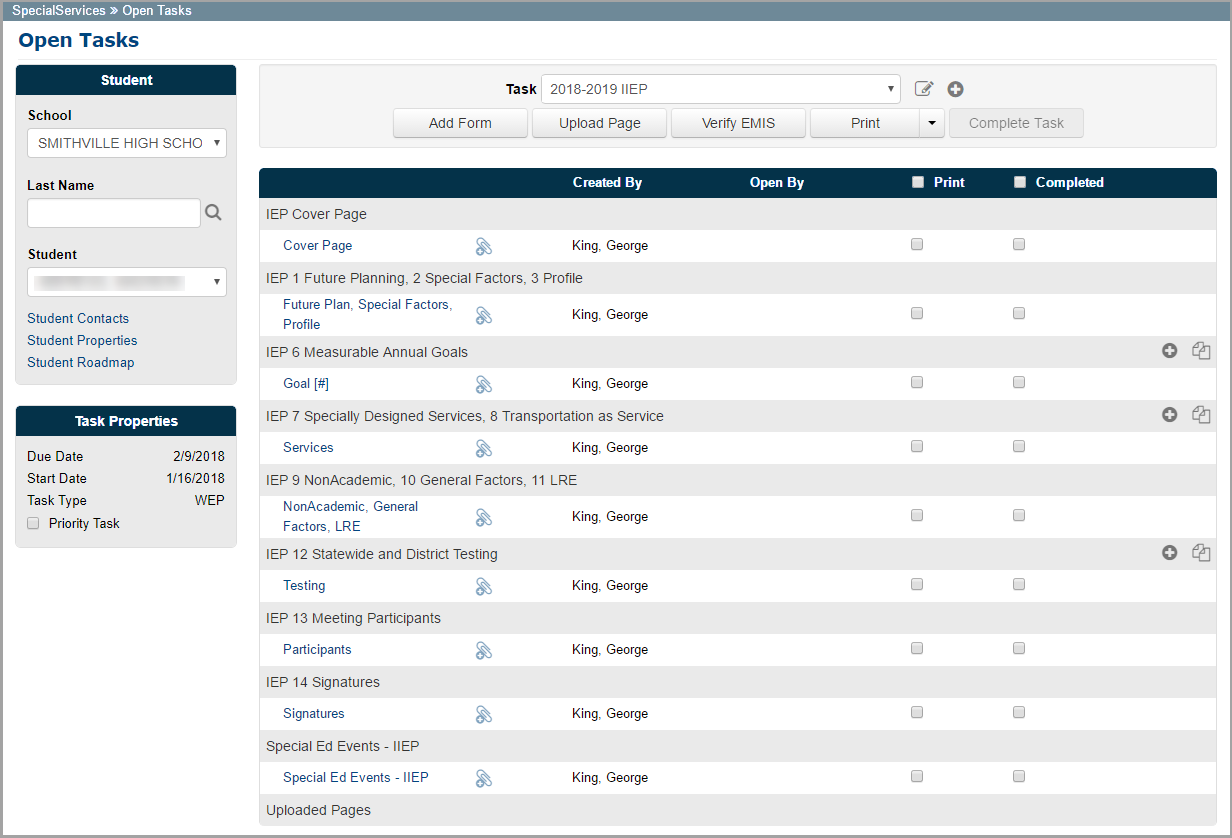
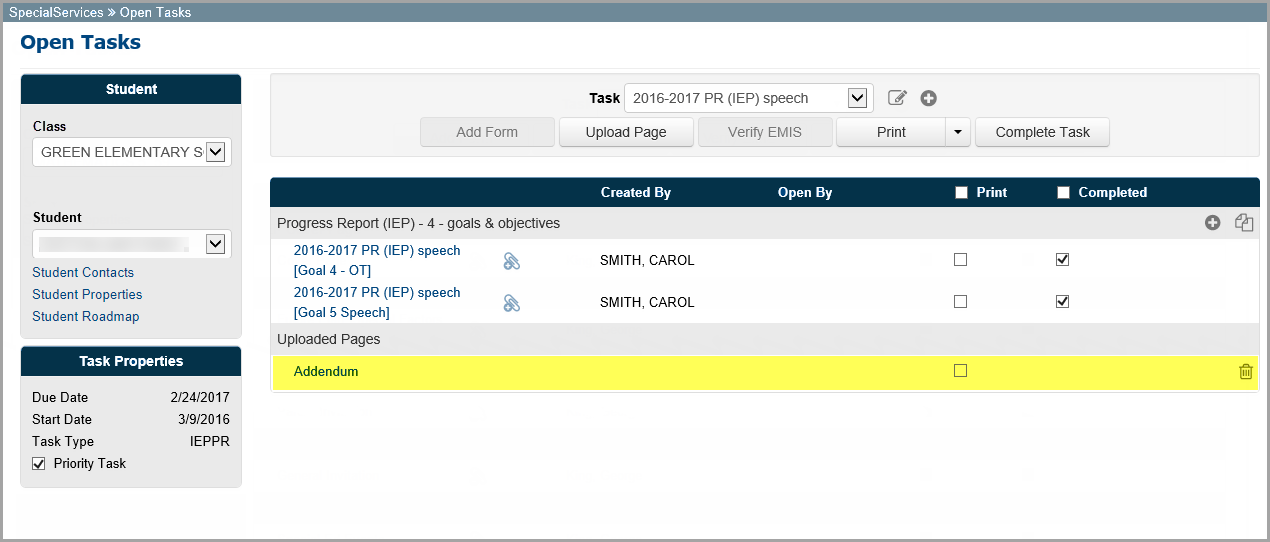
The Open Tasks screen is the main work area in SpecialServices Classic where you can create new and view existing tasks for a particular student. You can access the Open Tasks screen in either of the following ways:
•On
the banner, click ![]() , and then click Open
Tasks.
, and then click Open
Tasks.
•On the Task Queue screen, in the Task column, click the name of the task you want to view.
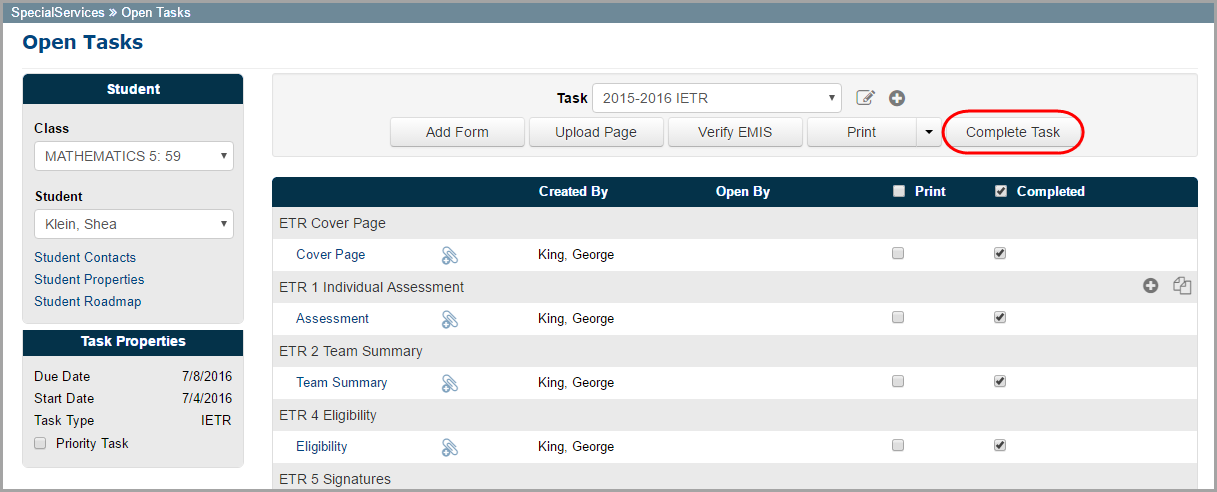
The Open Tasks screen displays.
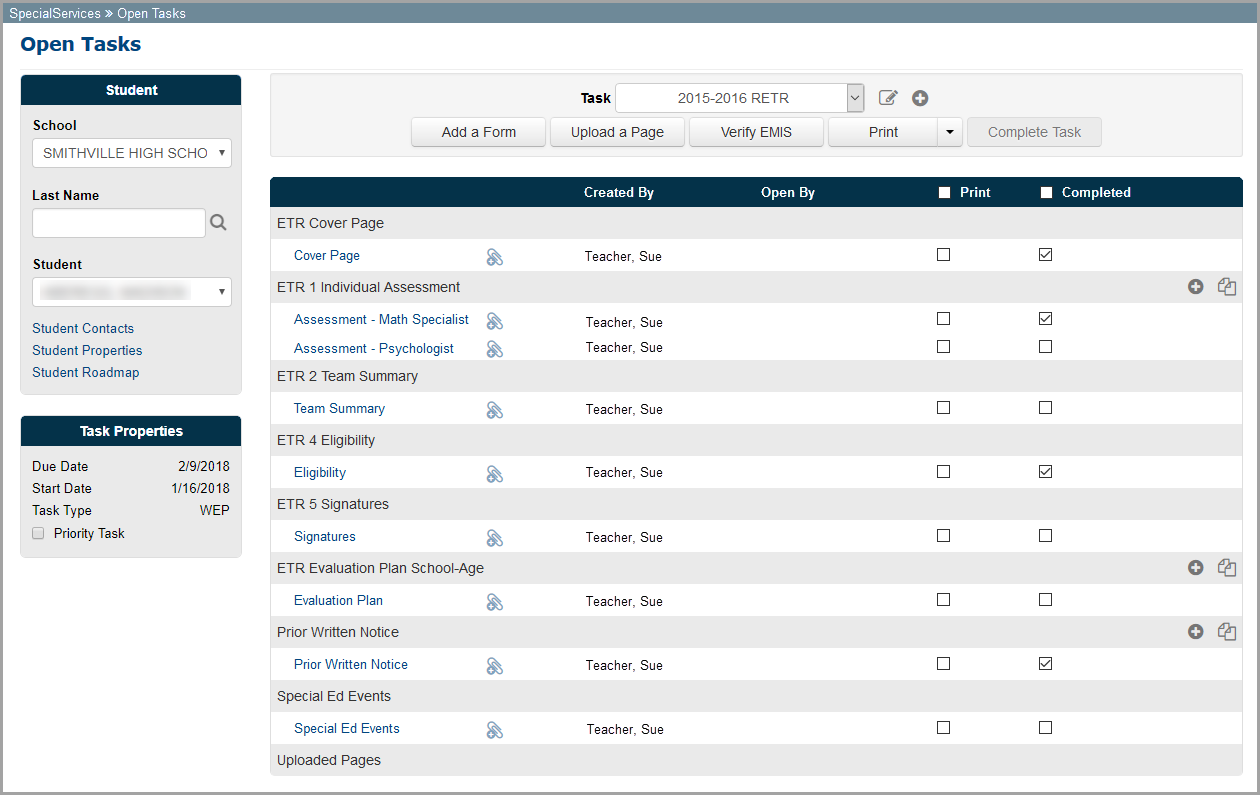
Note: The fields that display in the Student area on the left side of the screen depend on your security role. If you are a teacher, only the Class drop-down list and the Student drop-down list display.
To work with tasks, refer to the appropriate topic:
•“Viewing/Adding Student Contacts”
•“Deleting Pages, Forms, and Attachments”
Viewing/Adding Student Contacts
You can view and add information for student contacts.
Note: Only student contacts whose information has been added in StudentInformation can be added to a student’s contacts in SpecialServices Classic.
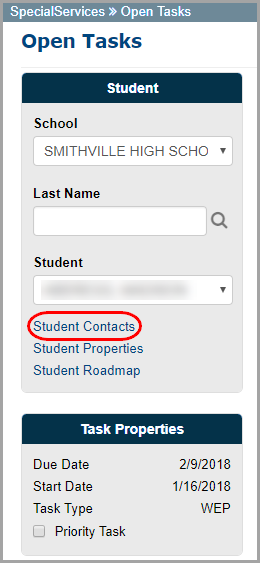
1.On the Open Tasks screen, select the Student from the drop-down list for whom you want to view/add contact information.
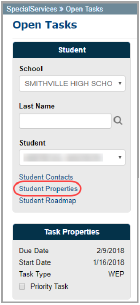
2.Click Student Contacts.
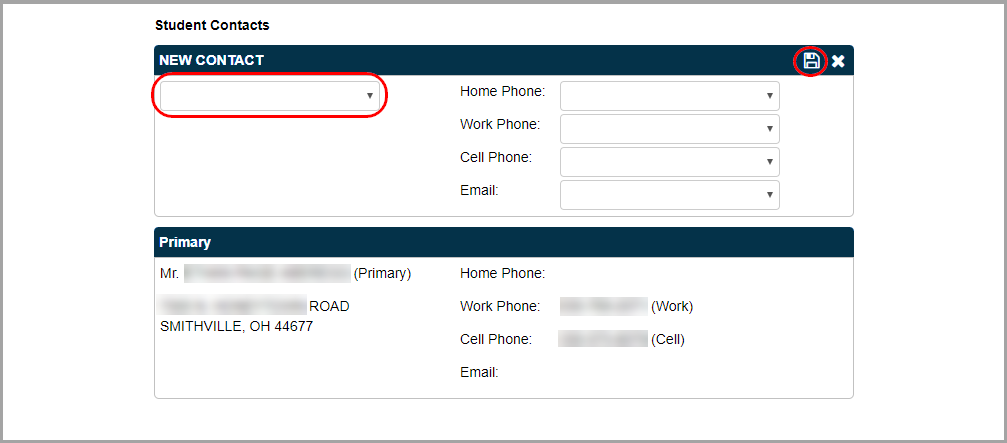
3.On the Student Contact window that opens, click Add Contacts.
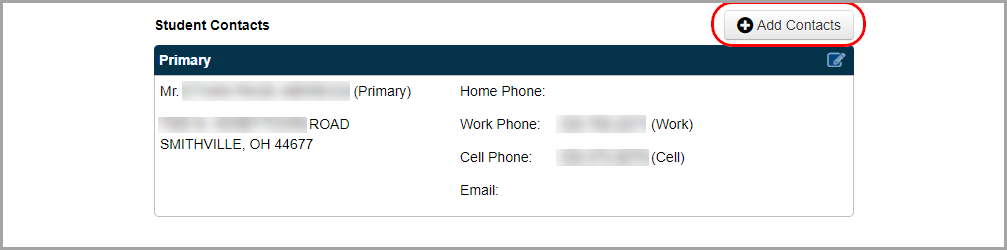
Note: Add Contacts displays only if contact information is available in StudentInformation.
4.In the New Contact drop-down list, select the contact you want to add.
The information entered in StudentInformation for that contact automatically displays in the appropriate fields.
5.Click
![]() .
.
6.(Optional)
To rearrange the order of the contacts, click ![]() or
or
![]() .
.
Note: If the student contact you selected as Primary is deleted from a student’s account in StudentInformation, the Primary area defaults to the student’s primary contact in StudentInformation.
If you have the appropriate security privileges, you can set a student’s demographic information, such as parent contact information and school district of residence. This information displays on multiple forms, including forms in open tasks.
1.On the Open Tasks screen, select the Student whose demographic information you want to set.
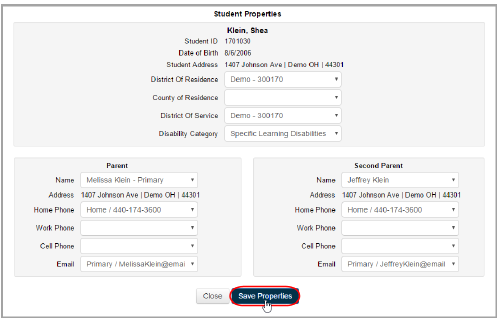
2.Click Student Properties.
3.On the Student Properties window that opens, select the appropriate information in the drop-down lists.
Note: Address information and parent contact information is live data from StudentInformation.
Note: To update information other than parent contacts, make the changes in StudentInformation. The new values are then updated in SpecialServices Classic during the nightly integration process. The exception is student address information, which is updated live.
4.Click Save Properties.
A confirmation message briefly displays.
5.Click Close.
You can create tasks in either of the following ways:
•To create a new task with blank forms, see “Creating a New Task.”
•To save time when creating a follow-up task, use the information entered on forms from a completed task (see “Creating a New Task from an Existing Task” ). For example, you can create a Periodic Review IEP (RIEP) from a student’s Initial IEP (IIEP).
Note: For a list of the available tasks in SpecialServices Classic, see “SpecialServices Classic Tasks.” Your district may provide additional tasks or custom versions of these tasks. Refer to your district procedures for more details about any custom tasks your district uses.
When you create a new task, the system provides all of the required forms, creating an editable page for each form. You can add forms once the task is created. All of the pages generated at the time you create the task display your name in the Created By field on the Open Tasks screen.
If you want to create a new task from a previous task, see “Creating a New Task from an Existing Task.”
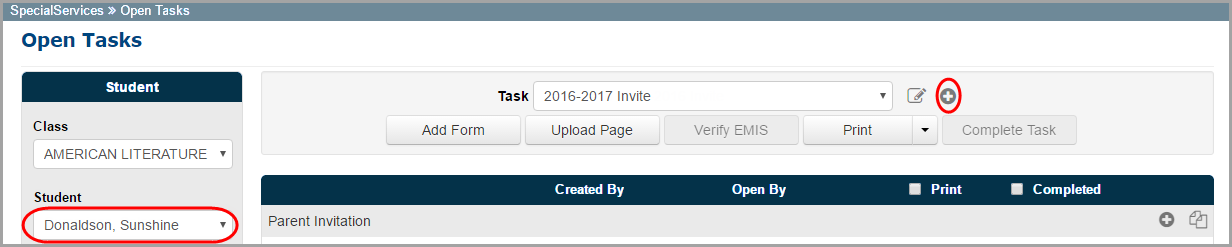
1.On the Open Tasks screen, in the Student drop-down list, select the student for whom you want to create the new task.
2.Click
![]() .
.
3.On the New Task window that opens, in the Task Template drop-down list, select the task you want to create.
4.In the Task Name field, the name defaults to the current school year followed by the task type. Enter a unique task name if desired.
5.In the School Year drop-down list, the current school year is selected by default. If the task applies to a different school year, select a different school year from the list.
Note: If you modify the task name and then select a school year other than the current school year, the task name reverts back to the default task name.
6.In the Grade Level drop-down list, select the student’s grade level. The student’s current grade level displays by default.
7.In the Due Date field, enter or select the due date. The due date is the deadline required for this event to be in compliance with EMIS.
8.If you want the task to display as Priority on the Task Queue screen, select the Add to my priority task list checkbox.
9.Click Start Task.

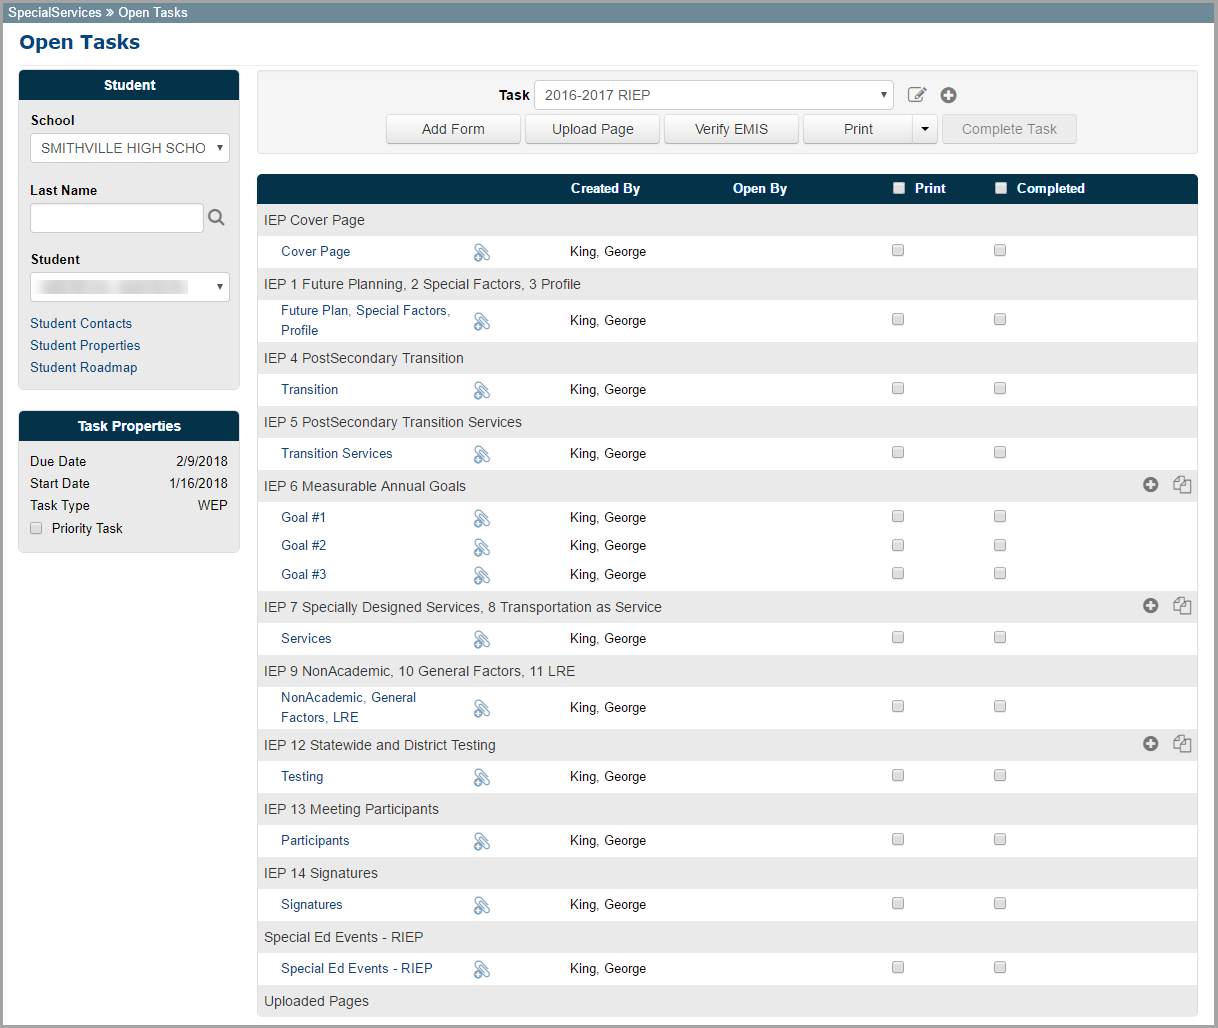
The system automatically creates the required pages for the new task, and these pages display on the Open Tasks screen.
You can now perform any of the following actions:
•Open a page to begin entering information (see “Editing Pages” ).
•Add a form to the task (see “Adding Forms” ).
•Create multiple pages of the same type (see “Creating New Pages” ).
•Add an editable attachment to a specific task page (see “Adding Attachments” ).
•Upload a read-only PDF to a specific task page or to the overall task (see “Uploading Pages” ).
Creating a New Task From an Existing Task
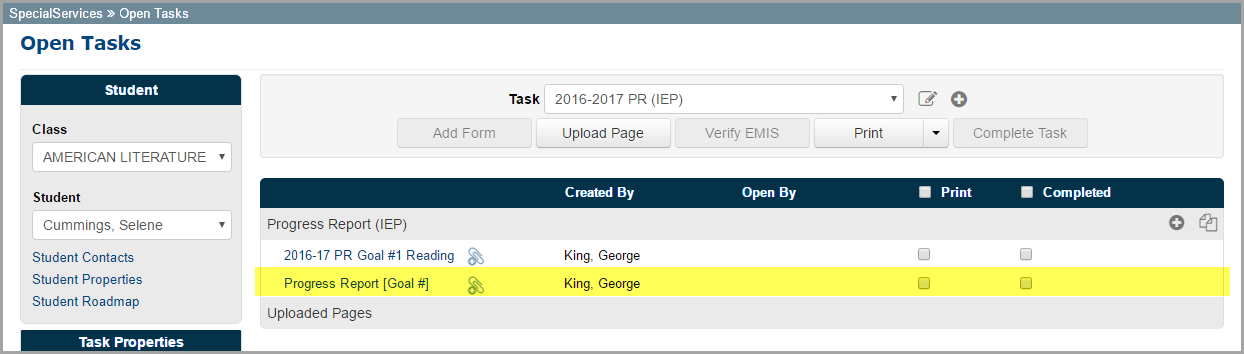
You can create a new task for a student by copying information from any of the student’s open or completed tasks. For example, you can use this feature to create an addendum to an existing IEP, copy a prior draft to create a new IEP, or copy the goals from an IEP task to a Progress Report task.
When you create a new task from an existing task of the same type, all of the information entered in the sections of the forms from the original task are copied to the corresponding forms or sections in the new task. Additionally, any uploaded pages, additional forms, and attachments added to the original task are copied to the new task.
When you create a new task from an existing task of a different type, only the information common between both forms is copied to the new task. For example, when creating a Progress Report (IEP) task, you could select the student’s IEP task. The system copies the information entered on the IEP 6 Measurable Annual Goals form to the corresponding sections on the progress report form as well as creates a progress report page for each goal page in the IEP.
The demographic information is not copied from the original task to the new task. The system uses the most current demographic information from StudentInformation and the Student Properties window.
If you want to create an entirely new task, see “Creating a New Task.”
1.On the Open Tasks screen, in the Student drop-down list, select the student for whom you want to create the new task.
2.Click
 .
.

3.On the New Task window that opens, in the Task Template drop-down list, select the task you want to create.
4.In the Task Name field, the name defaults to the current school year followed by the task. Enter a unique task name if desired.
5.In the School Year drop-down list, the current school year is selected by default. If the task applies to a different school year, select a different school year from the list.
Note: If you modify the task name and then select a school year other than the current school year, the task name reverts back to the default task name.
6.In the Grade Level drop-down list, select the student’s grade level. By default, the student’s current grade level displays.
7.In the Due Date field, enter or select the due date. The due date is the deadline required for this event to be in compliance with EMIS.
8.In the Create from Previous Task drop-down list, select the task from which you want to create the new task.
Note: Only tasks completed within the last 18 months display in the Create from Previous Task drop-down list.
Note: Completed tasks display with Comp: preceding the task name.
9.If you want the task to display as Priority on the Task Queue screen, select the Add to my priority task list checkbox.
10.Click Start Task.

All of the forms and attachments from the original task are created and display on the Open Tasks screen. When you open a page, the information from the original task displays in all of the sections. If the original task was a different task type than the new task, only the information relevant between the two tasks is copied to the appropriate pages.
You can now perform any of the following actions:
•Open a page to begin entering information (see “Editing Pages” ).
•Add a form to the task (see “Adding Forms” ).
•Create multiple pages of the same type (see “Creating New Pages” ).
•Add an editable attachment to a specific task page (see “Adding Attachments” ).
•Upload a read-only PDF to a specific task page or to the overall task (see “Uploading Pages” ).
On the Open Tasks screen, click the name of the page you want to edit to open it in an editable format.
•“Navigating to Pages on the Task Menu”
•“Importing Contact Information”
Note: You can also set up and maintain user banks on the page edit screen (see “Creating Bank Items Within Forms” ).
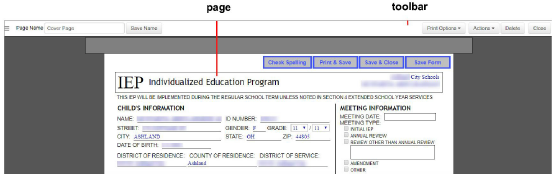
On the Open Tasks screen, click the name of a page to open it on the page edit screen. The page edit screen displays the page in a format that enables you to enter the appropriate information.
|
Caution: If a page is opened by another user (indicated in the Open By column on the Open Tasks screen), you can still open it unless it is locked. However, when more than one user is editing a page, SpecialServices Classic stores the changes made only by the user who last saved the page. Therefore, make sure that you do not begin editing a page already opened by another user. When you edit a page, you should lock it to ensure that you can save the changes you make. |
Note: Only users with appropriate security privileges can open pages locked by another user.
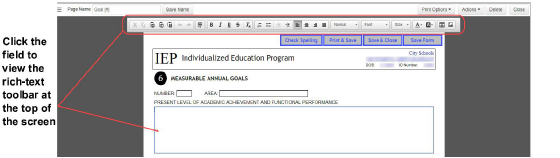
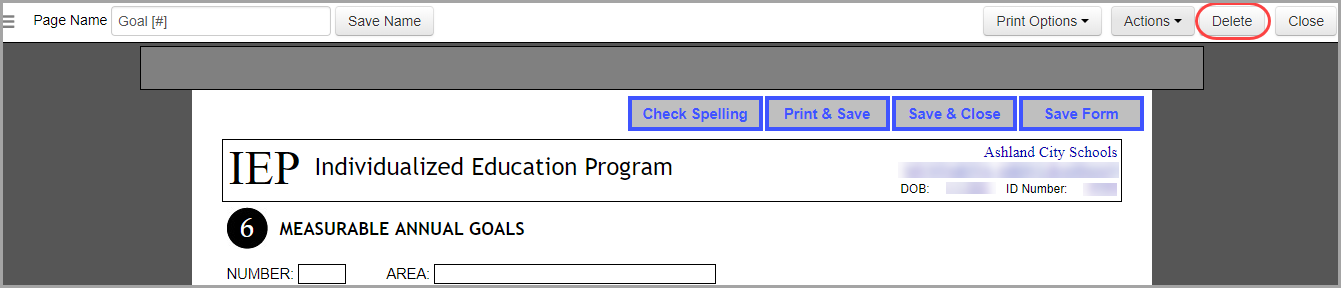
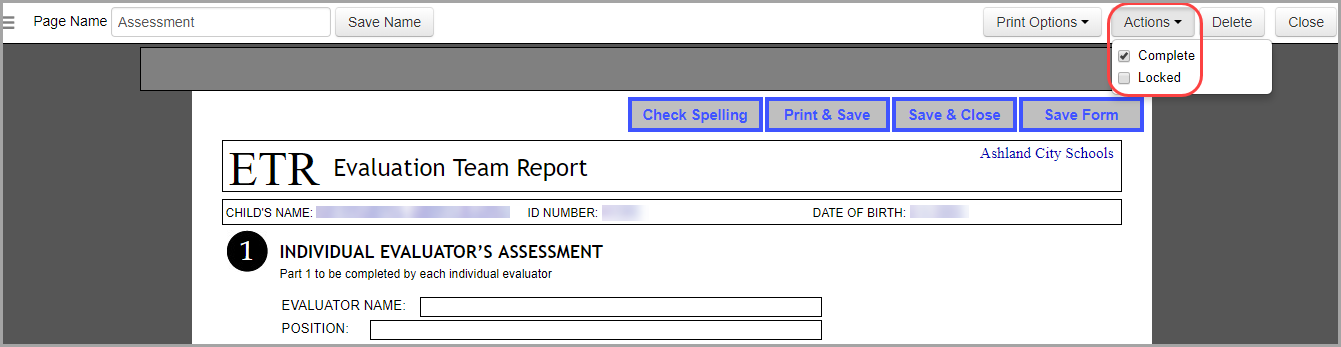
The page edit screen toolbar provides options such as renaming the page, printing the page, marking the page as complete, locking the page, and deleting the page.
Editable fields are distinguishable by a box around the area in which you can type. Read-only fields display without a box around them.
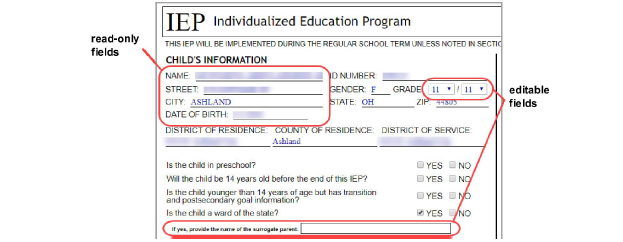
Some fields have rich-text formatting capabilities. When you click a rich-text field, the rich-text toolbar displays at the top of the screen.
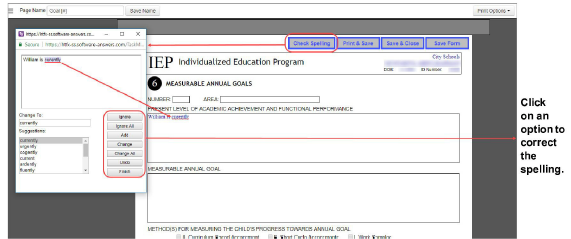
Spellcheck is available for forms. Click Check Spelling to open a window that checks the spelling in every field on the form.
If your administrator has enabled electronic signatures, you can sign certain forms using your mouse, tablet pen, or finger.
1.In the signature field of
the form you are signing, click ![]() .
.
2.On the Signature Agreement window that opens, select the I intend to sign electronically and I accept the terms checkboxes, then click Continue.
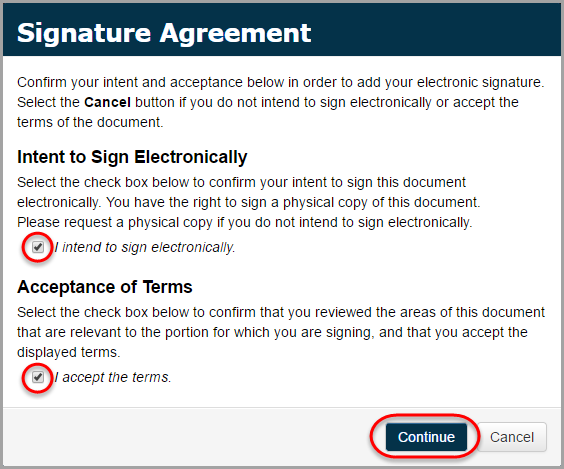
Note: Make sure you read all of the terms and conditions before selecting the checkboxes.
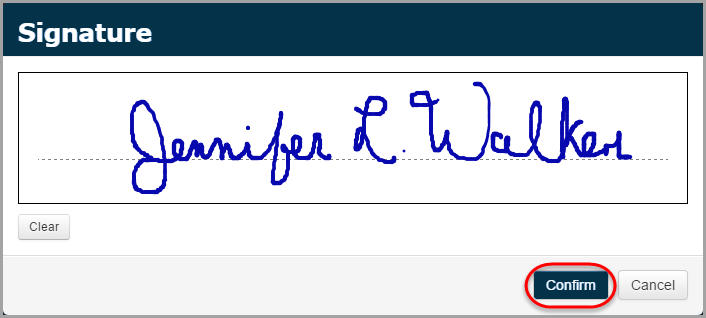
3.On the Signature window that opens, sign your name on the dotted line.
Note: You can click Clear to delete your signature and resign your name.
Note: If a Date field displays beside the signature on the form, the field automatically displays the date you signed the form.
Note: If you
need to clear/resign your name after you have clicked Confirm,
click  and
repeat step 1 through
step 4.
and
repeat step 1 through
step 4.
Note: If you sign a form and then attempt to navigate away from the screen before saving it, a confirmation window displays asking you if you want to save your signature.
When you save your changes to a page on the page edit screen, the following options display:
•Click
 to
save your changes and print the current page. The form displays in another
tab or window as a PDF where you can click the print button to print the
page.
to
save your changes and print the current page. The form displays in another
tab or window as a PDF where you can click the print button to print the
page.
•Click
 to
save your changes and return to the Open
Tasks screen.
to
save your changes and return to the Open
Tasks screen.
•Click
 to save your changes and
continue editing the page.
to save your changes and
continue editing the page.
If you attempt to save your changes and the system prompts you to log in, SpecialServices Classic has timed out due to a period of inactivity exceeding the time limit defined by your district.
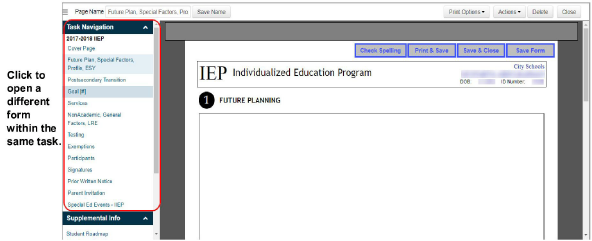
Navigating to Pages on the Task Menu
When you are editing a page, you can navigate to other forms within the same task without returning to the Open Tasks screen.
1.On
the page edit screen toolbar, click ![]() to expand the task menu.
to expand the task menu.

2.In the Task Navigation area, click the name of the form you want to open.
Note: You cannot
open forms that are currently locked (denoted by ![]() ).
).
If enabled by your administrator, on the left side of the page edit screen, the Copy Task Info area displays so that you can copy information from one task to another.
1.With a form open on the page edit screen, click the field to which you want to copy information.
2.Click
 to expand the task menu.
3.In the Copy Task Info area, in the Task drop-down list, select the task from which you want to copy information.
4.In the Page drop-down list, select the page from which you want to copy information.
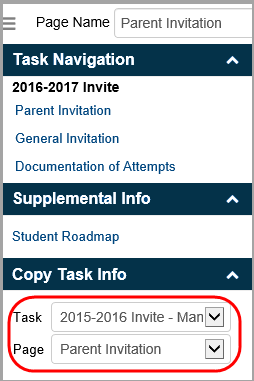
If information is available to copy, links display below the drop-down lists.
5.(Optional)
Click ![]() to preview the available information.
to preview the available information.
6.Click the link for the task information you want to copy.
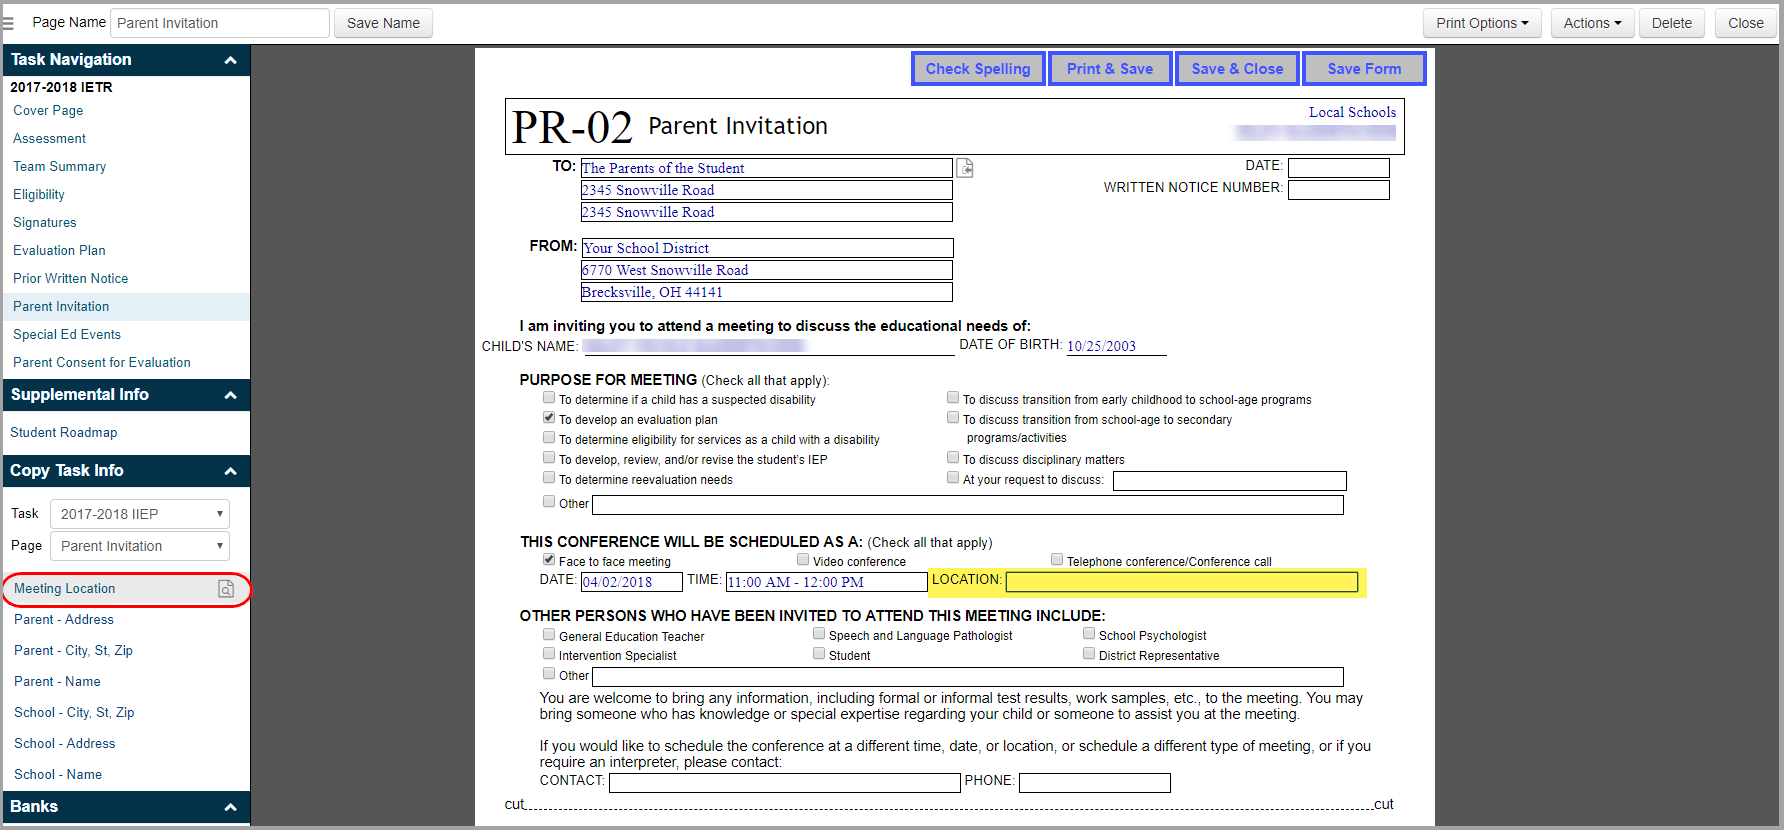
The information displays in the field to which you copied it.

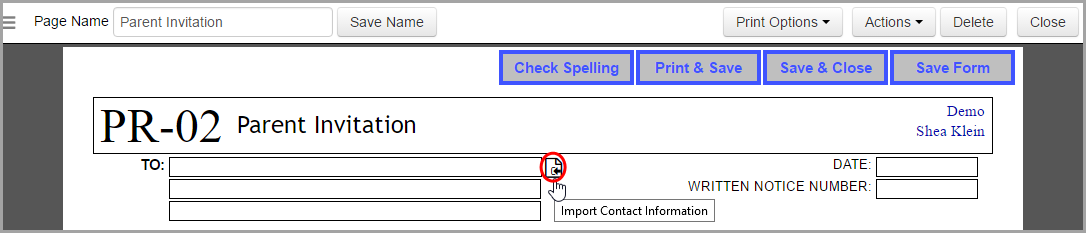
When editing the Parent Invitation form or General Invitation form, you can import a student’s contacts from the Student Properties window (see “Setting Student Properties” ).
1.With
the form open on the page edit screen, beside the TO field,
click  .
.
2.On the Import Contact Information window that opens, select the contact you want to display on the form.
3.Click Import.
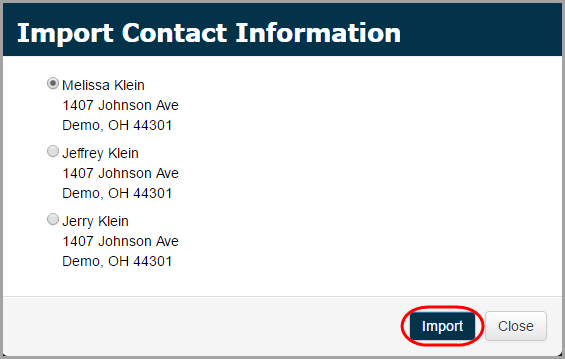
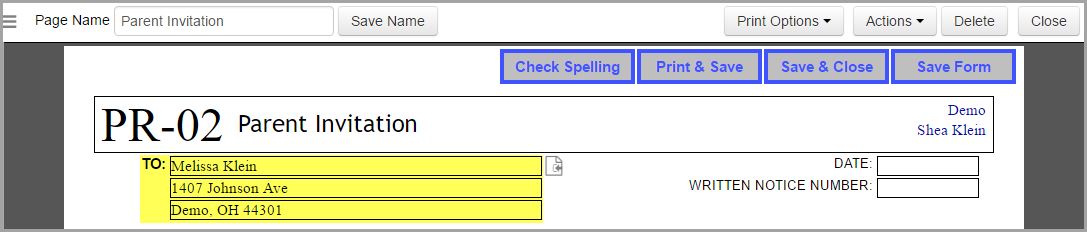
The selected contact’s information displays on the form.
4.Save the page using one of the save options specified in “Saving Pages.”
When you create a new page, the system assigns a name by default. You can change the name of the page if desired.
1.With the appropriate task open on the Open Tasks screen, click the link for the page you want to rename.
The selected page displays on the page edit screen.
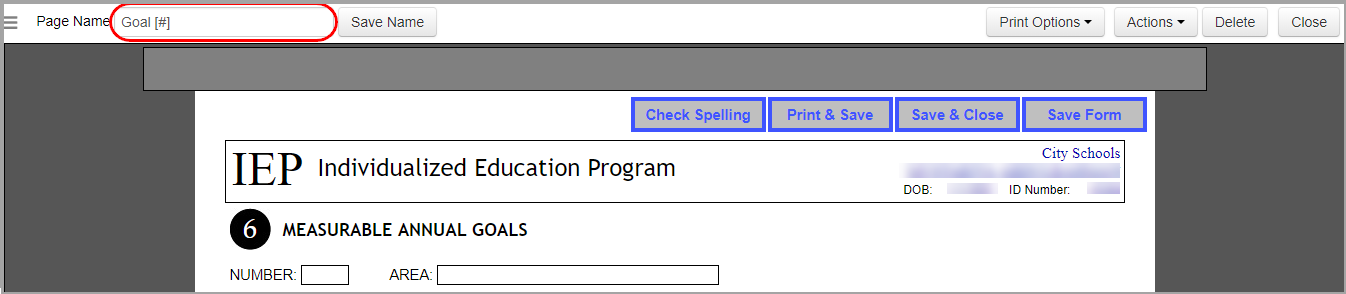
2.At the top of the screen, in the Page Name field, enter the desired name for the page.
3.Click Save Name.
A confirmation message briefly displays.
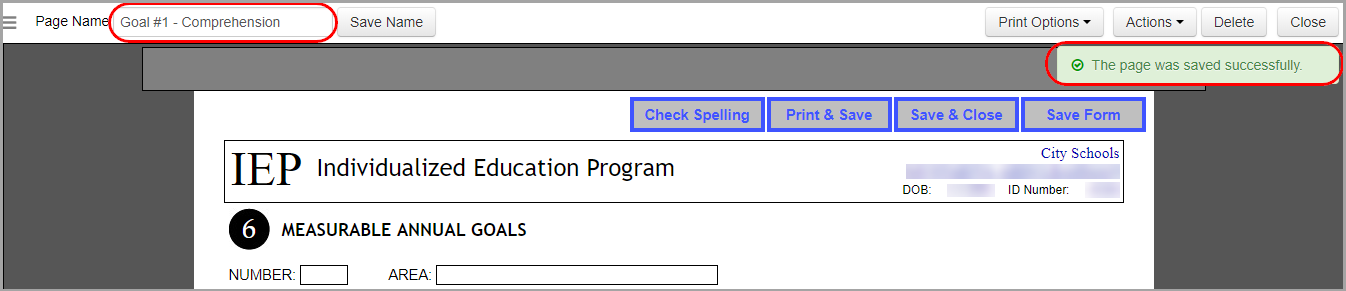
The new name displays as the link for the page on the Open Tasks screen.
You can lock a page you are working on to prevent other users from opening, viewing, editing, printing, or completing it. You can access a locked page only if you are the user who locked the page or you have the appropriate security privileges.
1.With the desired task open on the Open Tasks screen, click the link for the page you want to lock.
The selected page displays on the page edit screen.
2.In the Actions drop-down list, select the Locked checkbox.
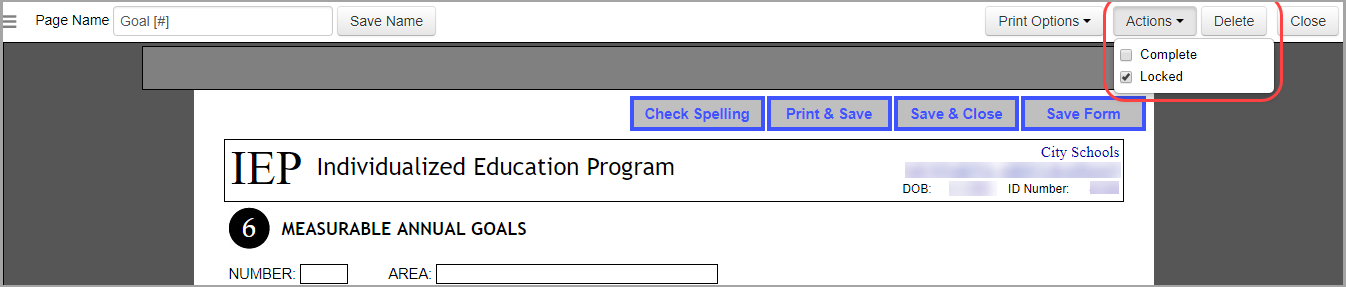
3.Click Close.
On the Open
Tasks screen,  displays
beside the page name to indicate that the page is now locked. All attachments
associated with the page are also locked. If you want to unlock a page,
see “Unlocking
Pages.”
displays
beside the page name to indicate that the page is now locked. All attachments
associated with the page are also locked. If you want to unlock a page,
see “Unlocking
Pages.”
Only the user who locked the page or users with Confidential Override security privileges can unlock a page. All pages must be unlocked before you can complete a task unless you are the user who locked the page or you have Confidential Override security privileges.
1.With the desired task open on the Open Tasks screen, click the link for the page you want to unlock.
The selected page displays on the page edit screen.
2.In the Actions drop-down list, deselect the Locked checkbox.

3.Click Close.
On the Open
Tasks screen,  no
longer displays beside the page name. Users can now open and edit the
page or complete the task. If you want to lock a page, see “Locking Pages.”
no
longer displays beside the page name. Users can now open and edit the
page or complete the task. If you want to lock a page, see “Locking Pages.”
Each task has additional forms that you can add to the task. For example, if the student is 14 years of age or younger, you might need to include the IEP 5 Postsecondary Transition form in your IEP task.
1.On the Open Tasks screen, in the Student drop-down list, select the appropriate student.
2.In the Task drop-down list, select the task to which you want to add a form.
3.Click Add Form.
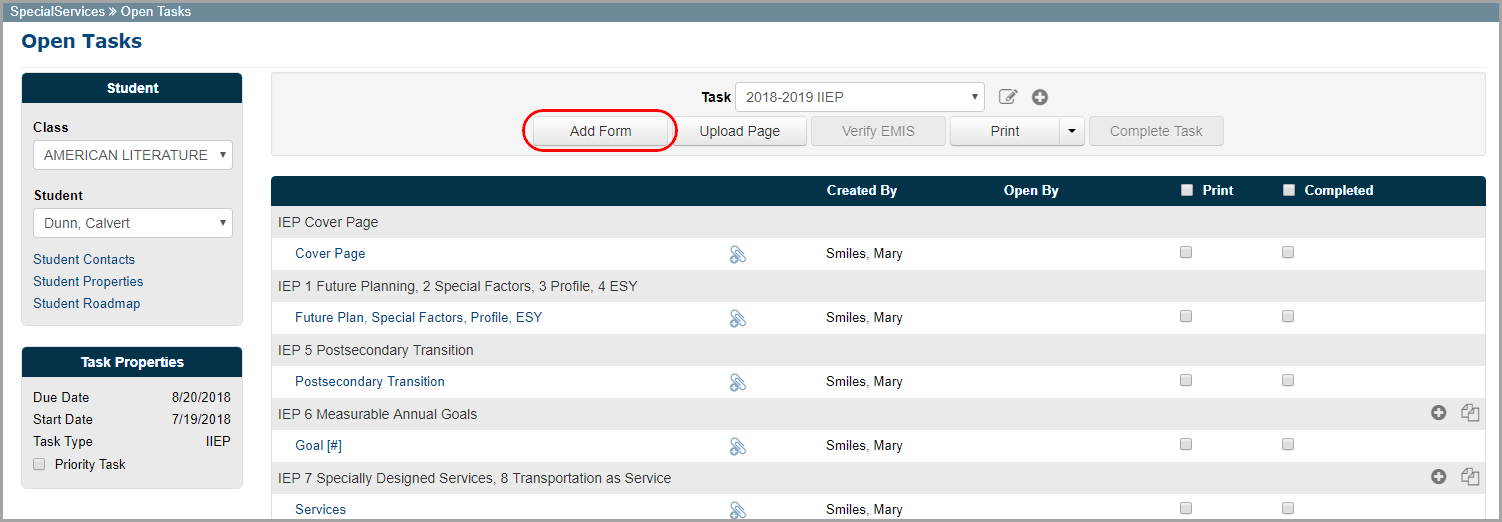
The Add a Form window opens, listing the additional forms available for the task.
4.Select the checkbox beside the form(s) that you want to add to the task.
5.Click Add Forms.
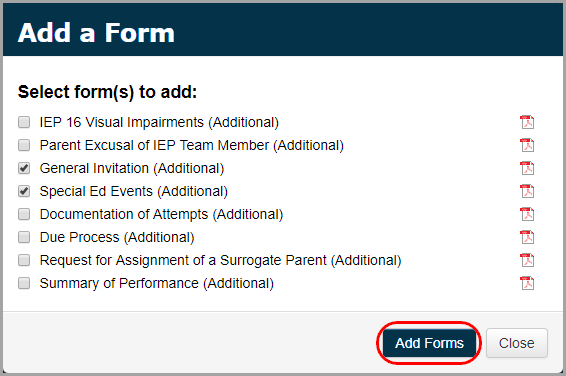
The selected form(s) and corresponding page(s) display on the Open Tasks screen.

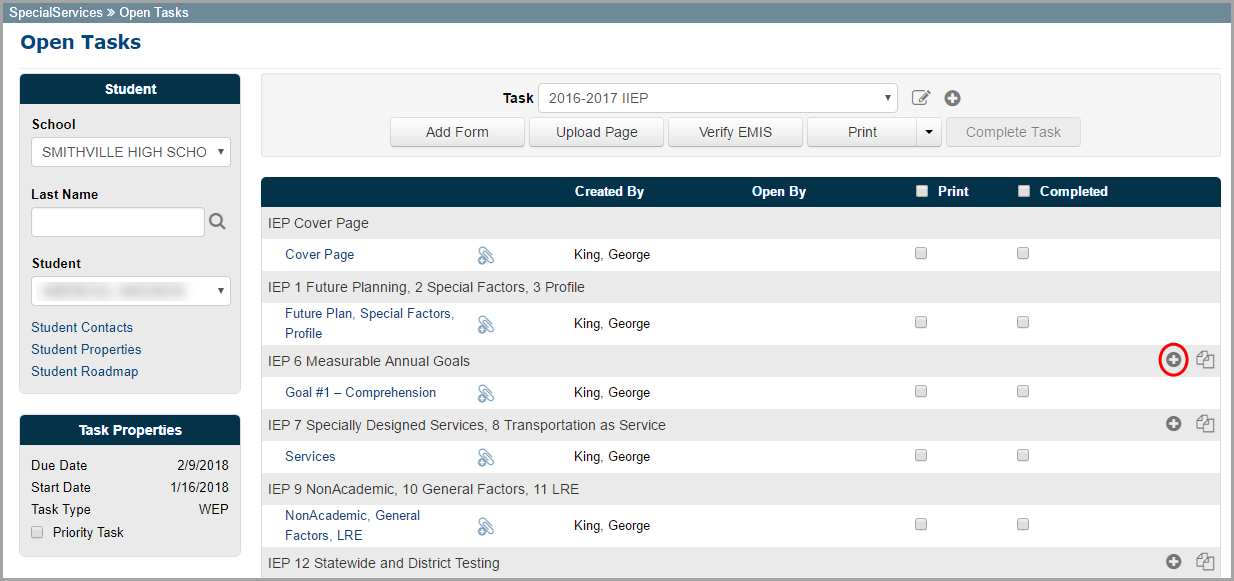
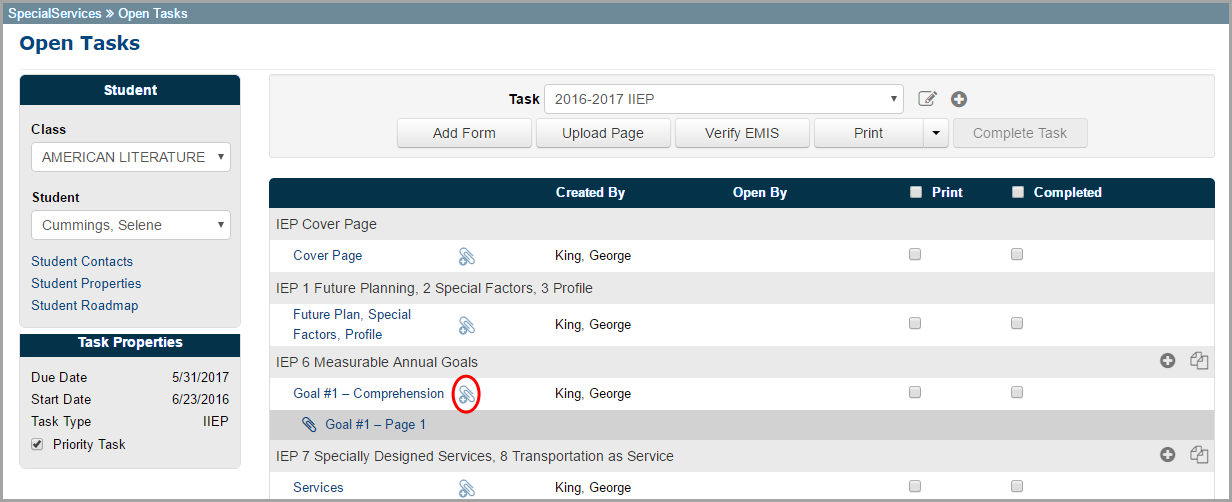
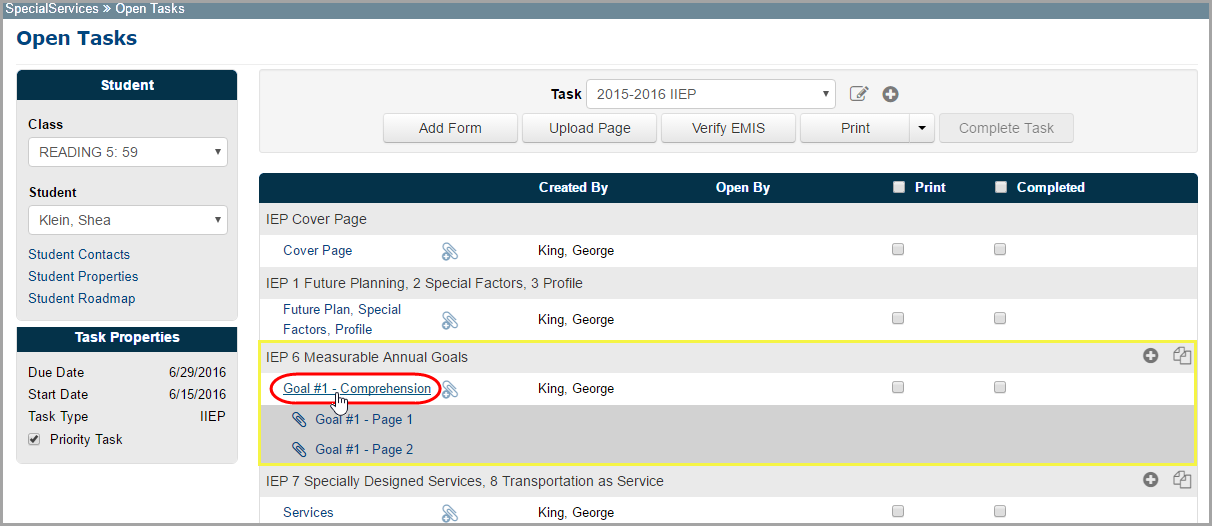
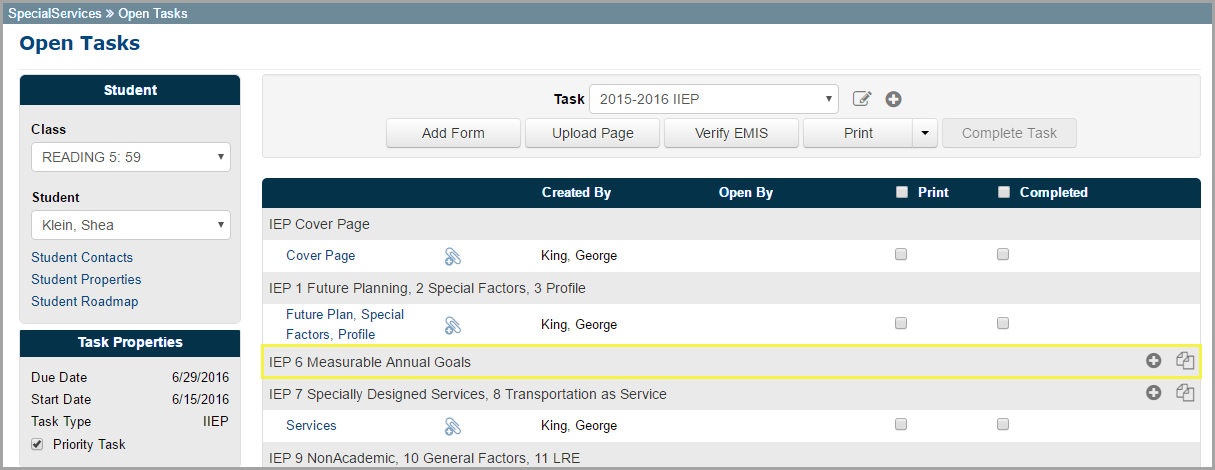
All of the required pages you need to complete the task are automatically generated when you create the task. However, you may need to create multiple pages of the same type. For example, if your student has multiple goals to meet for his/her IEP, you will need to create an IEP 6 Goals page for each goal. You can create an entirely new page or copy an existing page from a previous task.
Additionally, you can create new pages by copying an existing page from the current task, another open task, or a completed task. For example, you can copy the goals from the goal page for a Measurable Annual Goals form in an IEP to create a new progress report page.
You can create an entirely new page for any
form marked with  .
.
1.On the Open Tasks screen, in the Student drop-down list, select the student for whom you want to create the page.
2.In the Task drop-down list, select the task to which you want to add a page.
The pages created for the task display in a grid on the Open Tasks screen.
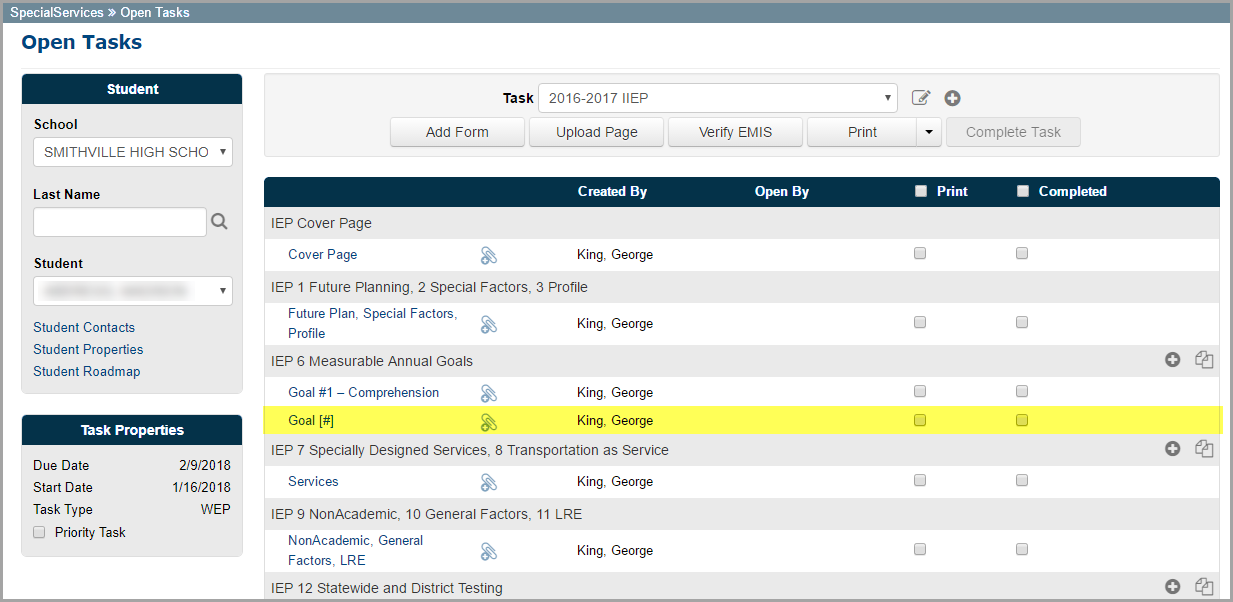
3.In
the row of the form for which you want to add a page you want to add,
click  .
.
Note: For forms
that do not allow multiple pages,  displays
only if the original page was deleted.
displays
only if the original page was deleted.
A new page is created and displays in a new row.
Note: To open the page and begin working on it, see “Opening and Editing Pages.” To rename the page, see “Renaming Pages.”
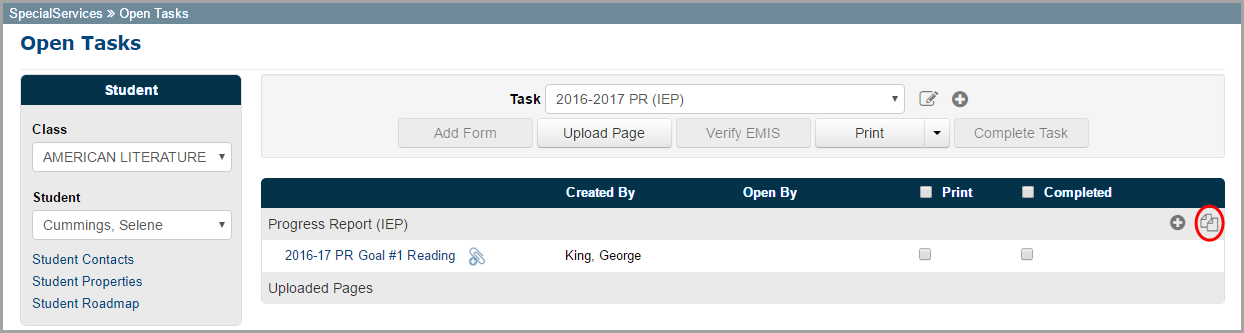
Creating a New Page from an Existing Page
You can create a new page using information from an existing page in the current task, another open task, or a completed task.
You can create a new page from an existing
page for any form marked with  .
.
1.On the Open Tasks screen, in the Student drop-down list, select the student for whom you want to create a new page from an existing page.
2.In the Task drop-down list, select the task to which you want to add a page.
The pages created for the task display in a grid on the Open Tasks screen.
3.In
the row of the page you want to create from an existing page, click  .
.
4.On the Create From Existing window that opens, in the Task drop-down list, select the task from which you want to copy the page.
The Create From drop-down list displays the pages that comprise the selected task.
Note: Completed tasks display with a Completed Task: prefix.
5.In the Create From drop-down list, select the page from which you want to copy information for the new page.
6.Click Create Page.
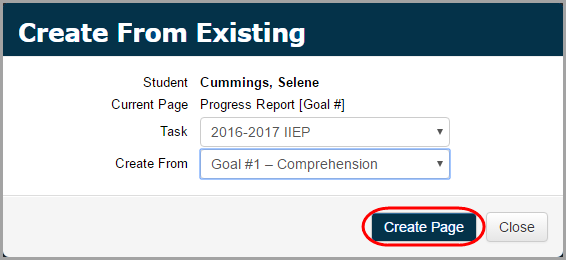
A new page displays in the grid, containing the information from the page you selected to copy in step 5.
Note: To open the page and begin working on it, see “Opening and Editing Pages.” To rename the page, see “Renaming Pages.”
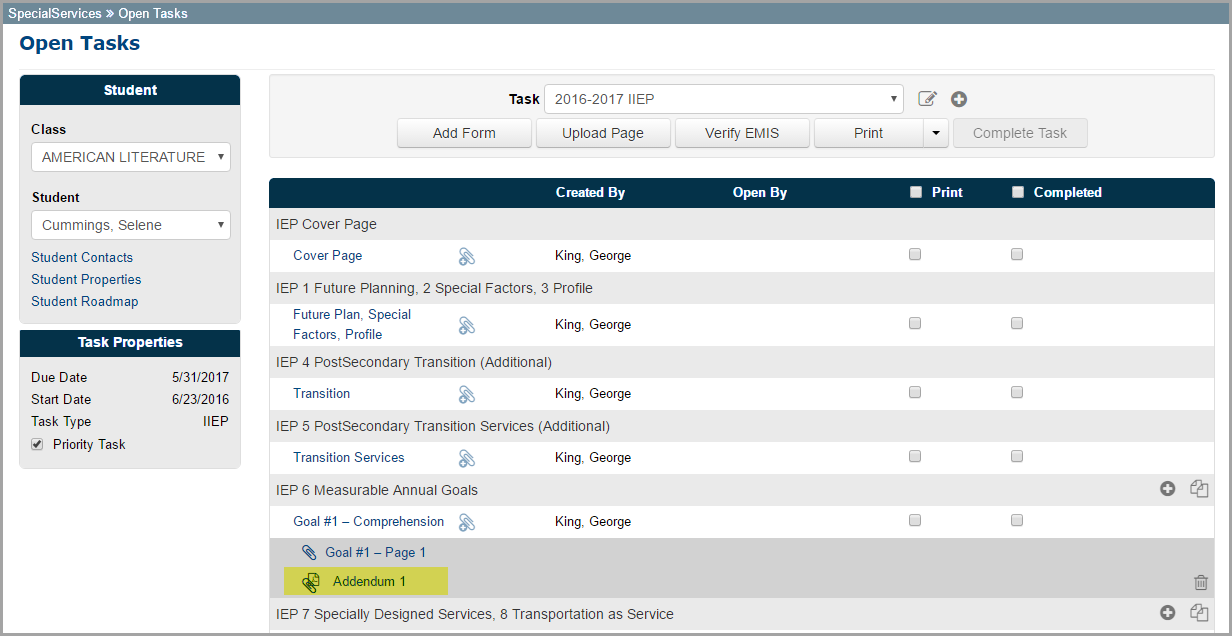
You can add editable attachments to a specific page in an open task. When you select to print all of the pages in a task, the attachment displays in the merged document following the page to which it is attached. When you select to print only the page, the attachment is automatically merged with the selected page.
Note: If you want to upload a read-only PDF to a specific task page or to an overall task, see “Uploading Pages.”
1.On the Open Tasks screen, in the Student drop-down list, select the appropriate student.
2.In the Task drop-down list, select the appropriate task.
3.In
the row of the page to which you want to add an attachment, click  .
.
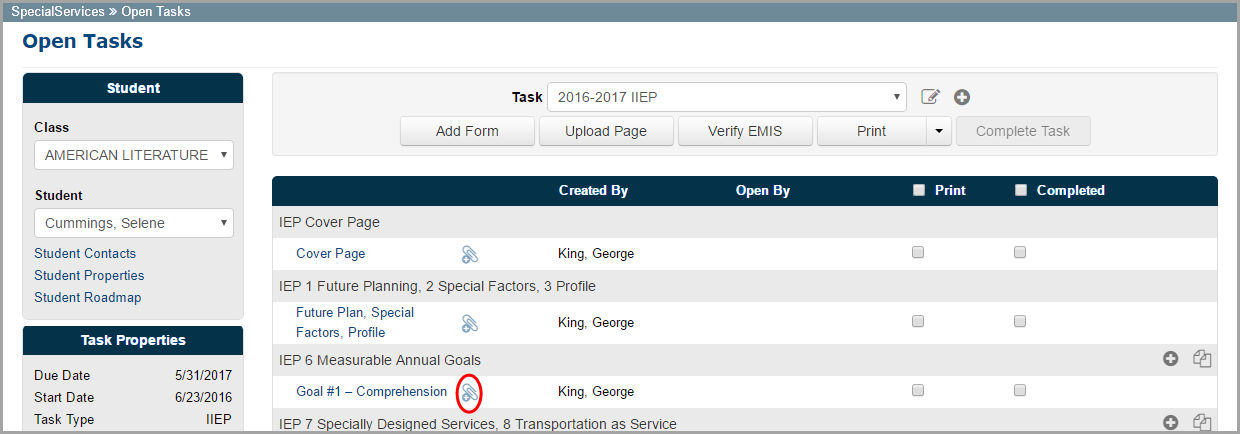
The Add Attachments window opens, listing the forms that can be attached to the page.
4.(Optional)
On the Add Attachments window,
click ![]() to preview the form
in a new window.
to preview the form
in a new window.
5.Select the checkbox beside the name of the form you want to attach, or click the name.
6.Click Add Attachments.
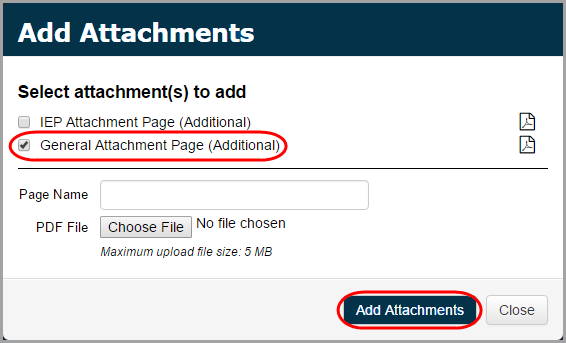
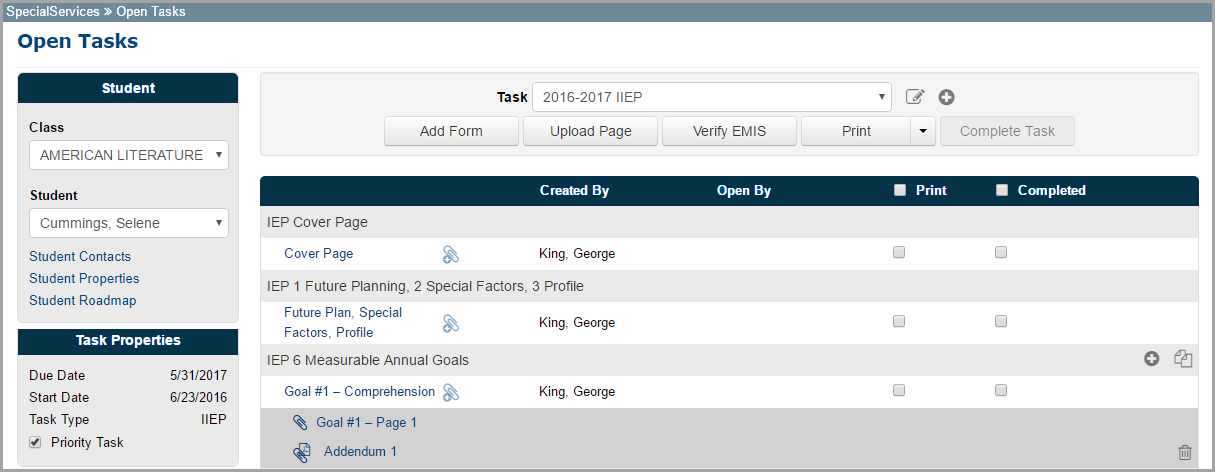
The attachment displays in a row below the page to which it is now attached.
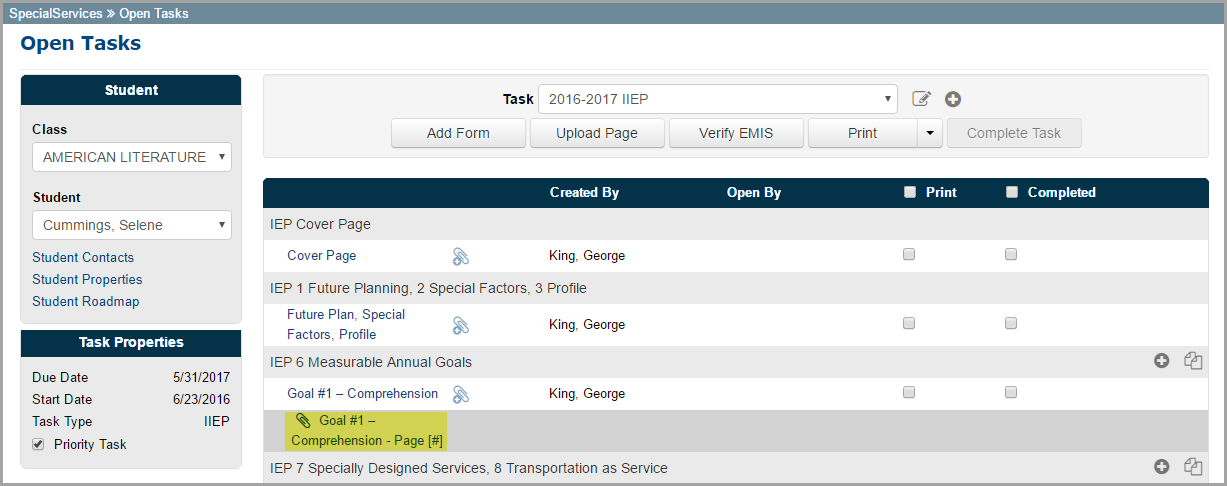
Note:
Attachments display alphabetically below a page. To change the
order, assign names using numbers or letters to specify the desired sequence.
All editable attachments (denoted by ![]() )
display above read-only PDF attachments (denoted by
)
display above read-only PDF attachments (denoted by ![]() ).
).
Note: To open the page and begin working on it, see “Opening and Editing Pages.” To rename the page, see “Renaming Pages.”
You can upload additional pages to a task, such as the signature page for an evaluation, an example of the student’s work, or scanned pages from participants in the task who do not have access to SpecialServices Classic. Any pages you wish to upload must be in PDF format no larger than 5 megabytes. Once they are uploaded, you can view but not edit these pages.
•To upload a read-only PDF to a specific task page, see “Uploading Pages to a Specific Task Page.”
•To upload a read-only PDF to an overall task, see “Uploading Pages to an Overall Task.”
Uploading Pages to a Specific Task Page
Use this procedure when you want to attach read-only PDFs to a specific task page. If you want to attach read-only PDFs that are relevant to an overall task, see “Uploading Pages to an Overall Task.” If you want to add an editable attachment to a task page, see “Adding Attachments.”
1.On the Open Tasks screen, in the Student drop-down list, select the appropriate student.
2.In the Task drop-down list, select the appropriate task.
3.Beside
the page to which you want to upload a PDF, click  .
.
4.On the Add Attachments window that opens, click in the PDF File field and navigate to and select the PDF you want to upload.
5.In the Page Name field, enter the name you want to display on the Open Tasks screen for the uploaded page.
Note: Once you upload the page, you cannot change the name in SpecialServices Classic; you must reupload the page with a new name.
6.Click Add Attachments.

Note: To add editable attachments, see “Adding Attachments.”
The attachment displays in a row below the page to which it is now attached.
Note:
Attachments display alphabetically below a page. To change the
order, assign names using numbers or letters to specify the desired sequence.
All editable attachments (denoted by  )
display above read-only PDF attachments (denoted by
)
display above read-only PDF attachments (denoted by  ).
).
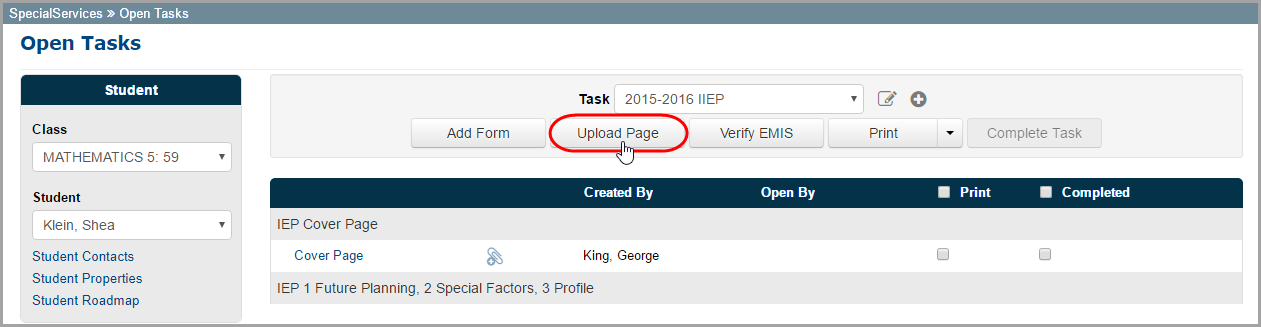
Uploading Pages to an Overall Task
Use this procedure when you want to attach read-only PDFs that are relevant to an overall task. If instead, you want to attach pages that are relevant to a specific part of a task, see “Uploading Pages to a Specific Task Page.”
1.On the Open Tasks screen, in the Student drop-down list, select the appropriate student.
2.In the Task drop-down list, select the appropriate task.
3.Click Upload Page.
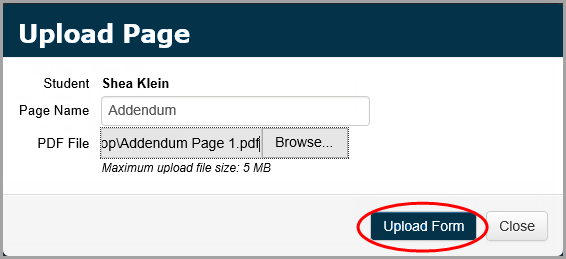
4.On the Upload Page window that opens, in the PDF File area, click Browse and then locate the PDF you want to upload.
5.In the Page Name field, enter the name you want to display on the Open Tasks screen for the uploaded page.
Note: Once you upload the page, you cannot change the name in SpecialServices Classic; you must reupload the page with a new name.
6.Click Upload Form.
The page displays below the Uploaded Pages heading on the Open Tasks screen. You can view the page by clicking its name.
Deleting Pages, Forms, and Attachments
If you have the appropriate security privileges, you can delete pages, forms, and attachments from a task.
•To delete pages from a task, see “Deleting Task Pages.”
•To delete additional forms from a task, see “Deleting Added Forms.”
•To delete read-only PDF attachments, see “Deleting Uploaded Pages.”
If you have the appropriate security privileges, you can delete pages and attachment pages from a task.
1.With the desired task open on the Open Tasks screen, click the name of the page you want to delete.
The selected page displays on the page edit screen.
2.Click Delete.
3.On the Delete Confirmation window that opens, click Delete.
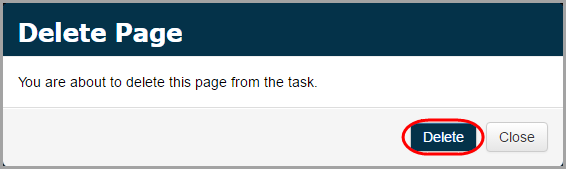
The Open Tasks screen displays, and the page you selected to delete, as well as any associated attachment pages, no longer displays in the grid.
Note: If the
page you deleted was the only page for a required form,  and
and  display
so you can add a new page. If the page was for an added form and you have
the appropriate security privileges, you can delete the form from the
task by clicking
display
so you can add a new page. If the page was for an added form and you have
the appropriate security privileges, you can delete the form from the
task by clicking ![]() (see “Deleting Added Forms” ).
(see “Deleting Added Forms” ).
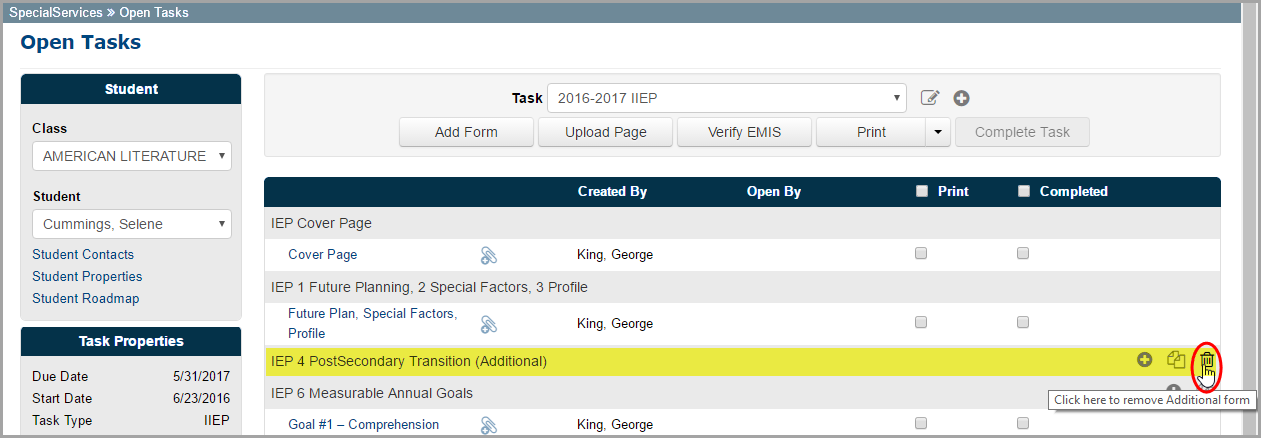
Users with the appropriate security privileges can delete added forms from a task.
Before you can delete an added form, you must
first delete all pages that have been created for the form (see “Deleting Task Pages” ). If pages have
already been deleted or no pages have been created for the form you want
to delete,  displays in the row of the form.
1.With
the task displayed on the Open Tasks screen,
in the row of the form you want to delete, click  .
.
2.On the Delete Additional Form window that opens, click Delete.
The Open Tasks screen displays, and the form you selected to delete no longer displays in the grid.
Whether you uploaded a read-only PDF to a specific task page or to an overall task, you can delete this type of attachment on the Open Tasks screen.
1.With the desired task open on the Open Tasks screen, complete one of the following:
•In
the row of an attachment associated with a specific task page (denoted
by  ),
click
),
click  .
.
•Below
the Uploaded Pages heading,
in the row of the attachment you want to delete, click  .
.
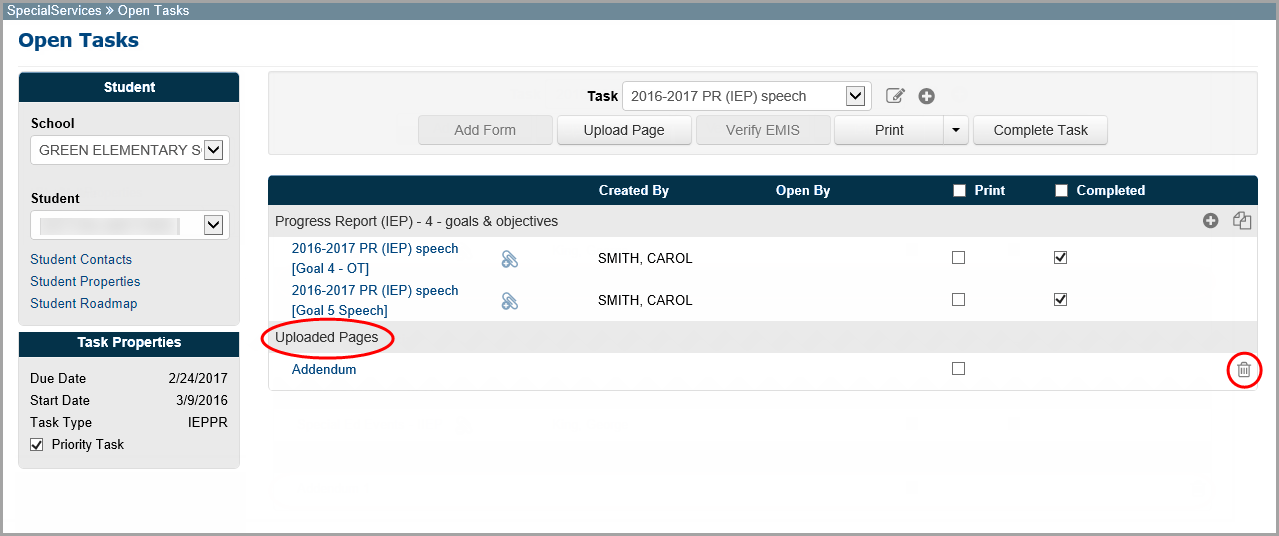
2.On the delete confirmation window that opens, click Delete.
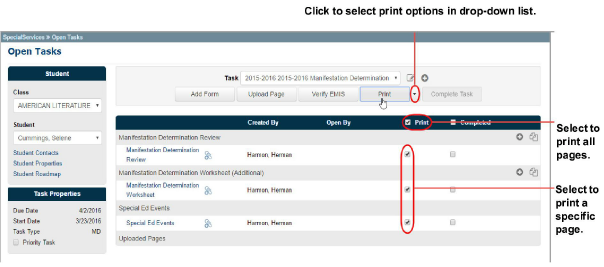
The Print option on the Open Tasks screen merges the pages you select from a student’s task into a single document and displays them in Adobe Reader so that you can print them.
The pages are merged in the order in which they display on the Open Tasks screen. To change the order in which the pages display in the printed document, you must rename the pages (see “Renaming Pages” ).
Note: You cannot print a page if it is locked by another user. For more information about locked pages, see “Locking Pages.”
1.On the Open Tasks screen, in the Student drop-down list, select the student for whom you want to print forms.
2.In the Task drop-down list, select the task that contains the forms you want to print.
3.Select which form(s) to print:
•To print specific pages, in the row of each page you want to print, select the Print checkbox.
•To print all of the pages, select the Print checkbox in the column header.
4.(Optional) If you do not want page numbers to print on the forms, in the Print drop-down list, deselect the Include Page Numbers checkbox.
5.(Optional) If you want to print the forms with a Draft watermark, in the Print drop-down list, select the Include Draft Watermark checkbox.
6.Click Print to download the selected pages in a single PDF document.
7.Open the document and select print in your PDF viewer.
8.(Optional) Save the merged document to a location of your choice on your local computer.
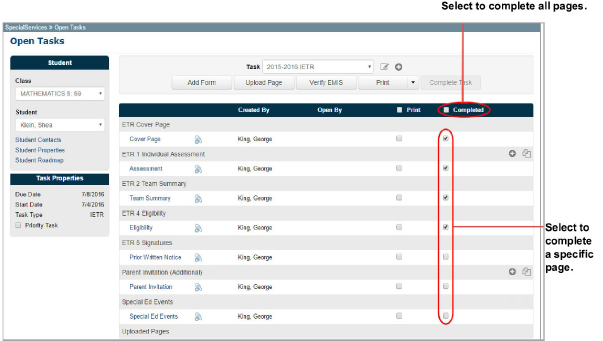
As you finish editing pages in a task, you can mark them as complete using one of the following methods:
•On the Open Tasks screen, in the row of the page you want to mark as complete, select the Completed checkbox. Or, to mark all pages as complete, select the Completed checkbox in the column header.
•With a page open on the page edit screen, in the Actions drop-down list, select the Complete checkbox.
Note: On the Task Queue screen, in the Pages Complete column, the progress percentage bar represents the number of pages completed for that task. When you hover your cursor over the bar, the number of completed pages out of the total number of pages for the task displays in a tooltip. Once all of the pages are marked as complete, you can complete the task, which removes it from the Task Queue screen (see “Completing Tasks” ).

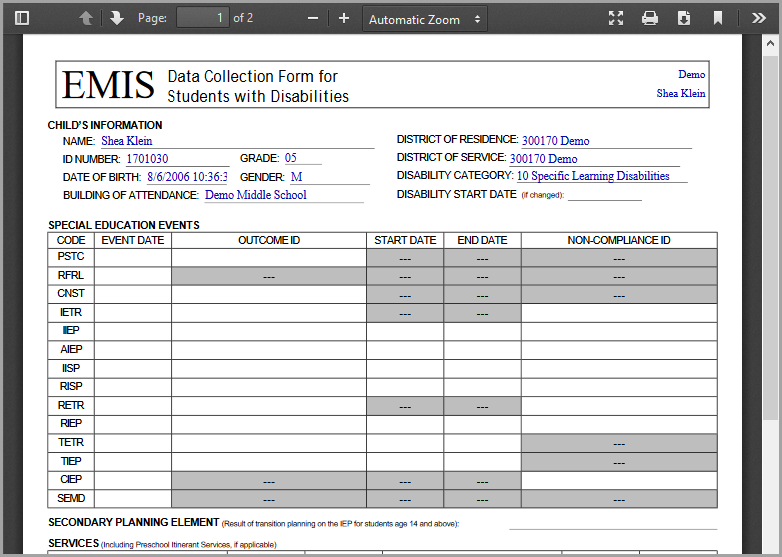
You can view or print the Data Collection Form for an open task to verify that the information is complete and to maintain a hard-copy record of the information that will be used in the EMIS extract. The Data Collection Form displays only EMIS-reportable information for the current task.
Note: To view the EMIS Data Collection Form for a completed task, you must run the EMIS Review Report. See “Viewing the Data Collection Form for Completed Tasks.”
1.On the Open Tasks screen, in the Student drop-down list, select the student for whom you want to view the Data Collection Form.
2.In the Task drop-down list, select the desired task.
3.Click Verify EMIS.
Note: Verify EMIS enabled only if the task contains information that is reportable to EMIS.

The Data
Collection Form opens in a new window and displays the latest
EMIS- reportable information for the selected student and task.
4.(Optional) Use the PDF viewer options to print or save the form.
5.Close the window to return to the Open Tasks screen.
Once all of the pages in a task are marked as complete, if you are have the appropriate security privileges, you can complete the task and merge its pages into a read-only form set that you can view on the Completed Tasks screen. It is important to complete a task when all the pages are complete for the following reasons:
•Users with read-only security privileges can view the forms within the task.
•You or other users can start the next cycle of forms for the task. (You cannot open a new task if a task of the same type is currently open.)
•You or other users can generate data using the EMIS tools. (The system extracts EMIS data only from completed tasks.)
•You or other users can transfer a student’s forms to another district. (The district transfers function transfers forms only from completed tasks.)
You cannot complete a task if any of the pages are currently locked by another user. If you are the user who locked the page, you can complete the task because the system automatically unlocks the page during the task completion process. If you are not the user who locked the form, but you have the appropriate security privileges, you can also complete the task without unlocking locked pages; however, the system will warn you that a page is locked. It is recommended that you verify the locked page is complete before completing the task.
1.On the Open Tasks screen, in the Student drop-down list, select the student for whom you want to complete a task.
2.In the Task drop-down list, select the task you want to complete.
3.Ensure that all of the required pages for the task are marked as complete and none of the pages are currently locked by another user.
•To mark a page as complete, see “Completing Pages.”
•To unlock a page, see “Unlocking Pages.”
Note: Complete Task displays only if all of the required forms are marked as complete.
4.Click Complete Task.
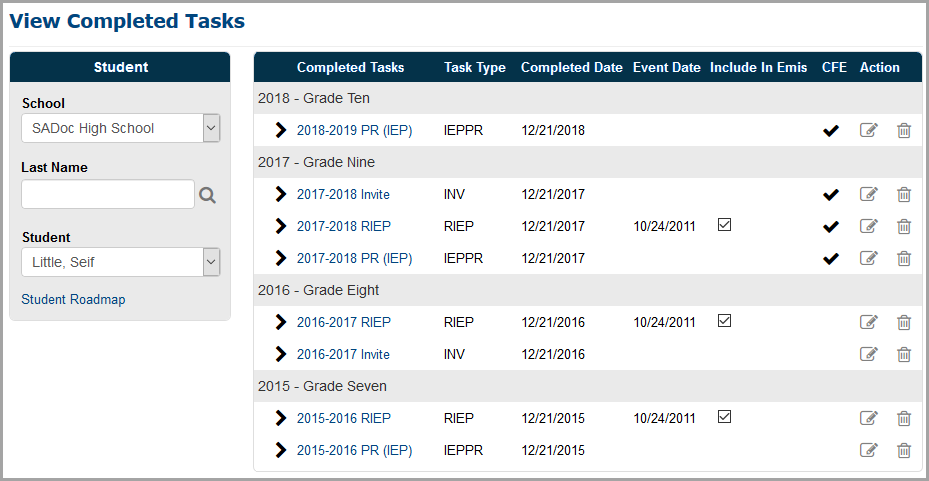
The completed task now displays in the grid for the student on the View Completed Tasks screen.