Running the EMIS Review Report
Navigation: SpecialServices > EMIS > EMIS Review
The EMIS Review report lists all of the students whose IEP, ETR, or ISP task has an event date that falls within a specified range and lets you (depending on your security privileges) view or edit the EMIS Data Collection Form after a task has been completed. You can select the information you want to display about the task on the report.
Note: The EMIS Review report includes only the completed tasks with the Include in Emis checkbox selected on the View Completed Tasks screen.
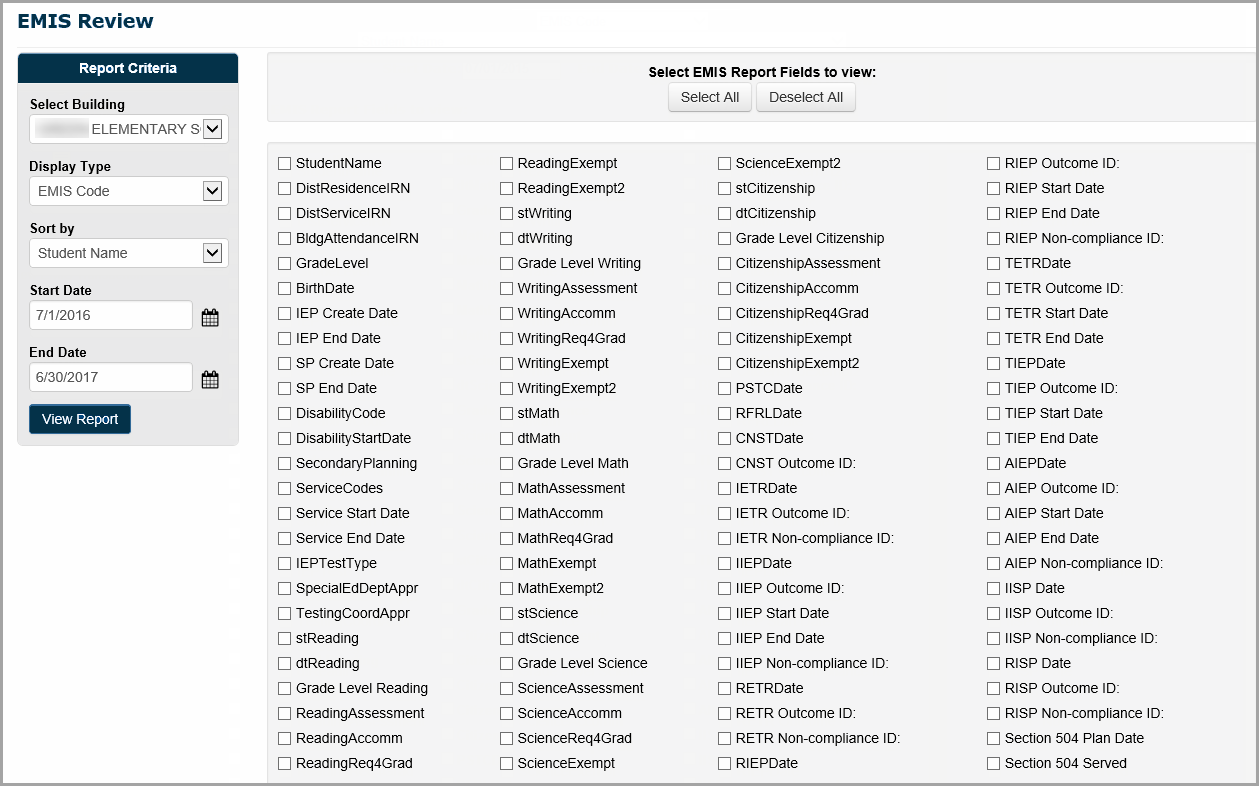
1.On the EMIS Review screen, in the Report Criteria area, in the Select Building drop-down list, select the building or class for which you want to run the EMIS Review report.
Note: Depending on your security privileges, either the Select Building or Select Class drop-down list displays.
2.In the Display Type drop-down list, select the display type for the report. This option determines how some of the data elements you select in step 3 display.
•EMIS Code – Displays only the EMIS code for the data element. For example, if you select to view the DistrResidenceIRN data element, only the IRN for the student’s district of residence displays on the EMIS Review report.
•Description – Displays only the description for the data element. For example, if you select to view the DistrResidenceIRN data element, only the description of the student’s district of residence displays on the EMIS Review report.
•EMIS Code & Description – Displays the EMIS code and description for the data element. For example, if you select to view the DistrResidenceIRN data element, the EMIS code and description for the student’s district of residence display on the EMIS Review report.
3.In the Sort by drop-down list, select the data element by which you want the system to sort the information on the report.
4.In the Start Date and End Date fields, enter the start and end date range within which you want to view the applicable tasks. See “How Tasks Are Selected by Date Range in EMIS.” The default date range is the current EMIS event year; for example, 07/01/2019 for the start date and 06/30/2020 for the end date.
5.In the Select EMIS Report Fields to view section, select the checkbox beside the data elements you want to display on the EMIS Review report. Ensure you select the data element by which you selected to sort the report in step 3.
The EMIS Review report displays all of the completed tasks that fall within the selected criteria and have the Include in Emis checkbox selected on the View Completed Tasks screen.
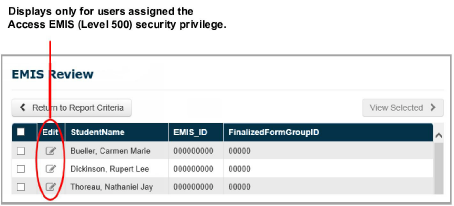
7.You can perform one of the following optional actions:
•View the EMIS Data Collection Form for one or more tasks. See “Viewing the EMIS Data Collection Form.”
•Edit the EMIS Data Collection Form for a task. See “Editing the EMIS Data Collection Form.”