Assign a Role to an Individual Account
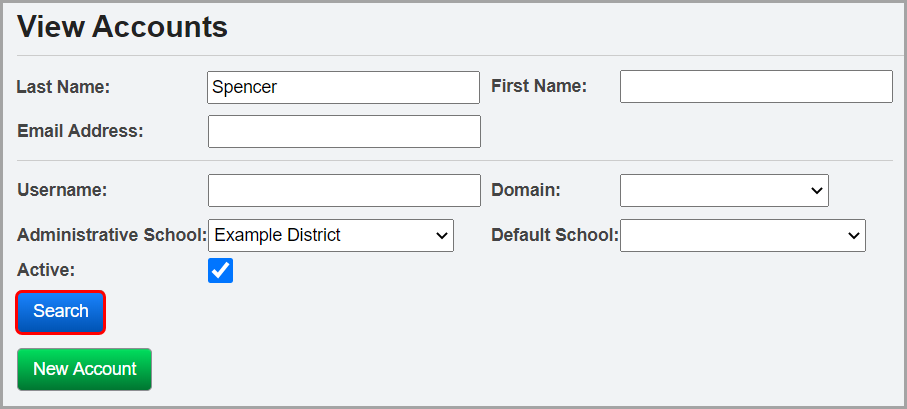
1.On the StudentInformation View Accounts screen, enter information in any of the search fields to find the account that you want to assign a DataMap role.
2.Click Search.
3.In the results grid that displays, in the row of the appropriate account, click ![]() .
.
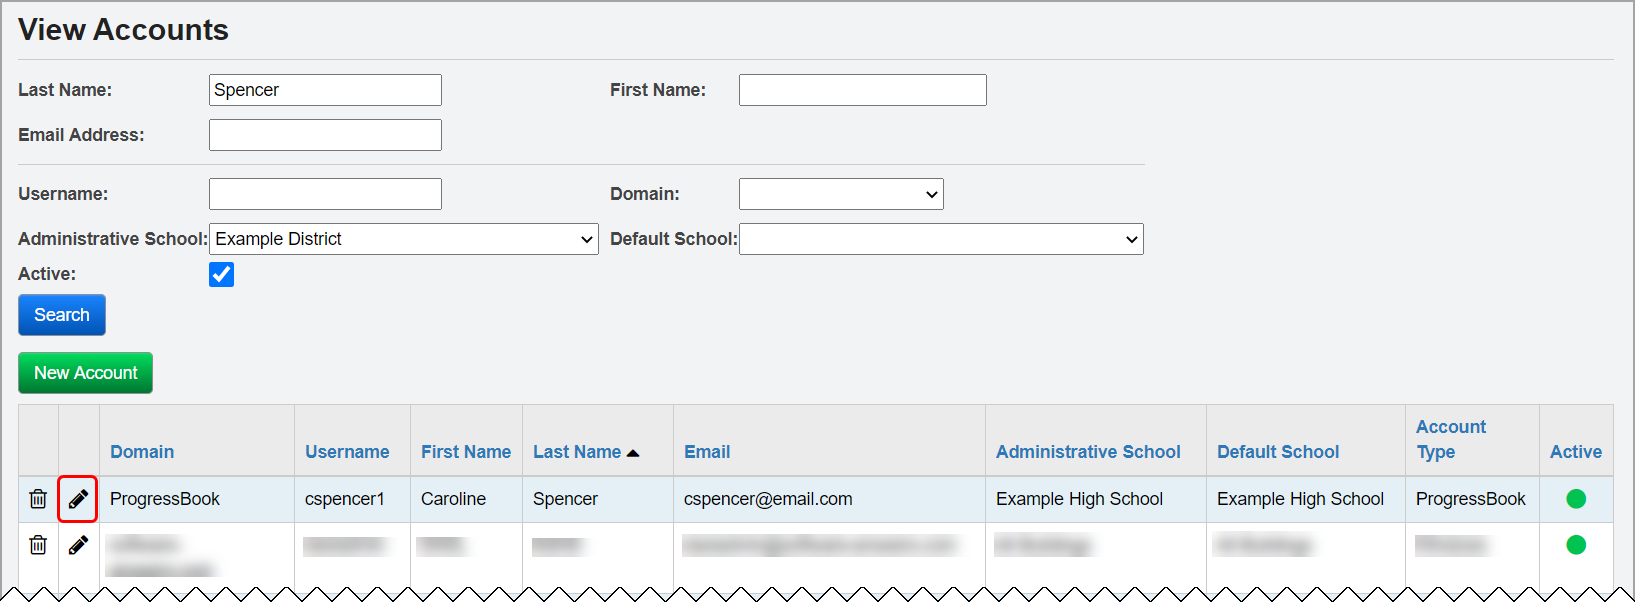
The user record screen Account tab displays.
4.At the bottom of the screen, on the Roles subtab, in the School drop-down list, select the district or school to which the role grants access.
5.In the Role drop-down list, select the desired DataMap role (see “DataMap Roles in StudentInformation” ).
6.Click Add Role.
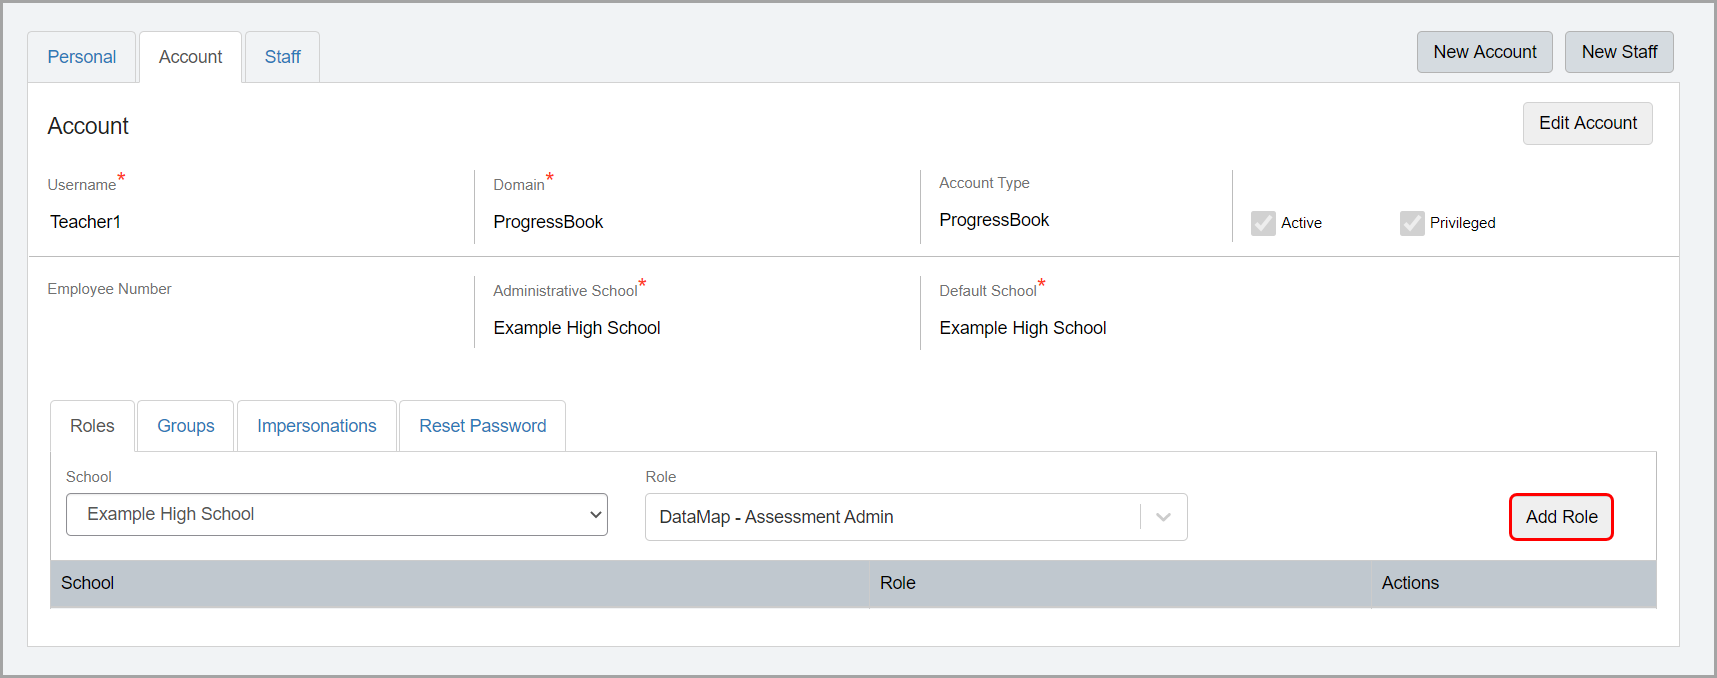
The role now displays in the grid and is assigned to the account.

Note: To remove a role from an account, in the row of the role you want to remove, click ![]() .
.