|
|
Student Progress Report By Assignment Type for a Custom Setup 2 Class
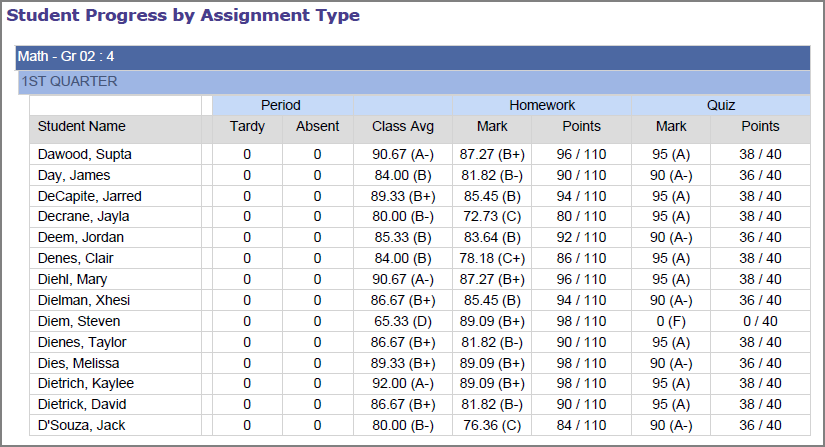
The Student Progress by Assignment Type report for a Custom Setup 2 class displays the students’ overall class averages, averages by assignment type with total points earned out of total points possible, as well as period attendance for individual and multiple classes in individual or multiple reporting periods.
1.On the Teacher Home Page, in the Select a Report drop-down list, below Report Builder Reports, select Student Progress By Assignment Type.
2.Click Run.
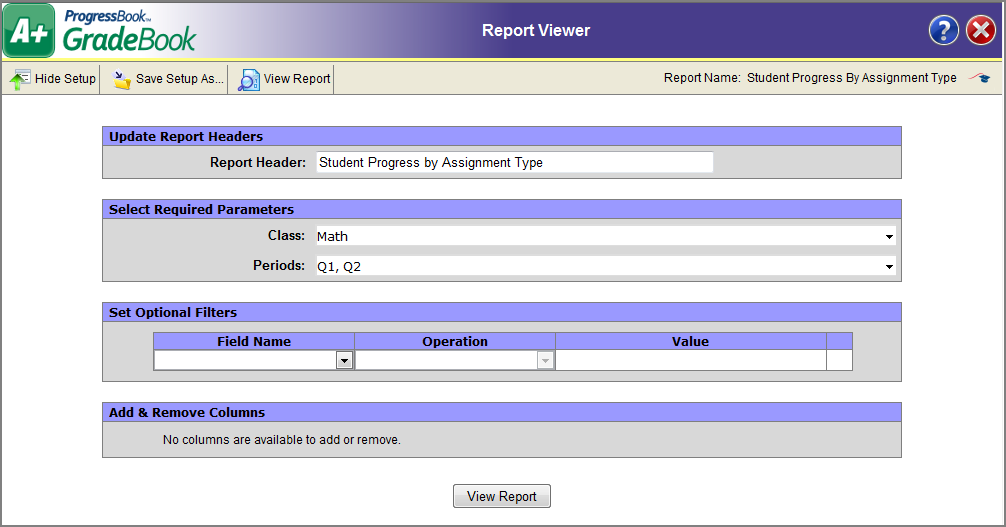
3.In the Report Header field, enter the name of the report. Student Progress by Assignment Type displays by default, but you may change the name if desired.
4.In the Select Required Parameters area, in the Class drop-down list, select the appropriate class(es).
Note: Only the classes to which you have access display in list; however, you should only choose classes that use standards-based grading.
5.In the Select Required Parameters area, in the Periods drop-down list, select the appropriate period(s).
6.In the Set Optional Filters area, in the Field Name drop-down list, select the appropriate option. See “Student Progress By Assignment Type Report – Field Name Options” for descriptions of all the available options.
7.Select one of the following options in the Operation drop-down list if it is available. The available options may vary depending on the option you selected in the Field Name drop-down list.
•Is Equal To
•Is Not Equal To
•Begins With
•Does Not Begin With
•Ends With
•Does Not End With
•Contains
•Does Not Contain
•Has a Value
•Does Not Have a Value
8.In the Value field, type the appropriate value.
Note: The available options and acceptable values vary depending on the option you selected in the Field Name drop-down list. You may be able to enter only alphabetical or only numeric characters depending on the option you selected in the Field Name drop-down list. If you selected Has a Value or Does Not Have a Value in the Operation drop-down list, then the Value field is not available.
9.Click View Report.
The report displays at the bottom of the window.
Note: The field or list displays red indicating an unacceptable value was entered or a required field was left blank.
10.To save the report with your selected parameters, filters, and columns, click Save Setup As. On the Save Setup As window, in the New report name field, enter the unique report name, and in the New description field, enter the description of the report. Then, click Save.
The following message displays at the bottom of the window: “Report setup saved successfully.”
|
|
|
|