|
|
Class Progress Standards Based Report
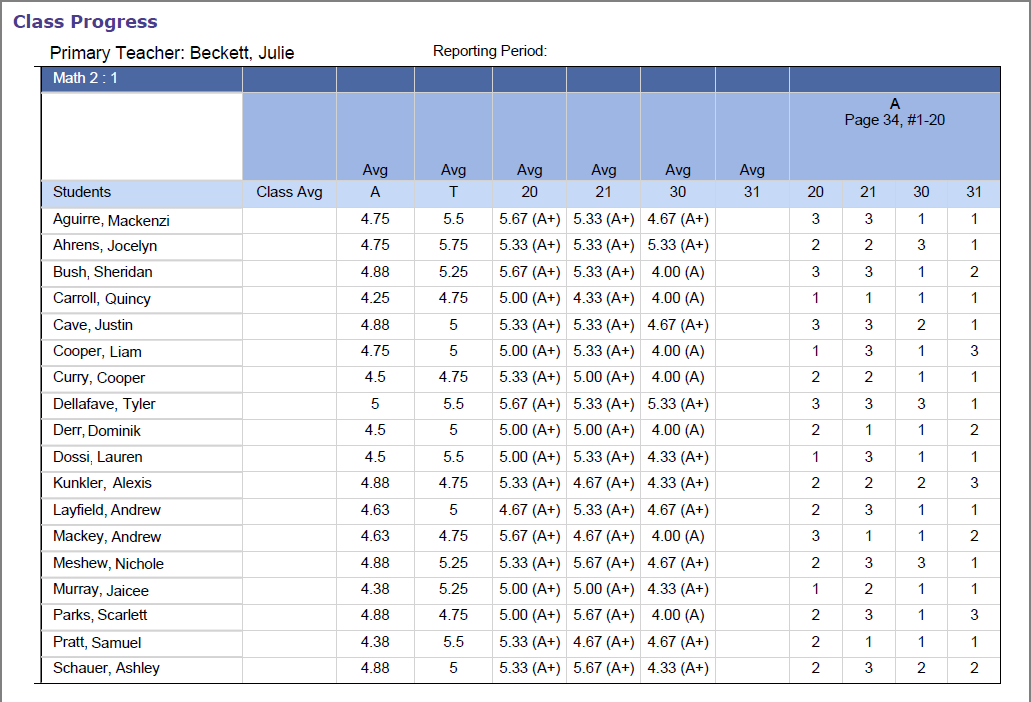
The Class Progress Standards Based report displays assignment type averages, assignment assessment marks, and class averages for an individual class in a reporting period. This report is also a good option for printing a paper backup of your GradeBook. If you are trying to run a Class Progress Report on a class using traditional grading, use the Class Progress Report in the Classic Report list instead.
1.On the Teacher Home Page, in the Select a Report drop-down list, select Class Progress Standards Based.
2.Click Run.
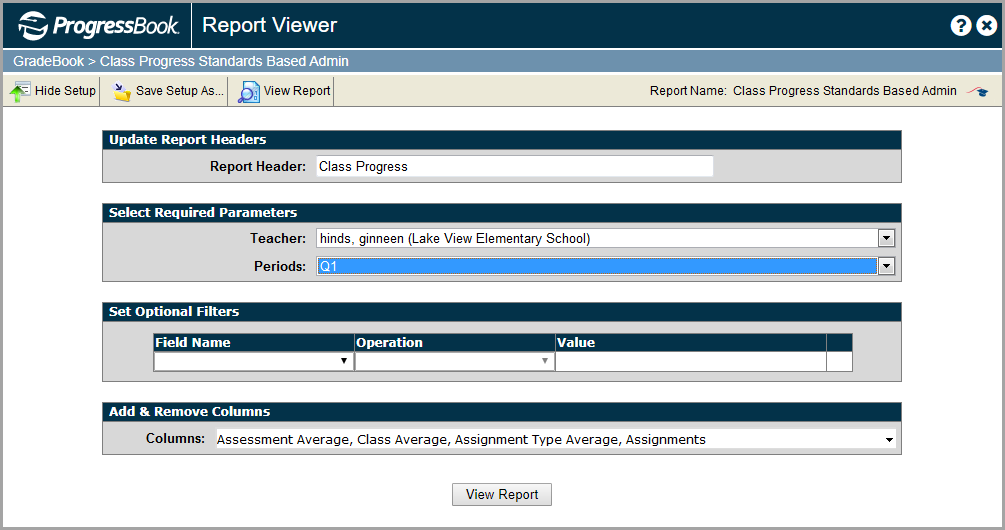
3.On the GradeBook Report Viewer, enter the name of the report in the Report Header field. Class Progress Standards Based displays by default, but you may change the name if desired.
4.In the Select Required Parameters area, select the appropriate class in the Class drop-down list. In the Select Required Parameters area, select the appropriate period in the Periods drop-down list.
Note: Only the classes to which you have access display in the list; however, you should only choose classes that use standards-based grading.
5.In the Set Optional Filters area, select the appropriate option in the Field Name drop-down list. See “Class Progress Standards Based Report – Field Name Options” for descriptions of all available options.
6.Select one of the following options in the Operation drop-down list if it is available. The available options may vary depending on the option you selected in the Field Name drop-down list.
•Is Equal To
•Is Not Equal To
•Is Before
•Is Before Or On
•Is After
•Is After Or On
•Is Less Than
•Is Less Than Or Equal To
•Is Greater Than
•Is Greater Than Or Equal To
•Has a Value
•Does Not Have a Value
7.Enter the appropriate value in the Value field.
Note: The available options and acceptable values vary depending on the option you selected in the Field Name drop-down list. You may be able to enter only alphabetical or only numeric characters depending on the option you selected in the Field Name drop-down list. If you selected Has a Value or Does Not Have a Value in the Operation drop-down list, then the Value field is not available.
8.Specific selected columns indicated by a check mark display on the report by default. If you have selected specific filter options in the Field Name drop-down list and you want that information to display on the report, make sure to select the corresponding column name in the Columns list.
9.Click View Report.
The report displays at the bottom of the window.
10.To save the report with your selected parameters, filters, and columns, click Save Setup As. On the Save Setup As window in the New report name field, enter the unique report name, and in the New description field, enter the description of the report. Then, click Save.
The following message displays at the bottom of the window: “Report setup saved successfully.”
|
|
|
|