|
|
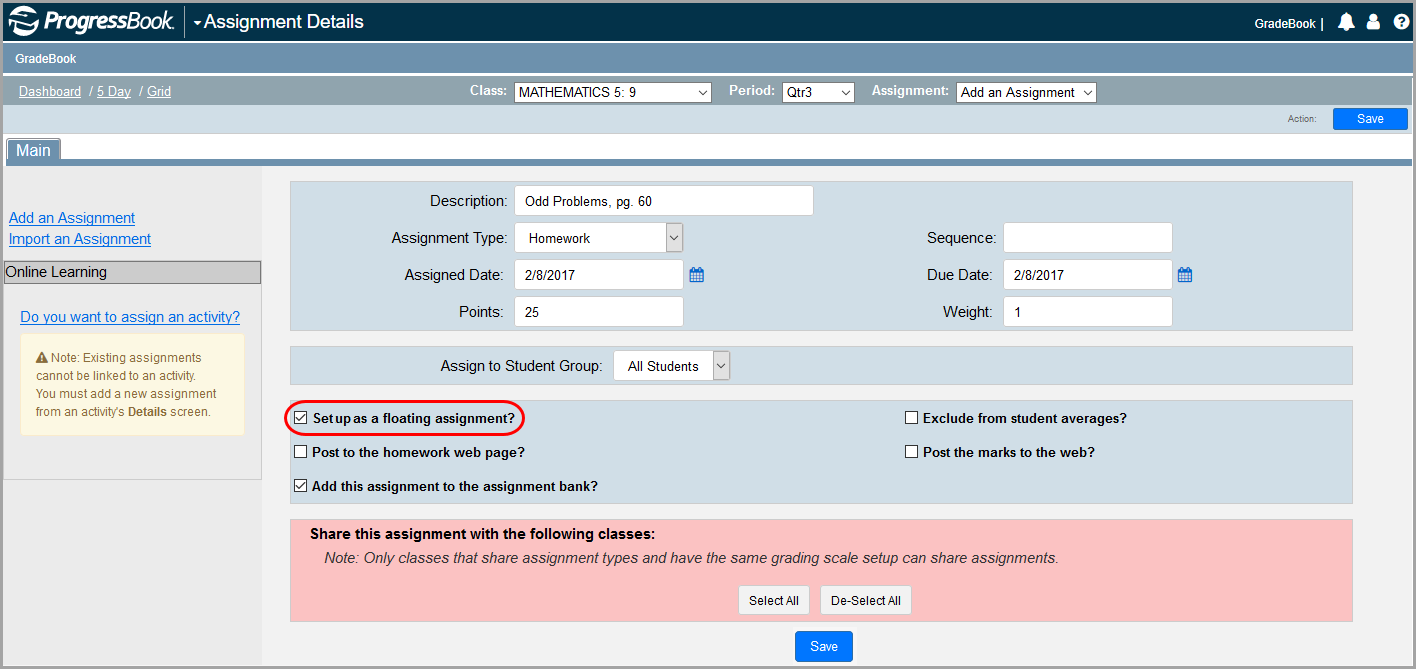
Create a Floating Assignment for a Default or Custom Setup 1 Class
You can create a floating assignment, which is an assignment that can have a different assigned due date for each student. This option can be used for any assignment where students work at their own pace. For example, you may assign a worksheet to the entire class to be completed within 2 weeks. Several students may complete the assignment the next day, but other students may not complete it until the next week.
1.On the Class Dashboard, click Add an Assignment.
2.On the Assignment Details screen, in the Description field, enter a description of the assignment.
3.In the Assignment Type drop-down list, select the type of assignment.
4.In the Sequence field, enter a number that represents the order in which the assignment is sorted.
5.Beside the Assigned Date field, click the calendar icon to select the date the assignment begins, or enter it in the field.
6.In the Due Date field, delete the date.
7.In the Points field, enter the value of the assignment.
8.Select the Set up as a floating assignment? checkbox.
9.Click Save.
|
|
The assignment displays on the Float Assign tab on the Class Dashboard.
|
|
Note: Enter the date each student completed the assignment in the Date Due field on the Assignment Marks screen Marks tab.
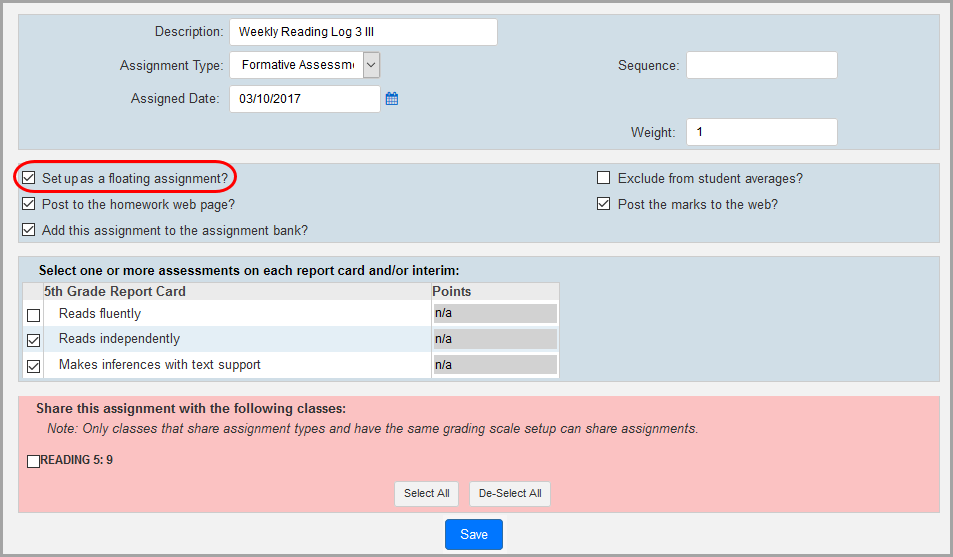
Create a Floating Assignment for a Custom Setup 2 Class
You can create a floating assignment, which is an assignment that can have a different assigned due date for each student. This option can be used for any assignment where students work at their own pace. For example, you may assign a worksheet to the entire class to be completed within two weeks. Several students may complete the assignment the next day, but other students may not complete it until the next week.
1.On the Class Dashboard, click Add an Assignment.
2.On the Assignment Details screen, in the Description field, enter a description of the assignment.
3.In the Assignment Type drop-down list, select the type of assignment.
4.In the Sequence field, enter a number that represents the order in which the assignment is sorted.
5.Beside the Assigned Date field, click the calendar icon to select the date the assignment begins, or enter it in the field.
6.In the Weight field, enter the desired weight for the assignment.
Note: The Weight field default is 1. You can only enter numeric characters within the range of 0 to 100 with no more than two decimal places.
7.Select the Set up as a floating assignment? checkbox.
Note: When you select the Set up as a floating assignment? checkbox, the Due Date field becomes unavailable. You can edit the Assigned Date and Due Date fields on the Assignment Marks screen.
8.In the Select one or more assessments on each report card and/or interim area, select the assessments that apply to the assignment.
9.If this is a points assignment, proceed to step 10. If not, proceed to step 11
10.In the Points field, enter a point value for each selected assessment.
Note: If this is a points assignment type in the Points field, you can only enter numeric characters within the range of 0 to 1,000 and up to two decimal places.
Note: If you have chosen to show a default assessment for the class with an Assignment Type that uses points, you must have a numeric value in the Points field.
|
|
Note: When you click Save, GradeBook verifies that at least one report card assessment is selected; otherwise, it warns you that you have not selected an assessment.
The assignment displays on the Floating Assign tab on the Class Dashboard.
Note: Enter the date each student completed the assignment in the Due Date field on the Assignment Marks screen Marks tab.