|
|
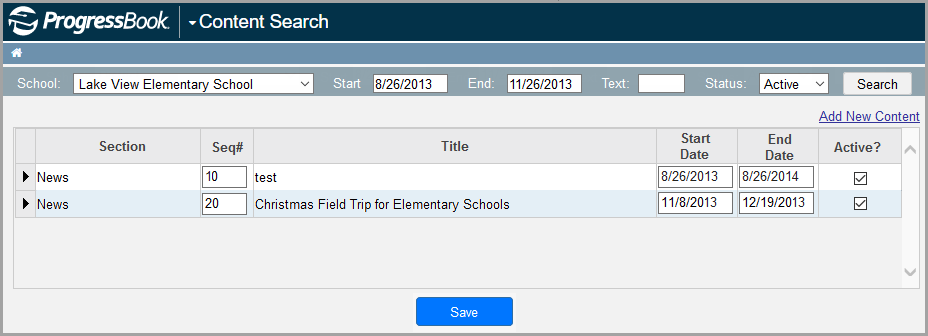
1.On the ParentAccess Administration screen, below Manage Website Content, click News & Information (Content).
|
|
The Content Search screen displays.
|
|
2.Click Add New Content.
The Content Maintenance screen displays.
|
|
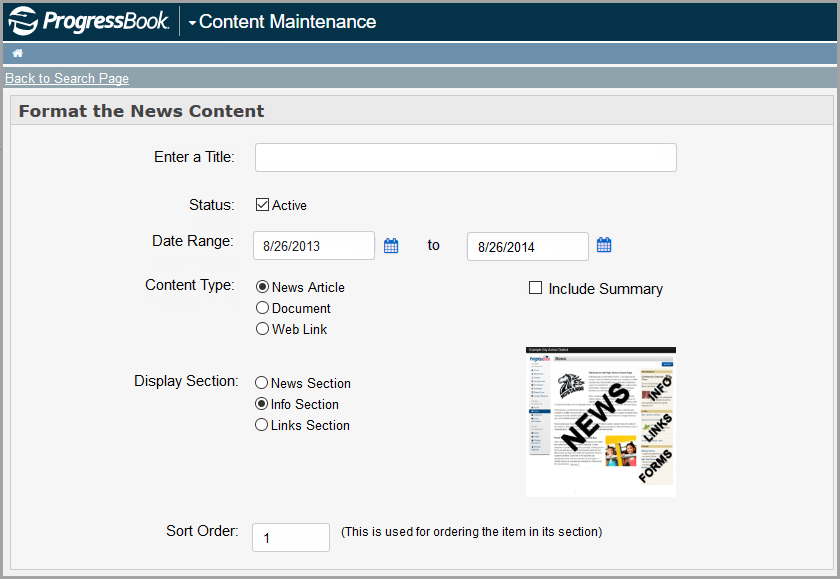
3.In the Format the News Content area, in the Enter a Title field, enter a title for the news item.
4.In the Status area, select the Active checkbox.
5.In the Date Range fields, enter or select the start and end dates during which this news item should display.
6.In the Display Section area, select where in ParentAccess you want this news item to display (News Section, Info Section, or Links Section).
Note: An image of the ParentAccess News screen displays as a guide to the screen’s layout.
Note: In the Frontline ProgressBook Parent & Student mobile app, all segments (News Section, Info Section, or Links Section) display together based on the Sort Order.
7.In the Sort Order field, enter a number to indicate the order in which you want the news item to display in ParentAccess and the Frontline ProgressBook Parent & Student app.
Note: It is a good idea to leave space between the numbers (for example, use increments of 10) so that you can insert items between others later if needed.
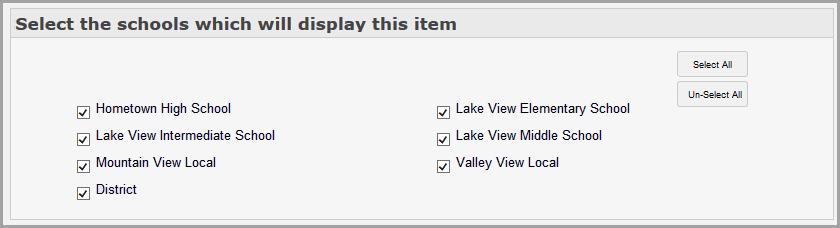
8.In the Select the schools which will display this item area at the bottom of the screen, select one or more schools that should display the news item on their News screen in ParentAccess and News tab in the Frontline ProgressBook Parent & Student app. (To select all of the schools, click Select All.)
|
|
9.Return to the Format the News Content area at the top of the screen, and select the Content Type you are uploading (News Article, Document, or Web Link). Then follow the steps for that type of content listed below:
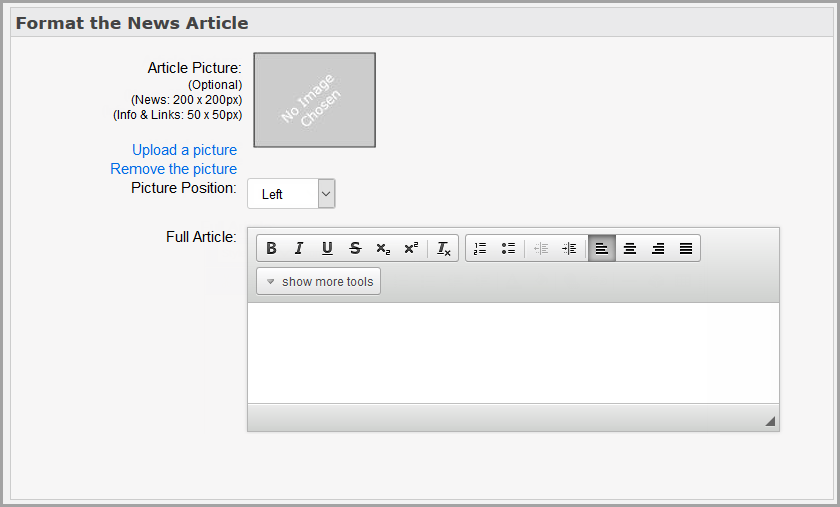
1.In the Format the News Article area in the middle of the screen, in the Full Article field, enter the text of the news article. You can use the options in the text editor to format the text.
|
|
2.(Optional) If you want an image to display with the news article, do the following:
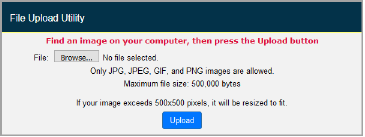
a.Below Article Picture, click Upload a picture.
The File Upload Utility window displays.
|
|
b.Click Browse, and then browse to and select the image from your computer.
c.Click Upload.
d.In the Picture Position drop-down list below the image you just uploaded, select where in relation to the news article text you want the image to display (Left, Right, Top, or Bottom).
3.(Optional) If you would like to display only a summary of the news item with a button users can click to open the full news item, do the following:
a.In the Format the News Content area, select the Include Summary checkbox.
b.In the Format the News Article area, in the Summary field, enter the text that you want to display as a summary of the news article.
c.(Optional) To include an image with the summary, do the following:
i.Below Summary Picture, click Upload a picture.
The File Upload Utility window displays.
|
|
ii.Click Browse, and then browse to and select the image from your computer.
iii.Click Upload.
iv.In the Picture Position drop-down list below the summary image you just uploaded, select where in relation to the summary text you want the image to display (Left, Right, Top, or Bottom).
d.(Optional) To include an image with the full news article that displays in the window after users click the button to read more, do the following:
i.Below Popup Picture, click Upload a picture.
The File Upload Utility window displays.
|
|
ii.Click Browse, and then browse to and select the image from your computer.
iii.Click Upload.
iv.In the Picture Position drop-down list below the popup image you just uploaded, select where in relation to the text of the full news article you want the image to display (Left or Right).
4.(Optional) To check the spelling of all of your entries on this page, click Check Spelling.
5.Click Save.
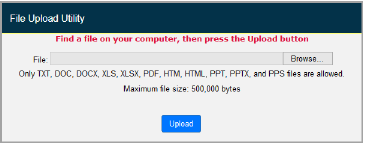
1.In the Upload the Document area in the middle of the screen, click Upload a new form.
|
|
The File Upload Utility window displays.
|
|
2.Click Browse, and then browse to and select the document from your computer.
3.Click Upload.
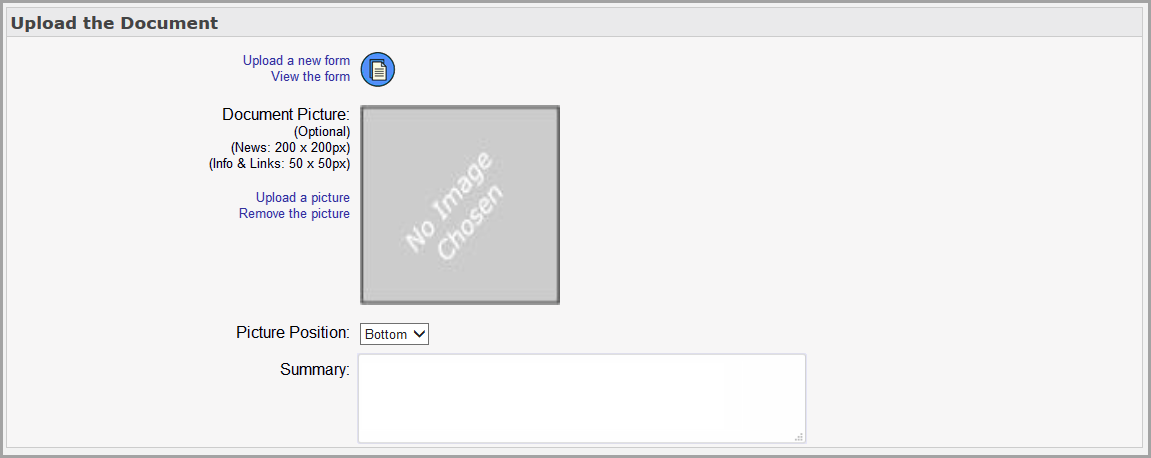
4.(Optional) To include an image with the document, do the following:
a.Below Document Picture, click Upload a picture.
The File Upload Utility window displays.
|
|
b.Click Browse, and then browse to and select the image from your computer..
c.Click Upload.
d.In the Picture Position drop-down list below the image you just uploaded, select where in relation to the document link you want the image to display (Left, Right, Top, or Bottom).
5.(Optional) To display a summary description of the document, enter a description in the Summary field.
6.(Optional) To check the spelling of all of your entries on this page, click Check Spelling.
7.Click Save.
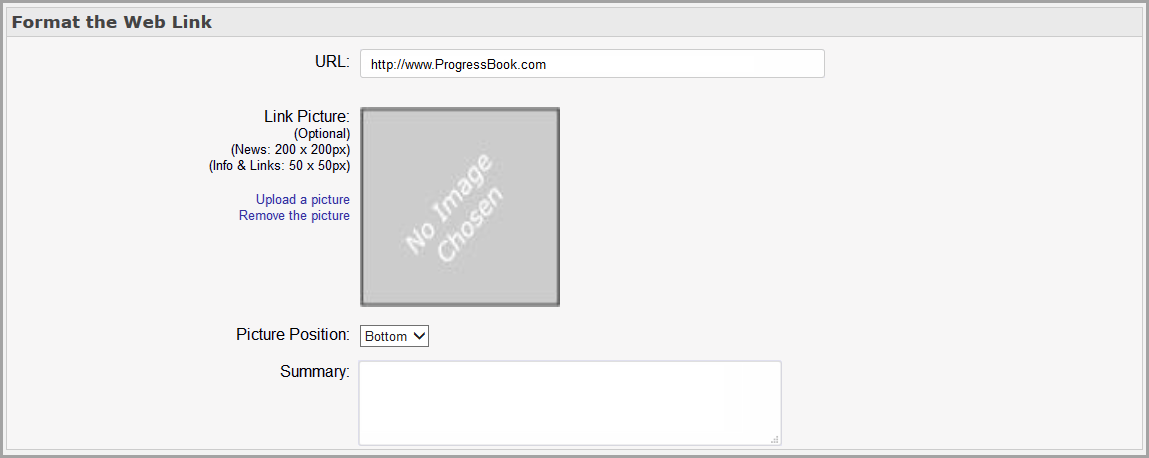
1.In the Format the Web Link area in the middle of the screen, in the URL field, enter the full URL (website address) of the web link, including http:// (for example: http://www.progressbook.com).
|
|
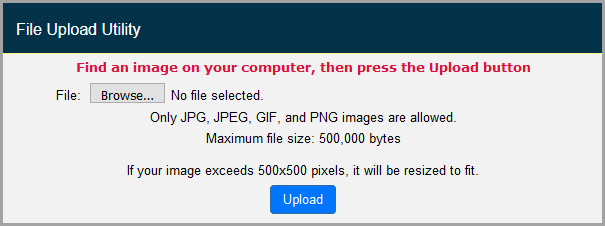
2.(Optional) To include an image with the link, do the following:
a.Below Link Picture, click Upload a picture.
The File Upload Utility window displays.
|
|
b.Click Browse, and then browse to and select the image from your computer.
c.Click Upload.
d.In the Picture Position drop-down list below the image you just uploaded, select where in relation to the web link you want the image to display (Left, Right, Top, or Bottom).
3.(Optional) To display a summary description of the website to which you are linking, enter a description in the Summary field.
4.(Optional) To check the spelling of all of your entries on this page, click Check Spelling.
5.Click Save.
.png)