The Report Builder screen lets you access Report Builder reports, print progress reports and IEP summaries by class, and print blank forms for use offline.
•“Working with Report Builder Reports”
Working with Report Builder Reports
Report Builder reports are available from the Report Builder screen if they are enabled for your district and you have the appropriate user privileges. You can select required parameters and numerous optional filters and columns for displaying desired report results. Once you select the desired settings, you can save the report with those settings to use in the future.
For information on managing Report Builder reports and user access to these reports, as well as guidelines for creating custom reports in Microsoft SQL Server Report Builder 2.0 for use in ProgressBook, refer to the ProgressBook Report Builder Management Guide.
•To view the available reports on the Report Builder screen, see “Accessing the Report Builder Screen.”
•For descriptions of available Report Builder reports, including links to procedures for running each report, see “Report Builder Reports Descriptions.”
•For information about available features for Report Builder reports, see “Report Builder Reports Available Features.”
Accessing the Report Builder Screen
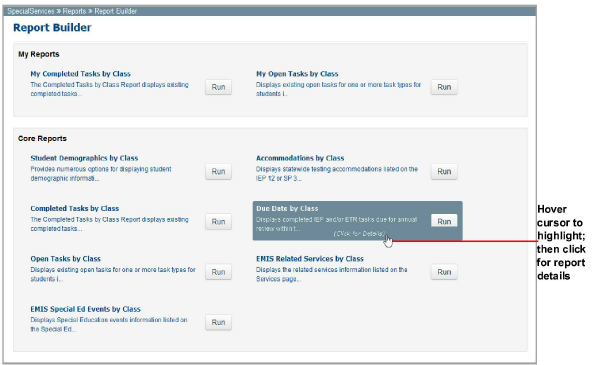
A list of reports that you can run displays on the Report Builder screen. Reports that your district makes available display in the Core Reports area. If you run any core reports and save them using your own specific parameters, those reports display in the My Reports area. To access the Report Builder screen:
1.On the banner, click ![]() to open the menu. Then, in the Reports submenu, click Report Builder.
to open the menu. Then, in the Reports submenu, click Report Builder.
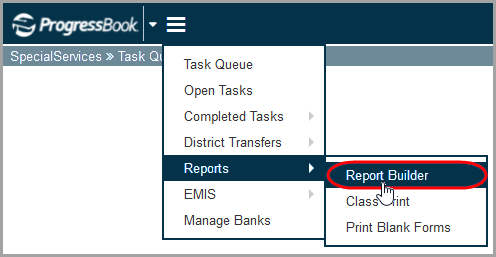
The Report Builder screen displays.
2.(Optional) Hover your cursor over a report name or description and click in the highlighted area to open a window with a description of the report.
3.(Optional) Click Run to open the Report Viewer window to set report parameters and view the report. For links to procedures for setting report parameters, see “Report Builder Reports Descriptions.”
Note: From the Report Builder screen, you can delete reports that you have created (My Reports) (see “Deleting Report Builder Reports” ).
Deleting Report Builder Reports
You can delete Report Builder reports that you have created (My Reports); however, you cannot delete Core Reports.
1.On the Report Builder screen, hover your cursor over a report name or description, and click in the highlighted area.
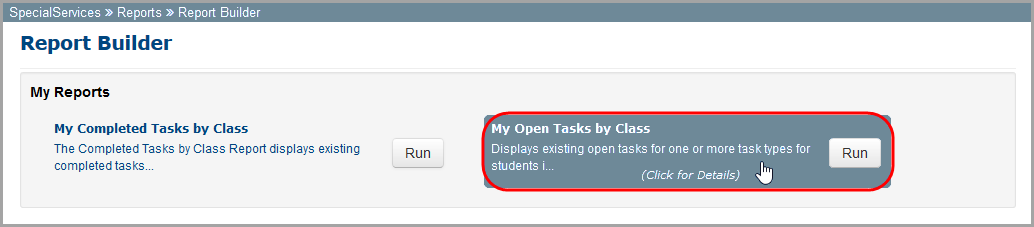
The My (report name) window opens.
2.Click Delete.
3.On the delete confirmation window that opens, click OK.
Report Builder Reports Descriptions
The following Report Builder reports are available by default on the Report Builder screen, with one version for users with access to school buildings and another for those with access to classes.
•Open Tasks – Displays existing open tasks for one or more task types for students in individual or multiple school(s) or class(es), depending on the report version. See “Open Tasks Report.”
•Completed Tasks – Displays existing completed tasks for one or more task types where the date the task was completed falls within the specified date range for students in individual or multiple school(s) or class(es), depending on the report version. See “Completed Tasks Report.”
•Due Date – Displays completed IEP and/or ETR tasks due for review within the specified date range for students in individual or multiple school(s) or class(es). See “Due Date Report.”
•Accommodations – Displays statewide testing accommodations listed on the IEP 12, SP 3, or 504 2 Statewide and District Testing Pages of the completed IEP, SPSP, or 504 tasks whose event dates fall within the specified date range for students in individual or multiple school(s) or class(es). See “Accommodations Report.”
•Student Demographics – Displays student demographic information for individual or multiple schools; or multiple classes, class groups, or homerooms. See “Student Demographics Report.”
•EMIS Related Services – Displays related services information listed on the Services page of the completed IEP or SP tasks whose meeting or start and end dates fall within the specified date range for students in individual or multiple school(s) or class(es), depending on the report version. See “EMIS Related Services Report.”
•EMIS Special Ed Events – Displays Special Education events information listed on the Special Education Events page of the completed IEP, ETR, and SP tasks whose event dates fall within the specified date range for students in individual or multiple school(s) or class(es), depending on the report version. See “EMIS Special Ed Events Report.”
Specific reports display on the Report Builder screen based on whether districts have assigned user roles access to those reports. For example, the Accommodations report is available by default to all users whose privileges allow access to school buildings. Even though a guidance counselor may have access to multiple school buildings, if the district does not assign the guidance counselor role access to the Accommodations report, that report does not display on the Report Builder screen.
Report Builder Reports Available Features
On the SpecialServices Report Viewer window, once you have selected required parameters and optional filters to create customized reports, you can save the report with those settings to use in the future. Once you have generated the report, numerous features are available as shown in the “Features for Report Builder Reports” table.
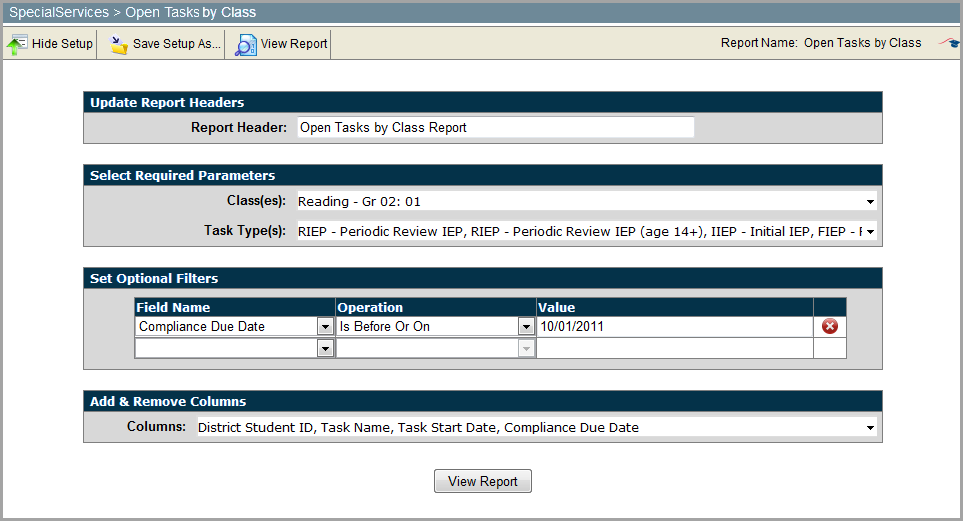
The Open Tasks report provides many options for displaying existing open tasks for one or more task types for students in individual or multiple school(s) or class(es), depending on the report version.
1.On the Report Builder screen, beside the description of the report, click Run.
The SpecialServices Report Viewer window opens.
2.By default, in the Report Header field, Open Tasks Report or Open Tasks by Class Report displays, but you can rename the report if desired.
3.In the Select Required Parameters area, if you have access to buildings, in the School(s) drop-down list, select the appropriate school(s). If you have access to classes, in the Class(es) drop-down list, select the appropriate class(es).
Note: Only school buildings to which you have access or classes and class groups to which you have been assigned display in the list. Hidden classes do not display.
4.In the Select Required Parameters area, in the Task Type(s) drop-down list, select the appropriate task type(s).
Note: Only tasks enabled for your district display in the list.
5.In the Set Optional Filters area, in the Field Name drop-down list, select the appropriate option(s).
•Compliance Due Date – Compliance due date of the task (entered on the New Task window in SpecialServices when the task was created)
•District Student ID – Code that identifies the student (imported from StudentInformation)
•Grade Level Code – Code that represents the grade level in which the student is enrolled (imported from StudentInformation)
•Grade Level Description – Description of the grade level in which the student is enrolled (imported from StudentInformation)
•Student Name – Full name of student in the form of last name, first name, middle name (imported from StudentInformation)
•Task Name – Name of the task (entered on the New Task window in SpecialServices when the task was created)
•Task Start Date – Date the task was created in SpecialServices
6.If the Operation drop-down list is available, select one of the following options. The available options may vary depending on the option you selected in the Field Name drop-down list.
•Is Equal To
•Is Not Equal To
•Is Before
•Is Before or On
•Is After
•Is After or On
•Begins With
•Does Not Begin With
•Ends With
•Does Not End With
•Contains
•Does Not Contain
•Has a Value
•Does Not Have a Value
7.In the Value field, type the appropriate value.
Note: The available options and acceptable values vary depending on the option you selected in the Field Name drop-down list. You may be able to enter only alphabetical or only numeric characters depending on the option you selected in the Field Name drop-down list. If you selected an option in the Field Name drop-down list that requires a date, a calendar becomes available in the Value field. If you selected Grade Level Code in the Field Name drop-down list, for grades 1 through 9 you must enter 0 before the grade in the Value field. If you selected Has a Value or Does Not Have a Value in the Operation drop-down list, then the Value field is not available.
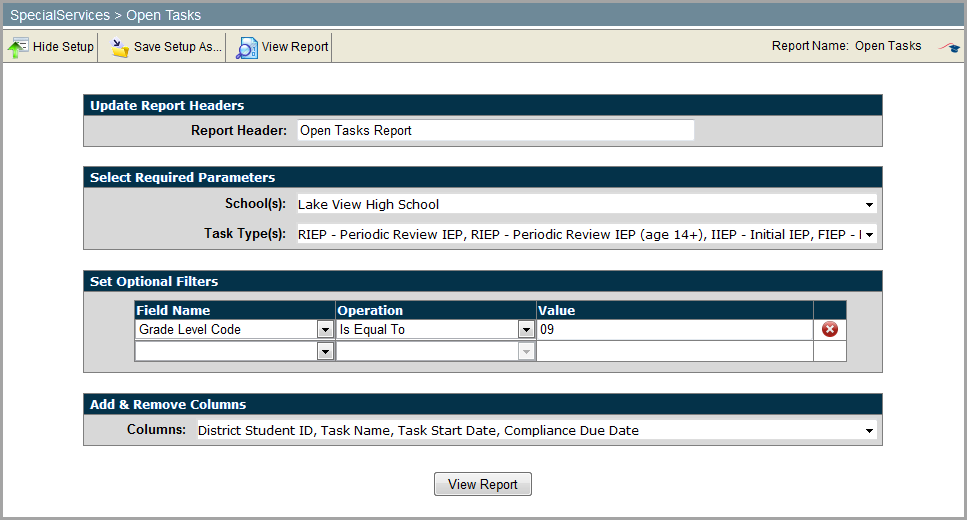
8.By default, certain columns display on the report. If you have selected specific filter options in the Field Name drop-down list and you want that information to display on the report, in the Columns drop-down list, select the corresponding column name.
9.Click View Report.
The report displays. If multiple events exist for a student, each event displays in a separate row.
Note: The field or list displays red indicating an unacceptable value was entered or a required field was left blank.
10.To save the report with your selected parameters, filters, and columns, complete the following steps:
a.On the Report Viewer window, click  Save Setup As.
b.On the Save Setup As window, in the New report name field, enter a unique report name.
c.In the New description field, enter a description of the report.
d.Click Save.
The report displays in the My Reports section on the Report Builder screen.
The Completed Tasks report provides numerous options for displaying existing completed tasks for one or more task types where the task completion date falls within the specified date range for students in individual or multiple school(s) or class(es), depending on the report version.
1.On the Report Builder screen, beside the description of the report, click Run.
The SpecialServices Report Viewer window opens.
2.By default, in the Report Header field, Completed Tasks Report or Completed Tasks Report by Class displays, but can renamed the report if desired.
3.In the Select Required Parameters area, if you have access to buildings, in the School(s) drop-down list, select the appropriate school(s). If you have access to classes, in the Class(es) drop-down list, select the appropriate class(es).
Note: Only school buildings to which you have access display in the list.
4.In the Select Required Parameters area, in the Task Type(s) drop-down list, select the appropriate task type(s).
Note: Only tasks enabled for your district display in the list.
5.In the Select Required Parameters area, in the Start Date and End Date fields, select the appropriate dates.
6.In the Set Optional Filters area, in the Field Name drop-down list, select the appropriate option(s).
•District Student ID – Code that identifies the student (imported from StudentInformation)
•Grade Level Code – Code that represents the grade level in which the student is enrolled (imported from StudentInformation)
•Grade Level Description – Description of the grade level in which the student is enrolled (imported from StudentInformation)
•Student Name – Full name of student in the form of last name, first name, middle name (imported from StudentInformation)
•Task Completed Date – Date the task was completed in SpecialServices
•Task Event Date – Date entered in the Meeting Date field on an IEP, SP, or ETR task Cover Page
•Task Name – Name of the task (entered on the New Task window in SpecialServices when the task was created)
7.If the Operation Drop-down list is available, select one of the following options. The available options may vary depending on the option you selected in the Field Name drop-down list.
•Is Equal To
•Is Not Equal To
•Is Before
•Is Before or On
•Is After
•Is After or On
•Begins With
•Does Not Begin With
•Ends With
•Does Not End With
•Contains
•Does Not Contain
•Has a Value
•Does Not Have a Value
8.In the Value field, type the appropriate value.
Note: The available options and acceptable values vary depending on the option you selected in the Field Name drop-down list. You may be able to enter only alphabetical or only numeric characters depending on the option you selected in the Field Name drop-down list. If you selected an option in the Field Name drop-down list that requires a date, a calendar becomes available in the Value field. If you selected Grade Level Code in the Field Name drop-down list, for grades 1 through 9, you must enter 0 before the grade in the Value field. If you selected Has a Value or Does Not Have a Value in the Operation drop-down list, then the Value field is not available.
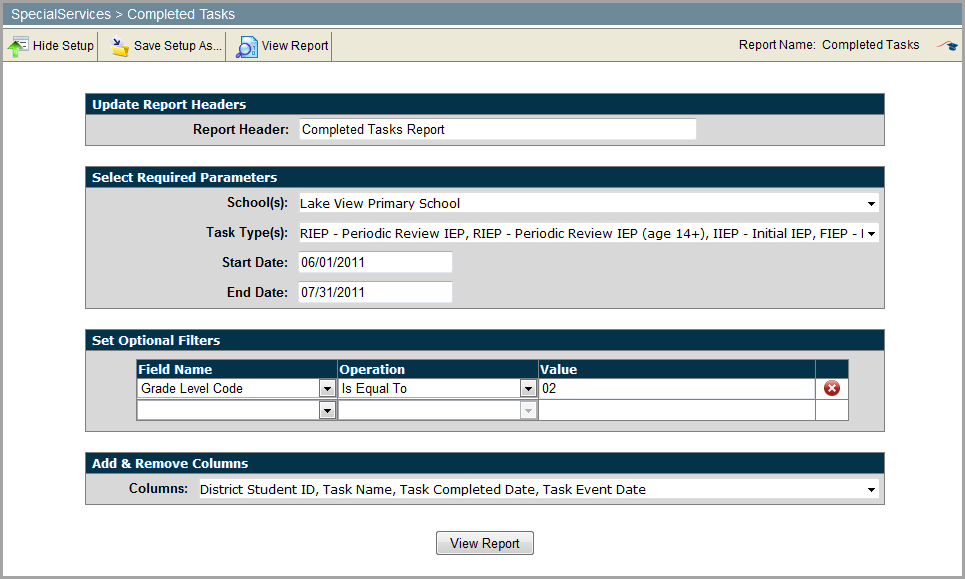
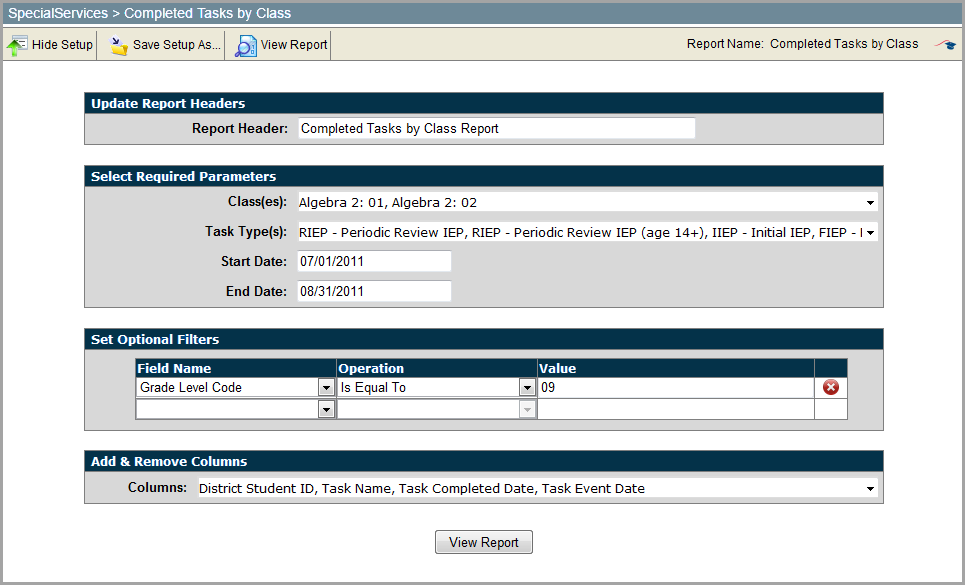
9.By default, certain columns display on the report. If you have selected specific filter options in the Field Name drop-down list and you want that information to display on the report, in the Columns drop-down list, select the corresponding column name.
10.Click View Report.
The report displays. If multiple events exist for a student, each event displays in a separate row.
Note: The field or list displays red indicating an unacceptable value was entered or a required field was left blank.
11.To save the report with your selected parameters, filters, and columns, complete the following steps:
a.On the Report Viewer window, click  Save Setup As.
b.On the Save Setup As window, in the New report name field, enter a unique report name.
c.In the New description field, enter a description of the report.
d.Click Save.
The report displays in the My Reports section on the Report Builder screen.
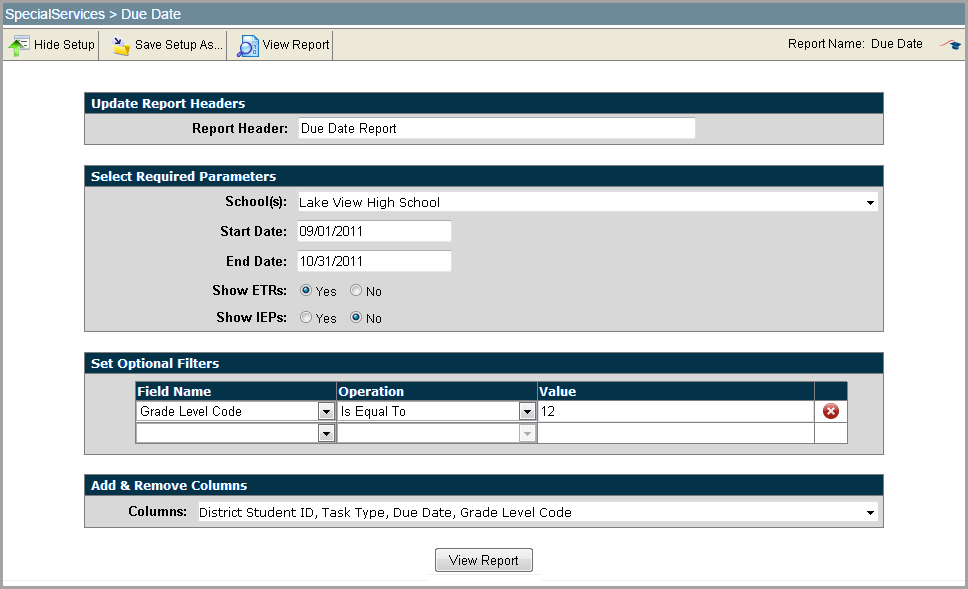
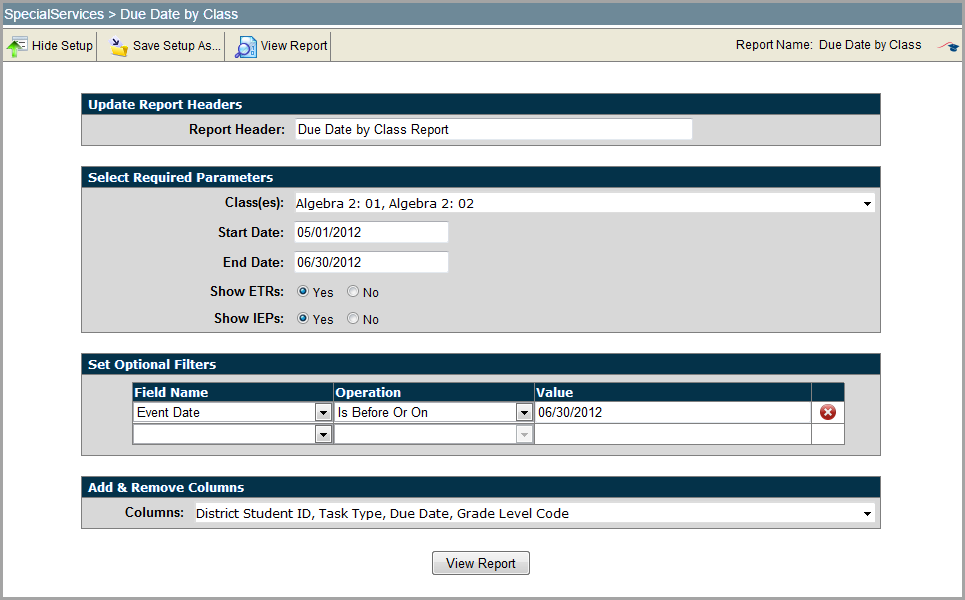
The Due Date report provides numerous options for displaying completed IEP and/or ETR tasks due for review within a specified date range for students in individual or multiple school(s) or class(es), depending on the report version.
1.On the Report Builder screen, beside the description of the report, click Run.
The SpecialServices Report Viewer window opens.
2.By default, in the Report Header field, Due Date Report or Due Date by Class Report displays, but you can rename the report if desired.
3.In the Select Required Parameters area, if you have access to buildings, in the School(s) drop-down list, select the appropriate school(s). If you have access to classes, in the Class(es) drop-down list, select the appropriate class(es).
Note: Only school buildings to which you have access or classes and class groups to which you have been assigned display in the list. Hidden classes do not display in the list.
4.In the Select Required Parameters area, in the Start Date and End Date fields, select the appropriate date(s).
Note: You may enter dates in multiple formats using different types of separators, such as 11/01/11, 01.01.2011 or 1-1-11.
5.In the Select Required Parameters area, select one of the following Show ETRs options:
•Yes – Include students with any of the following ETR tasks: IETR - Initial Evaluation (School-Age), IETR - Initial Evaluation (Preschool), RETR - Reevaluation (School-Age), RETR - Reevaluation (Preschool), and TETR - Transfer ETR, if they are enabled for your district
•No – Do not include students with ETR tasks
6.In the Select Required Parameters area, select one of the following Show IEPs options:
•Yes – Include students with any of the following IEP tasks: IIEP - Initial IEP, RIEP - Periodic Review IEP, RIEP - Periodic Review IEP (14+), and TIEP - Transfer IEP, if they are enabled for your district
•No – Do not include students with IEP tasks
7.In the Set Optional Filters area, in the Field Name drop-down list, select the appropriate option(s).
•District Student ID – Code that identifies the student (imported from StudentInformation)
•Due Date – Date by which the task must be complete to be in compliance
The system determines the due date of the IEP by adding one year minus one day to the date entered in the Meeting Date field on the IEP Cover Page. The system determines the due date of the ETR by adding three years minus one day to the date entered in the Meeting Date field on the ETR Cover Page. If the calculated IEP or ETR due date falls within the date range entered in the Start Date and End Date fields entered, the student displays on the report.
•Event Date – Date entered in the Meeting Date field on an IEP, SP, or ETR task Cover Page
•Grade Level Code – Code that represents the grade level in which the student is enrolled (imported from StudentInformation)
•Grade Level Description – Description of the grade level in which the student is enrolled (imported from StudentInformation)
•Student Name – Full name of student in the form of last name, first name, middle name (imported from StudentInformation)
•Task Type – Type of the task (selected on the New Task window in SpecialServices when the task was created)
8.If the Operation drop-down list is available, select one of the following options. The available options may vary depending on the option you selected in the Field Name drop-down list.
•Is Equal To
•Is Not Equal To
•Is Before
•Is Before or On
•Is After
•Is After or On
•Begins With
•Does Not Begin With
•Ends With
•Does Not End With
•Contains
•Does Not Contain
•Has a Value
•Does Not Have a Value
9.In the Value field, type the appropriate value.
Note: The available options and acceptable values vary depending on the option you selected in the Field Name drop-down list. You may be able to enter only alphabetical or only numeric characters depending on the option you selected in the Field Name drop-down list. If you selected an option in the Field Name drop-down list that requires a date, a calendar becomes available in the Value field. If you selected Grade Level Code in the Field Name drop-down list, for grades 1 through 9, you must enter 0 before the grade in the Value field. If you selected Has a Value or Does Not Have a Value in the Operation drop-down list, then the Value field is not available.
10.By default, certain columns display on the report. If you have selected specific filter options in the Field Name drop-down list and you want that information to display on the report, in the Columns drop-down list, select the corresponding column name.
Note: Only the most recent task displays in the report results, if a student has multiple tasks of one task type and the following information is the same: Student Name, School Name, District Student ID, Task Type, Event Date, Grade Level Code and Grade Level Description. If any of this information is different, then multiple tasks display.
Note: If a student has a TIEP - Transfer IEP or TETR - Transfer ETR, See IEP or See ETR displays in the Due Date column.
11.Click View Report.
The report displays. If multiple events exist for a student, each event displays in a separate row.
Note: The field or list displays red indicating an unacceptable value was entered or a required field was left blank.
12.To save the report with your selected parameters, filters, and columns, complete the following steps:
a.On the Report Viewer window, click  Save Setup As.
b.On the Save Setup As window, in the New report name field, enter a unique report name.
c.In the New description field, enter a description of the report.
d.Click Save.
The report displays in the My Reports section on the Report Builder screen.
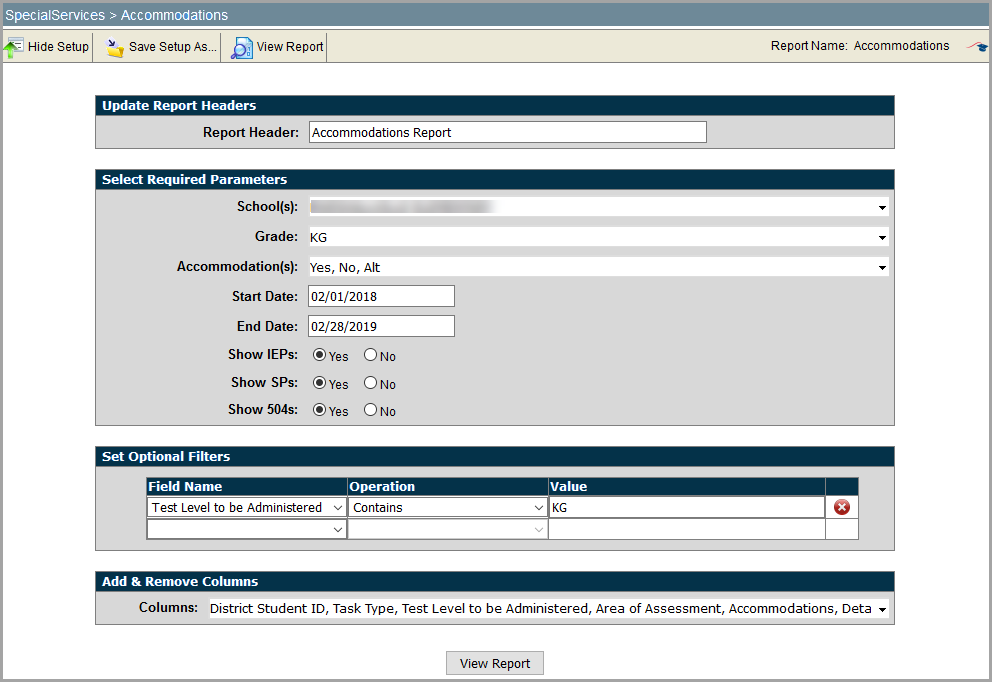
The Accommodations report provides numerous options for displaying statewide testing accommodations listed on the IEP 12, SP 3, or 504 2 Statewide and District Testing Pages of the completed IEP, SP, or 504 tasks whose event dates fall within the specified date range for students in individual or multiple school(s) or class(es), depending on the report version.
1.On the Report Builder screen, beside the description of the report, click Run.
The SpecialServices Report Viewer window opens.
2.By default, in the Report Header field, Accommodations Report or Accommodations by Class Report displays, but you can rename the report if desired.
3.In the Select Required Parameters area, if you have access to buildings, in the School(s) drop-down list, select the appropriate school(s). If you have access to classes, in the Class(es) drop-down list, select the appropriate class(es).
Note: Only school buildings to which you have access or classes and class groups to which you have been assigned display in the list. Hidden classes do not display.
4.In the Select Required Parameters area, in the Accommodation(s) drop-down list, select one of the following options.
•Select/De-select All Accommodations – Click once to select all the listed Accommodations options; click again to de-select all the listed Accommodations options
•Yes – Include subject areas With Accommodations, if any were selected, on the Child Will Be Tested sections on the IEP 12 Statewide and District Testing Page, the SP 3 Statewide and District Testing Page, or the 504 2 Statewide and District Testing Page
•No – Include subject areas Without Accommodations, if any were selected, on the Child Will Be Tested sections on the IEP 12 Statewide and District Testing Page, the SP 3 Statewide and District Testing Page, or the 504 2 Statewide and District Testing Page
•Alt – Include subject areas with Alternate Assessments, if any were selected, on the Child Will Be Tested sections on the IEP 12 Statewide and District Testing Page, the SP 3 Statewide and District Testing Page, or the 504 2 Statewide and District Testing Page
5.In the Select Required Parameters area, in the Start Date and End Date fields, select the appropriate dates.
6.In the Select Required Parameters area, select one of the following Show IEPs options:
•Yes – Include students with the following IEP tasks: IIEP - Initial IEP, RIEP - Periodic Review IEP, RIEP - Periodic Review IEP (14+), and TIEP - Transfer IEP, if they are enabled by your district
•No – Do not include students with IEP tasks
7.In the Select Required Parameters area, select one of the following Show SPs options:
•Yes – Include students with SP tasks, if they are enabled by your district
•No – Do not include students with SP tasks
8.In the Select Required Parameters area, select one of the following Show 504s options:
•Yes – Include students with 504 tasks, if they are enabled by your district
•No – Do not include students with 504 tasks
9.In the Set Optional Filters area, in the Field Name drop-down list, select the appropriate option(s).
•Area of Assessment – Subject area, for example, Reading, Writing, Math, Science or Social Studies, selected on the IEP 12 Statewide and District Testing Page, the SP 3 Statewide and District Testing Page, or the 504 2 Statewide District and Testing Page
•Detail of Accommodations – Description stated in the Detail of Accommodations section for each area of assessment selected on the IEP 12 Statewide and District Testing Page, the SP 3 Statewide and District Testing Page, or the 504 2 Statewide and District Testing Page
•District Student ID – Code that identifies the student (imported from StudentInformation)
•Grade Level When Tested – Grade level in which the student is or will be enrolled when tested as selected in the Grade column on the IEP 12 Statewide and District Testing Page, the SP 3 Statewide and District Testing Page, or the 504 2 Statewide and District Testing Page (imported from StudentInformation)
•Student Name – Full name of student in the form of last name, first name, middle name (imported from StudentInformation)
•Task Completed Date – Date the task was completed in SpecialServices
•Test Level to be Administered – Grade level assessment, for example, 10th OGT 3rd achievement, selected in the Assessment Area list on the IEP 12 Statewide and District Testing Page, the SP 3 Statewide and District Testing Page, or the 504 2 Statewide and District Testing Page
10.If the Operation drop-down list is available, select one of the following options. The available options may vary depending on the option you selected in the Field Name drop-down list.
•Is Equal To
•Is Not Equal To
•Is Before
•Is Before or On
•Is After
•Is After or On
•Begins With
•Does Not Begin With
•Ends With
•Does Not End With
•Contains
•Does Not Contain
•Has a Value
•Does Not Have a Value
11.In the Value field, type the appropriate value.
Note: The available options and acceptable values vary depending on the option you selected in the Field Name drop-down list. You may be able to enter only alphabetical or only numeric characters depending on the option you selected in the Field Name drop-down list. If you selected an option in the Field Name drop-down list that requires a date, a calendar becomes available in the Value field. If you selected Grade Level Code in the Field Name drop-down list, for grades 1 through 9, you must enter 0 before the grade in the Value field. If you selected Has a Value or Does Not Have a Value in the Operation drop-down list, then the Value field is not available.

12.By default, certain columns display on the report. If you have selected specific filter options in the Field Name drop-down list and you want that information to display on the report, in the Columns drop-down list, select the corresponding column name.
Note: Only accommodations from the most recent task displays in the report results, if a student has multiple tasks of one task type and the following information is the same: District Student ID, Task Type and Meeting Date. If any of this information is different, then accommodations from multiple tasks display.
13.Click View Report.
The report displays. A separate row displays for each test and subject area combination; therefore, multiple rows may display for a single student.
Note: The field or list displays red indicating an unacceptable value was entered or a required field was left blank.
14.To save the report with your selected parameters, filters, and columns, complete the following steps:
a.On the Report Viewer window, click  Save Setup As.
b.On the Save Setup As window, in the New report name field, enter a unique report name.
c.In the New description field, enter a description of the report.
d.Click Save.
The report displays in the My Reports section on the Report Builder screen.
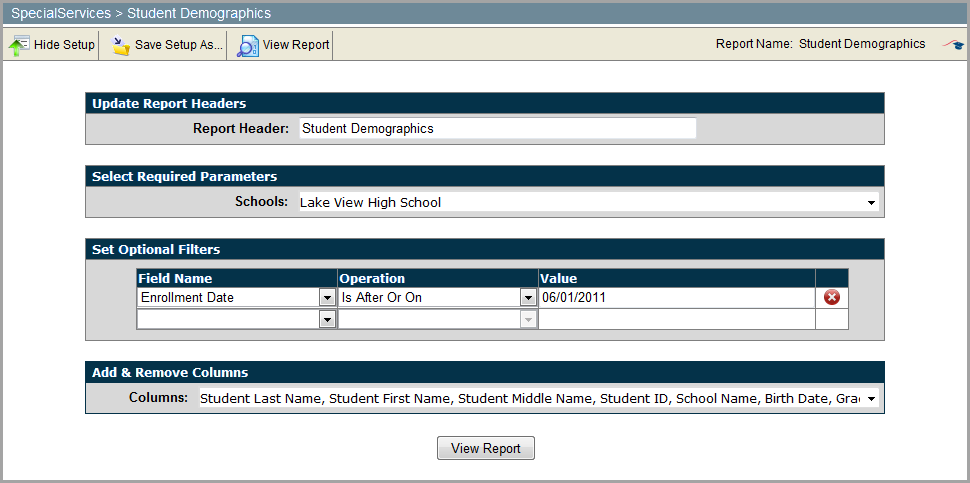
The Student Demographics report provides numerous options for displaying student demographic information for individual or multiple schools, or individual or multiple classes, class groups, or homerooms.
1.On the Report Builder screen, beside the description of the report, click Run.
The SpecialServices Report Viewer window opens.
2.By default, in the Report Header field, Student Demographics or Student Demographics by Class Report displays, but you can rename the report if desired.
3.In the Select Required Parameters area, if you have access to buildings, in the School(s) drop-down list, select the appropriate school(s). If you have access to classes, in the Class drop-down list, select the appropriate class(es).
Note: Only school buildings to which you have access or classes and class groups to which you have been assigned display in the list. Hidden classes do not display.
4.In the Set Optional Filters area, in the Field Name drop-down list, select the appropriate option(s). See “Available Filters for Student Demographics Report” for descriptions of all the available options.
5.If the Operation drop-down list is available, select one of the following options. The available options may vary depending on the option you selected in the Field Name drop-down list.
•Is Equal To
•Is Not Equal To
•Is Before
•Is Before or On
•Is After
•Is After or On
•Begins With
•Does Not Begin With
•Ends With
•Does Not End With
•Contains
•Does Not Contain
•Has a Value
•Does Not Have a Value
6.In the Value field, type the appropriate value.
Note: The available options and acceptable values vary depending on the option you selected in the Field Name drop-down list. You may be able to enter only alphabetical or only numeric characters depending on the option you selected in the Field Name drop-down list. If you selected an option in the Field Name drop-down list that requires a date, a calendar becomes available in the Value field. If you selected Grade Level Code in the Field Name drop-down list, for grades 1 through 9 you must enter 0 before the grade in the Value field.
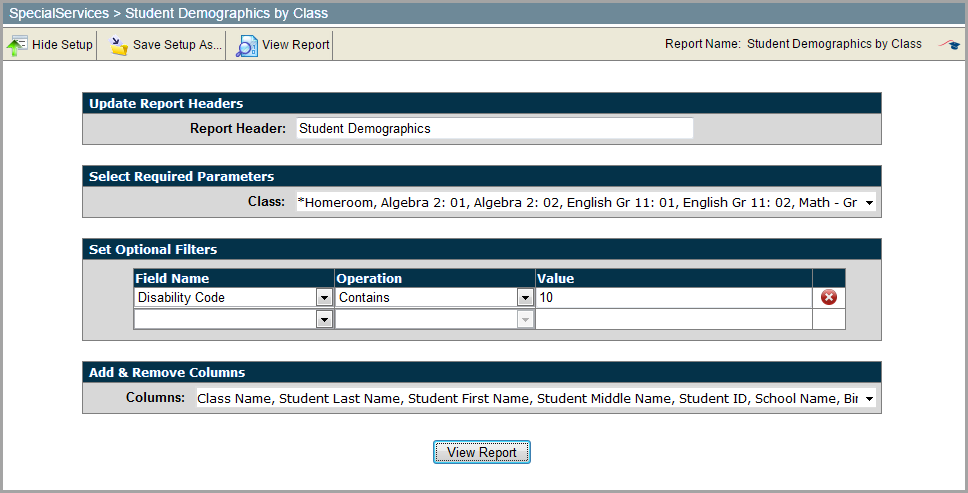
7.By default, certain columns display on the report. If you have selected specific filter options in the Field Name drop-down list and you want that information to display on the report, in the Columns drop-down list, select the corresponding column name.
8.Click View Report.
The report displays.
Note: The field or list displays red indicating an unacceptable value was entered or a required field was left blank.
9.To save the report with your selected parameters, filters, and columns, complete the following steps:
a.On the Report Viewer window, click  Save Setup As.
b.On the Save Setup As window, in the New report name field, enter a unique report name.
c.In the New description field, enter a description of the report.
d.Click Save.
The report displays in the My Reports section on the Report Builder screen.
The EMIS Related Services report provides numerous options for displaying related services information listed on the Services page of the completed IEP or SP tasks whose meeting or start and end dates fall within the specified date range for students in individual or multiple school(s) or class(es), depending on the report version.
1.On the Report Builder screen, beside the description of the report, click Run.
The SpecialServices Report Viewer window opens.
2.By default, in the Report Header field, EMIS Related Services or EMIS Related Services by Class displays, but you can rename the report if desired.
3.In the Select Required Parameters area, if you have access to buildings, in the School(s) drop-down list, select the appropriate school(s). If you have access to classes, in the Class(es) drop-down list, select the appropriate class(es).
Note: Only school buildings to which you have access or classes and class groups to which you have been assigned display in the list. Hidden classes do not display in the list.
4.In the Select Required Parameters area, select one of the following Task Included In EMIS options:
•Yes
•No
5.In the Select Required Parameters area, select one of the following Task Excluded From EMIS options:
•Yes
•No
6.In the Select Required Parameters area, in the Start Date and End Date fields, select the appropriate date(s).
Note: You may enter dates in multiple formats using different types of separators, such as 11/01/11, 01.01.2011 or 1-1-11.
7.In the Set Optional Filters area, in the Field Name drop-down list, select the appropriate option(s).
•District Student ID – Code that identifies the student (imported from StudentInformation)
•Duration – Amount of time the student receives services
•EMIS ID – State Student ID code that identifies the student (imported from StudentInformation)
•Frequency –How often the student receives services
•Goals Addressed – Goals that the services address
•Location Of Services – Location where the student receives services
•Provider Title – Title of the person providing the services
•Service Code – Code that represents the description of the service the student is receiving entered on the Specially Designed Services page of the task
•Service Description – Description of the service the student is receiving entered on the Specially Designed Services page of the task
•Service End Date – Date by which the student should stop receiving services entered on the Services page of the task
•Service Start Date – Date by which the student should begin receiving services entered on the Services page of the task
•Student Name – Full name of student in the form of last name, first name, middle name (imported from StudentInformation)
•Task Name – Name of the task (entered on the New Task window in SpecialServices when the task was created)
8.If the Operation drop-down list is available, select one of the following options. The available options may vary depending on the option you selected in the Field Name drop-down list.
•Is Equal To
•Is Not Equal To
•Is Before
•Is Before or On
•Is After
•Is After or On
•Begins With
•Does Not Begin With
•Ends With
•Does Not End With
•Contains
•Does Not Contain
•Has a Value
•Does Not Have a Value
9.In the Value field, type the appropriate value.
Note: The available options and acceptable values vary depending on the option you selected in the Field Name drop-down list. You may be able to enter only alphabetical or only numeric characters depending on the option you selected in the Field Name drop-down list. If you selected an option in the Field Name drop-down list that requires a date, a calendar becomes available in the Value field. If you selected Has a Value or Does Not Have a Value in the Operation drop-down list, then the Value field is not available.

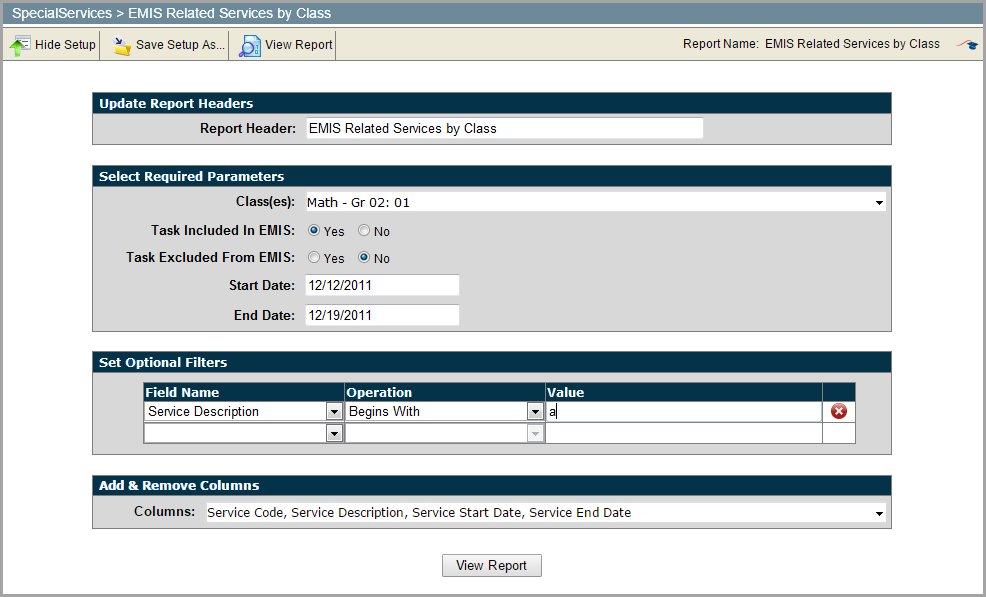
10.By default, specific columns display on the report. If you have selected specific filter options in the Field Name drop-down list and you want that information to display on the report, in the Columns drop-down list, select the corresponding column name.
11.Click View Report.
The report displays. If multiple events exist for a student, each event displays in a separate row.
Note: The field or list displays red indicating an unacceptable value was entered or a required field was left blank.
Note: Only nonhidden students in classes appear in the report.
12.To save the report with your selected parameters, filters, and columns, complete the following steps:
a.On the Report Viewer window, click  Save Setup As.
b.On the Save Setup As window, in the New report name field, enter a unique report name.
c.In the New description field, enter a description of the report.
d.Click Save.
The report displays in the My Reports section on the Report Builder screen.
The EMIS Special Ed Events report displays special education events information listed on the Special Ed Events page of the completed IEP, ETR, and SP tasks whose event dates fall within the specified date range for students in individual or multiple school(s) or class(es), depending on the report version. This report is available in two versions: one to users whose privileges allow access to school buildings and another version to users whose privileges provide access to classes.
1.On the Report Builder screen, beside the description of the report, click Run.
The SpecialServices Report Viewer window opens.
2.By default, in the Report Header field, EMIS Special Education Events or EMIS Special Education Events by Class displays, but you can rename the report if desired.
3.In the Select Required Parameters area, if you have access to buildings, in the School(s) drop-down list, select the appropriate school(s). If you have access to classes, in the Class(es) drop-down list, select the appropriate class(es).
Note: Only school buildings to which you have access or classes and class groups to which you have been assigned display in the list. Hidden classes do not display in the list.
4.In the Select Required Parameters area, in the Start Date and End Date fields, select the appropriate date(s).
Note: You may enter dates in multiple formats using different types of separators, such as 11/01/11, 01.01.2011 or 1-1-11.
5.In the Select Required Parameters area, in the Task Type(s) drop-down list, select the appropriate task type(s).
6.In the Select Required Parameters area, select one of the following Task Included In EMIS options:
•Yes
•No
7.In the Select Required Parameters area, select one of the following Task Excluded From EMIS options:
•Yes
•No
8.In the Set Optional Filters area, in the Field Name drop-down list, select the appropriate option(s).
•District Student ID – Code that identifies the student (imported from StudentInformation)
•EMIS ID – State Student ID code that identifies the student (imported from StudentInformation)
•Event Date – Date entered in the Meeting Date field on the task Cover Page
•Event End Date – Date the event ended
•Event Start Date – Date the event started
•Event Type – The type of event
•Non Compliance ID – The noncompliance identification
•Outcome ID – The outcome identification
•Required IEP Test Type – The IEP test type that is required
•Secondary Planning – The secondary plan
•Student Name – Full name of student in the form of last name, first name, middle name (imported from StudentInformation)
•Task Name – Name of the task (entered on the New Task window in SpecialServices when the task was created)
9.If the Operation drop-down list is available, select one of the following options. The available options may vary depending on the option you selected in the Field Name drop-down list.
•Is Equal To
•Is Not Equal To
•Is Less Than
•Is Less Than Or Equal To
•Is Greater Than
•Is Greater Than Or Equal To
•Is Before
•Is Before or On
•Is After
•Is After or On
•Begins With
•Does Not Begin With
•Ends With
•Does Not End With
•Contains
•Does Not Contain
•Has a Value
•Does Not Have a Value
10.In the Value field, type the appropriate value.
Note: The available options and acceptable values vary depending on the option you selected in the Field Name drop-down list. You may be able to enter only alphabetical or only numeric characters depending on the option you selected in the Field Name drop-down list. If you selected an option in the Field Name drop-down list that requires a date, a calendar becomes available in the Value field. If you selected Has a Value or Does Not Have a Value in the Operation drop-down list, then the Value field is not available.
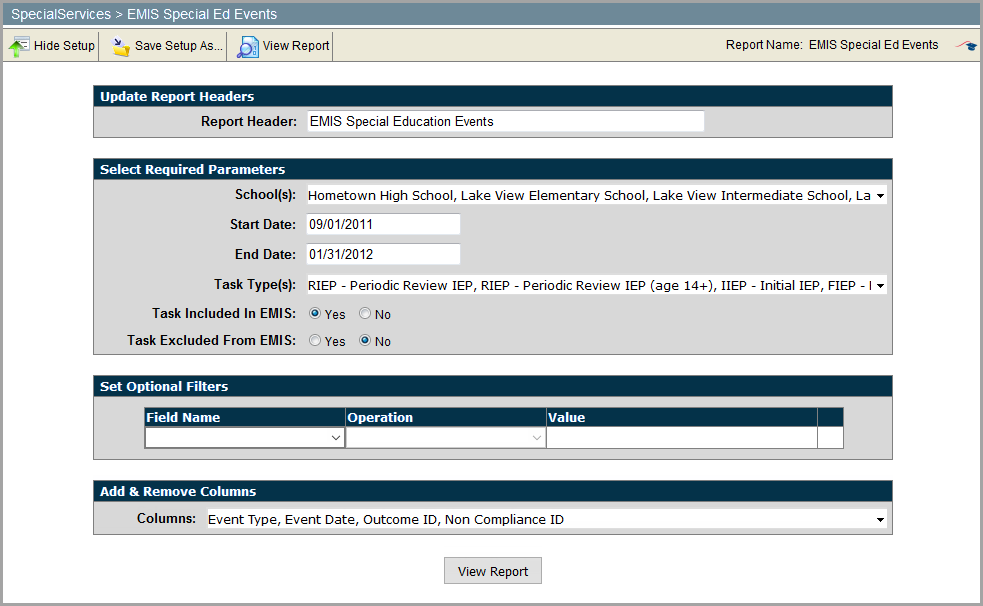
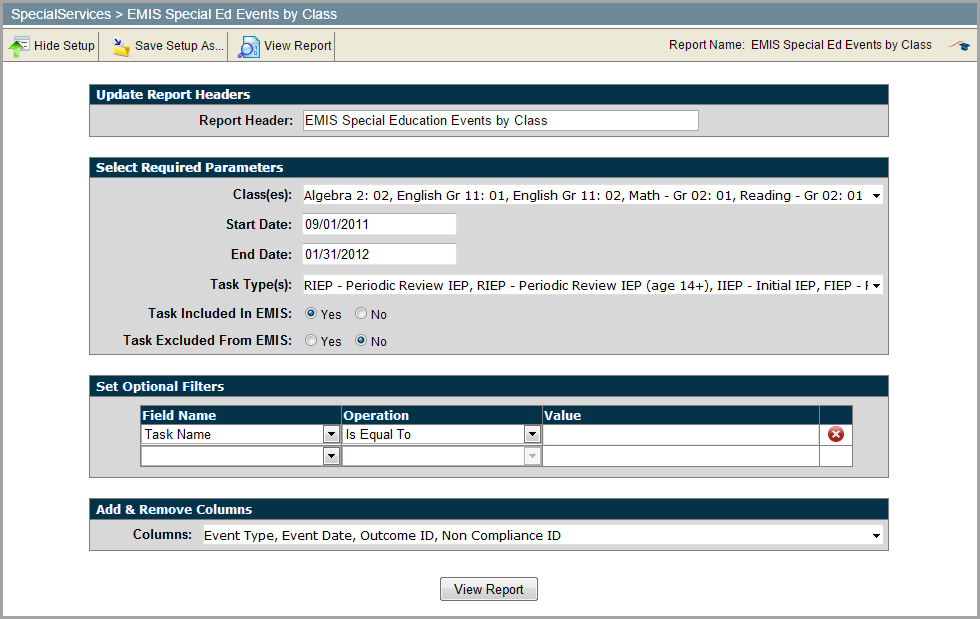
11.By default, certain columns display on the report. If you have selected specific filter options in the Field Name drop-down list and you want that information to display on the report, in the Columns drop-down list, select the corresponding column name.
12.Click View Report.
The report displays. If multiple events exist for a student, each event displays in a separate row.
Note: The field or list displays red indicating an unacceptable value was entered or a required field was left blank.
13.To save the report with your selected parameters, filters, and columns, complete the following steps:
a.On the Report Viewer window, click  Save Setup As.
b.On the Save Setup As window, in the New report name field, enter a unique report name.
c.In the New description field, enter a description of the report.
d.Click Save.
The report displays in the My Reports section on the Report Builder screen.
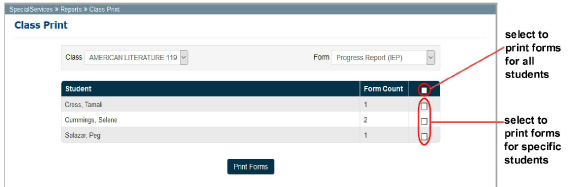
You can print progress reports and IEP summaries for one or more students in a class on the Class Print screen.
Note: To print progress reports and IEP summaries, you must be assigned to at least one class.
1.On the banner, click  to open the menu. Then, in the Reports submenu, click Class Print.

The Class Print screen displays with Progress Report (IEP) selected in the Form drop-down list by default.
2.In the Class drop-down list, select the class for which you want to print progress reports or IEP summaries.
3.In the Form drop-down list, select the type of progress report you want to print, or select IEP Summary.
A list displays that includes students in the selected class who have an open report task of the selected type. The Form Count field displays the number of pages contained in the student’s progress report or IEP summary.
4.Select the students whose progress reports you want to print:
•To select all students, on the column heading at the top of the grid, select the checkbox.
•To select individual students, in the row of the desired student, select the checkbox.
5.Click Print Forms.
The progress reports or IEP summaries for the selected students are merged into a single PDF document and display in a new window or tab.
6.Click Print in your PDF viewer.
7.To return to the Class Print screen, close the window or tab displaying the merged forms.
You can print blank versions of many SpecialServices forms to use offline. For example, you might print a blank set of the ETR forms to fill out during an ETR team meeting.
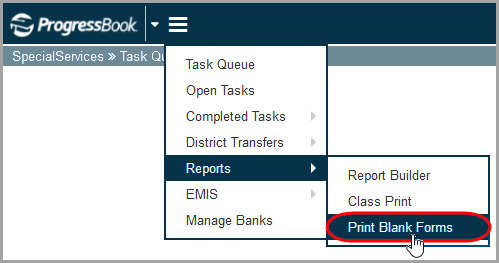
1.On the banner, click  to open the menu. Then, in the Reports submenu, click Print Blank Forms.
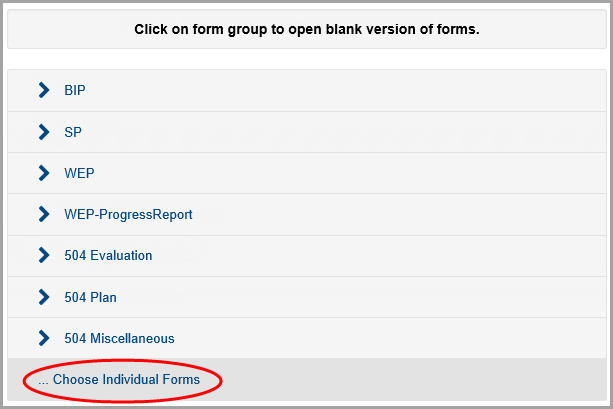
The Print Blank Forms screen displays a list of the form groups you can print as well as an option to choose individual forms to print.
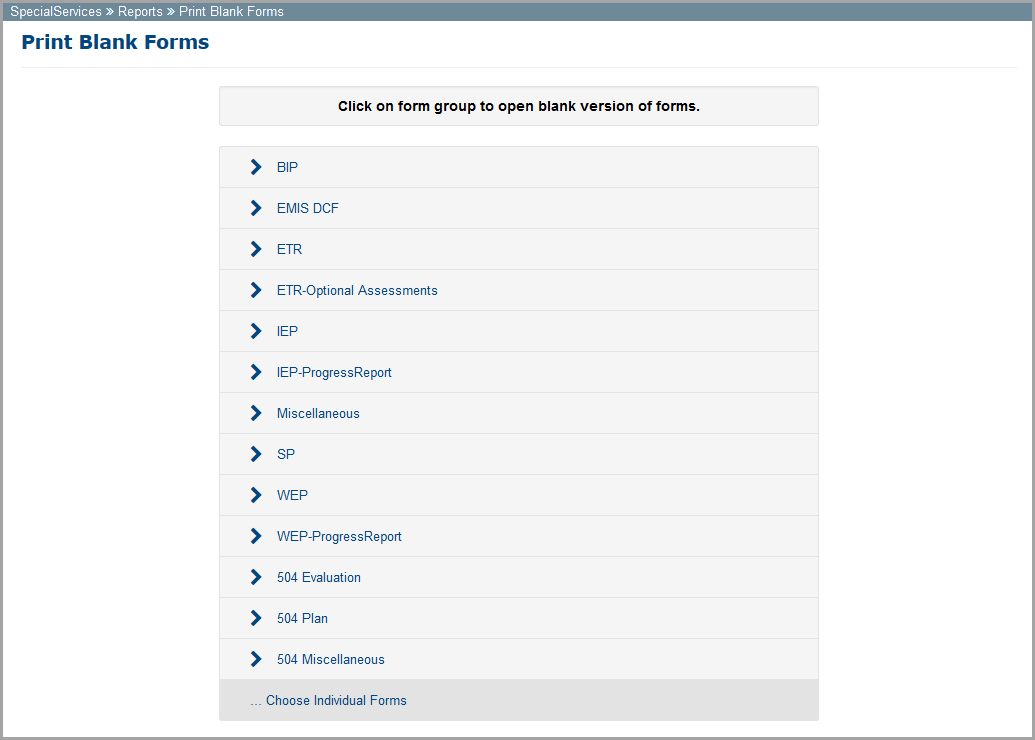
2.Select blank forms to print using one of the following options:
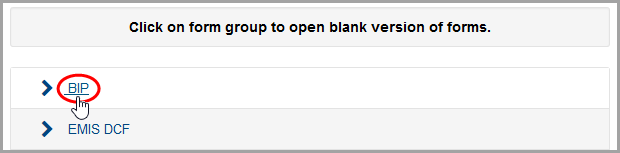
•To print all the forms in a particular form group (such as IEP, ETR, BIP, etc.), click the form group.
•To select individual forms:
i.Click ... Choose Individual Forms.
ii.On the Choose Forms window that opens, select the checkbox beside each form you want to print.
iii.Click Get Forms.
The selected blank forms display in a new window or tab in a single PDF document, and you can print the forms using your PDF viewer.