 .
.The District Transfers menu lets you transfer a student’s tasks from your district to another district, import a student’s tasks into your district, review transfer history, and delete a pending transfer. When you transfer a task, all the forms and attachments within the task are also transferred.
You can use the District Transfers menu only if the district to which you are transferring the task or from which you are importing the task also uses SpecialServices Classic.
Within the District Transfer menu, the search fields available for locating the student for whom you want to transfer tasks vary depending on the level of access assigned to your user account.
Note: Only users with the District Transfer security privilege assigned to their role can access the District Transfer menu.
Navigation: SpecialServices > District Transfers > Transfer Student
When a student transfers from your district to another district that also uses SpecialServices Classic, you can transfer tasks for
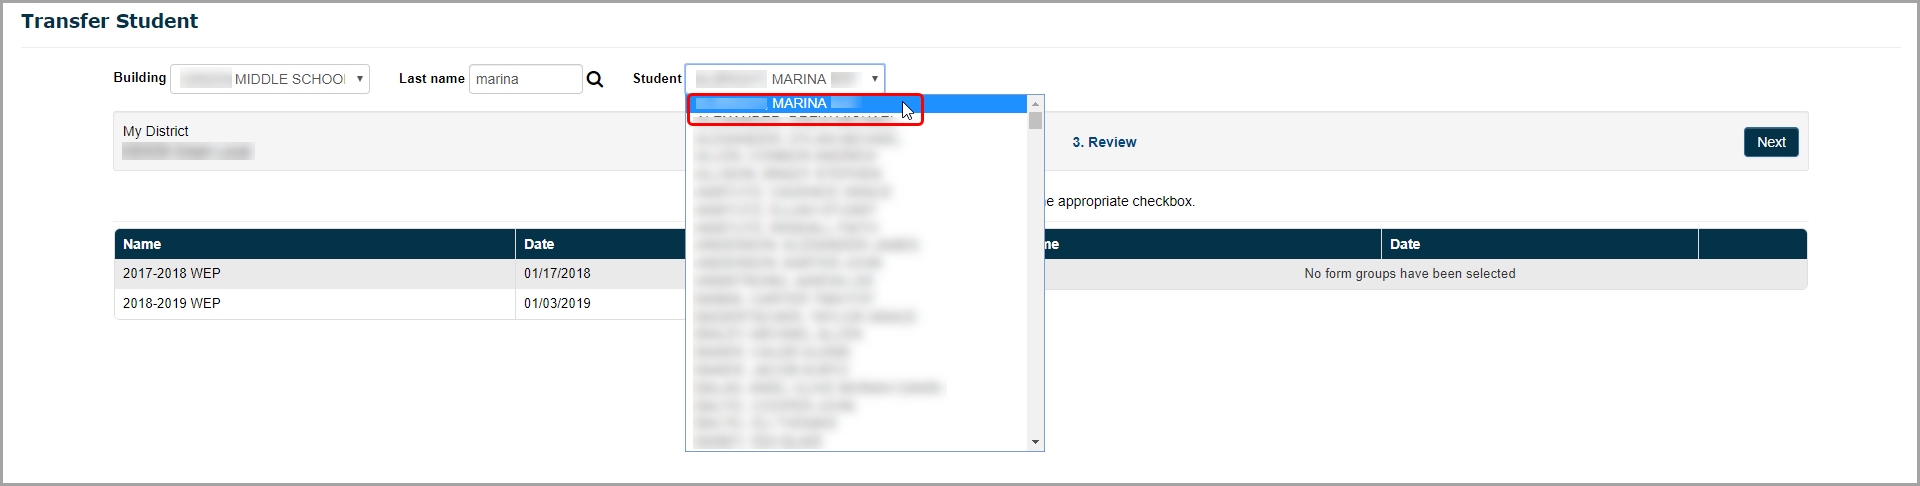
1.If you can view students in one or more school buildings and you have no classes assigned to you, on the Transfer Student screen, the Building drop-down list displays. Complete the following steps to select the student:
a.In the Building drop-down list, select a school building.
The Student drop-down list populates with students who are assigned to the selected school.
b.(Optional)
To further narrow your search, in the Last
name field, enter part or all of the student’s last name,
and then click .
2.In the Student drop-down list, select the student for whom you want to transfer tasks.
The tasks you can transfer for the student display.
Note: Only Classic View and Task View form set types are available for transfer. SSEM archived form set types cannot be transferred.
3.In the row of each task you want to transfer to another district, select the checkbox, and then click Add. The tasks you selected to transfer display in a grid on the right side of the screen.
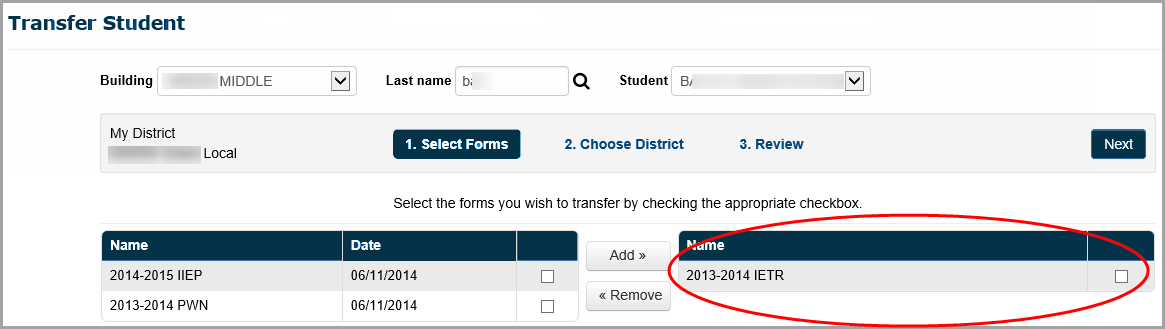
Note: To remove a task from the grid on the right side of the screen, in the appropriate row, select the checkbox, and then click Remove. The task displays in the grid on the left side of the screen.
4.Once all the tasks you want to transfer are selected, click Next.
The Choose District version of the Transfer Student screen displays.
5.To locate the district to which you want to transfer the tasks, in the "Enter search criteria" field, enter all or part of the identifying information.
Note: You can search for the district by entering all or part of the district's name, address, city, county, or state identification number (IRN).
The results of the search display below the "Enter search criteria" field.

Then, click ![]() .
.
6.In
the search results grid, in the row of the district to which you want
to transfer the student's tasks, click ![]() .
.
The row is highlighted to indicate that you have selected it.
7.Click Next.
The Review version of the Transfer Student screen displays.
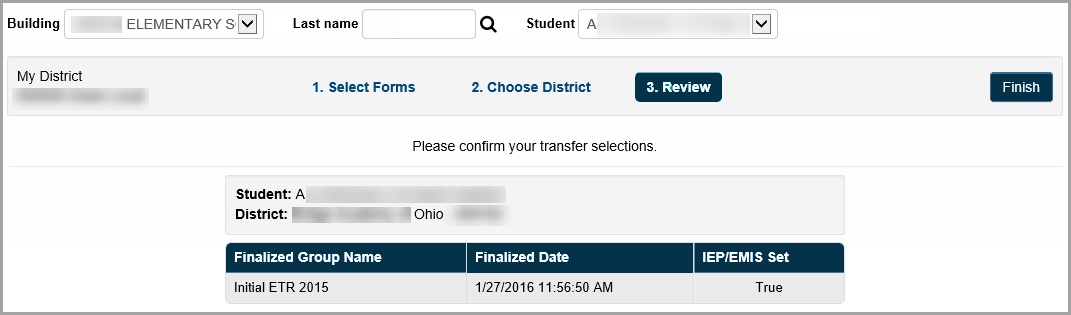
8.Verify that the correct student, tasks, and district are selected. To make any changes to the selected options, click the link for the step to which you would like to return, and modify the options as necessary.
9.To process the transfer, click Finish.
The transfer may take a few moments. When the transfer process is complete, the following message displays: Your transfer has been sent!
Importing Student Tasks from Another District
Navigation: SpecialServices > Districts Transfers > Import Forms
Administrators at other districts who use SpecialServices Classic can transfer the tasks for a student who has transferred to your district. You can then import these tasks and store them as part of the student's information in SpecialServices Classic. After you import the task into your district, you can view it from the Completed Tasks screen.
Note: The information from the imported forms does not display on the EMIS extract. To use any of the information on valid forms for the current year, you must create a new task from the imported task or create a new page within a task using a page from the imported task.
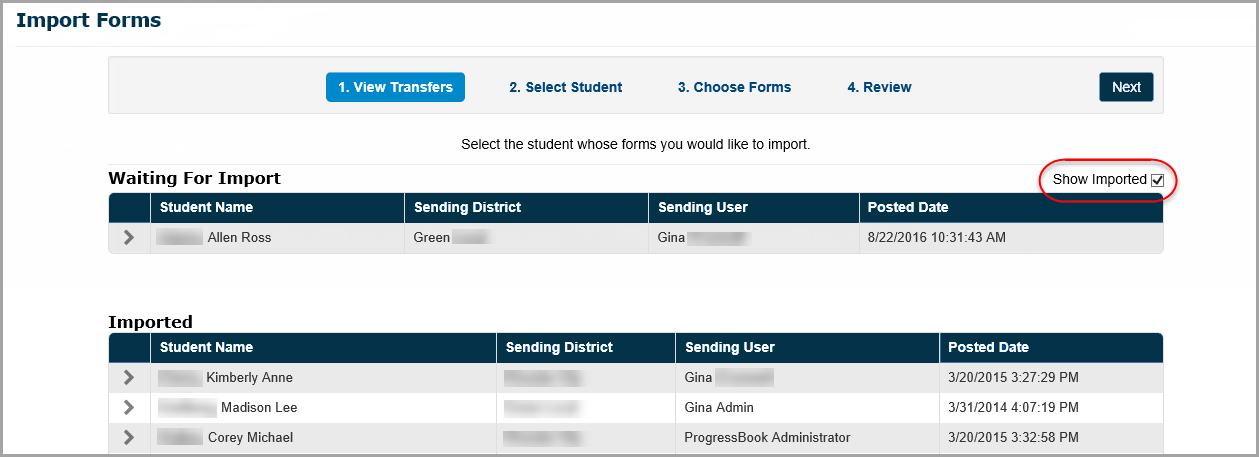
1.On the View Transfers version of the Import Forms screen, the names of students whose tasks have been transferred from another district display in the grid.
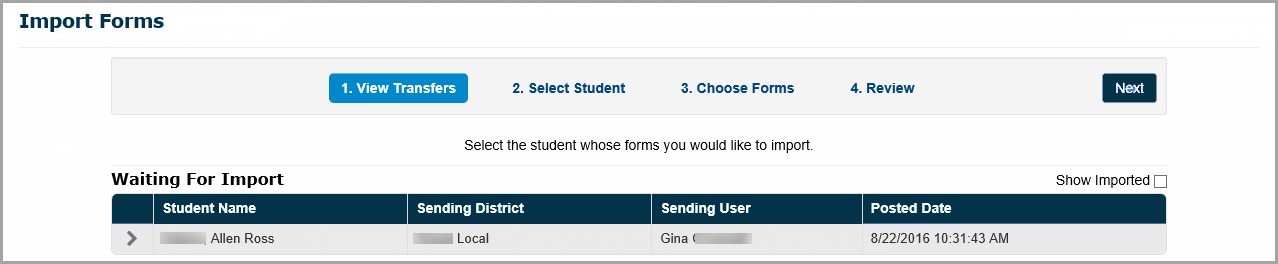
2.(Optional) To include students for whom you have already imported tasks, select the Show Imported checkbox above the grid.
An updated list displays.
3.In the row of the student
whose tasks you want to import into SpecialServices Classic,
click  .
.
The row is highlighted to indicate that you have selected it.
4.Click Next.
The Select Student version of the Import Forms screen displays. The student whose name matches the name associated to the task you are importing is selected by default.
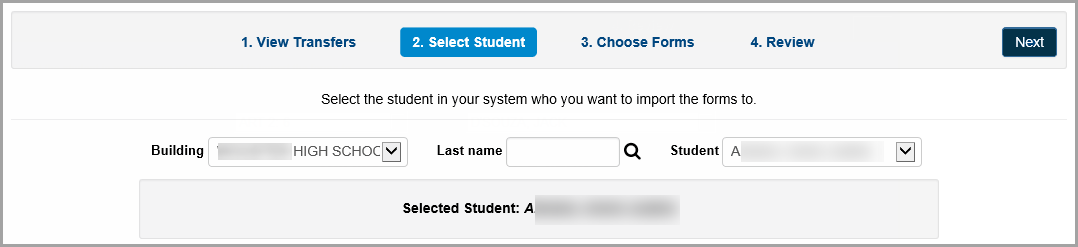
5.Verify that the student to whom you want to import the task is selected in the Student drop-down list. If not, select the appropriate student.
6.Click Next.
The Choose Forms version of the Import Forms screen displays, listing the task(s) available to import for the student selected in step 3.
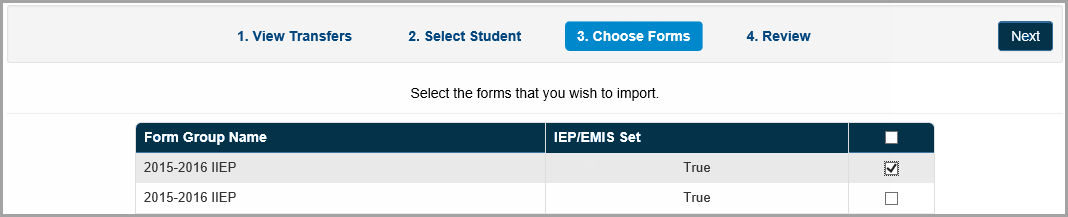
7.In the row(s) of the task(s) you want to import, select the checkbox.
8.Click Next.
The Review version of the Import Forms screen displays.
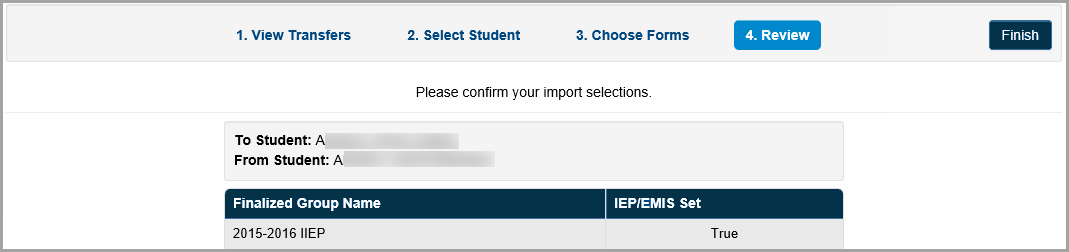
9.Verify that the correct information displays in the To Student and From Student fields. To change any of the selected information, click the link of the step to which you would like to return, and modify your selections as necessary.
10.To import the selected task, click Finish.
Once the tasks are imported into your district, the message displays: The forms have been imported!
11. You can perform any of the following actions:
•View the imported task from the Completed Tasks screen (see the "Completed Tasks" chapter of the ProgressBook SpecialServices Classic User Guide.)
•Create a new task using the task you imported (see the "Creating New Tasks from Existing Tasks" section of the ProgressBook SpecialServices Classic User Guide.)
•Create a new page in an existing task using a page from the task you imported (see the "Creating New Pages from Existing Pages" section of the ProgressBook SpecialServices Classic User Guide.)
Viewing Transfer Status & Reports
Navigation: SpecialServices > District Transfers > Transfer Status & Reports
You can view the transfer status of the student task imported into or transferred out of your district.
1.On the Transfer Status & History screen, search for the transfer history records you want to view using one or both of the following methods:
•In the Student name field, enter the student’s name.
•In the Start Date and End Date fields, enter the start and end dates within which the transfer occurred.
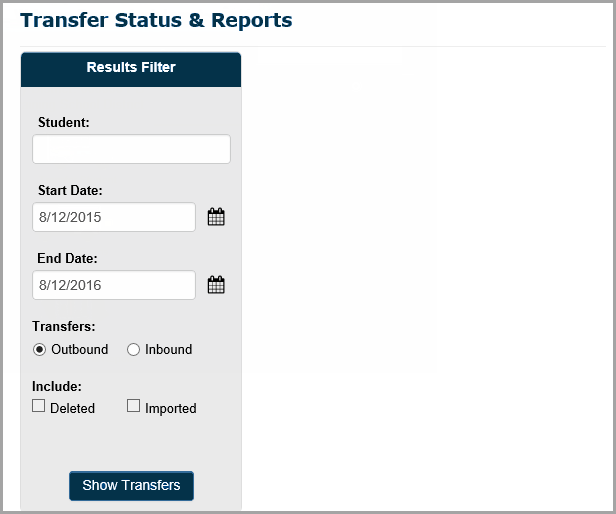
2.Select one of the following Transfers options:
•Outbound – Lists the students for whom tasks have been sent to another district.
•Inbound – Lists the students whose tasks have been imported into your district; you can optionally select the Include Deleted and/or Include Imported checkboxes to include deleted and/or imported student transfer records in your results.
3.Click Show Transfers.
The transfer status records that meet the criteria you selected display.
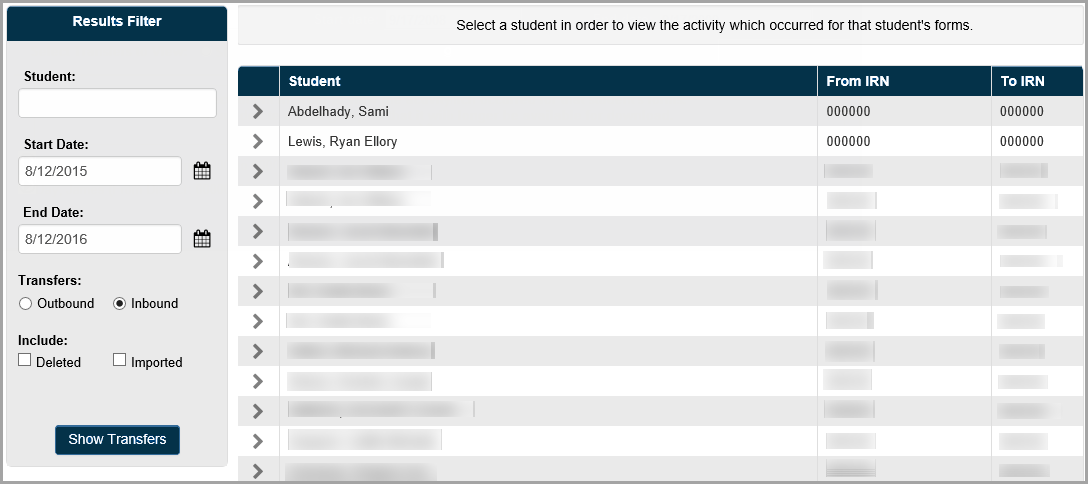
4.To
view the details of the transfer status, in the row of the student for
whom you want to view the transfer status, click  .
.
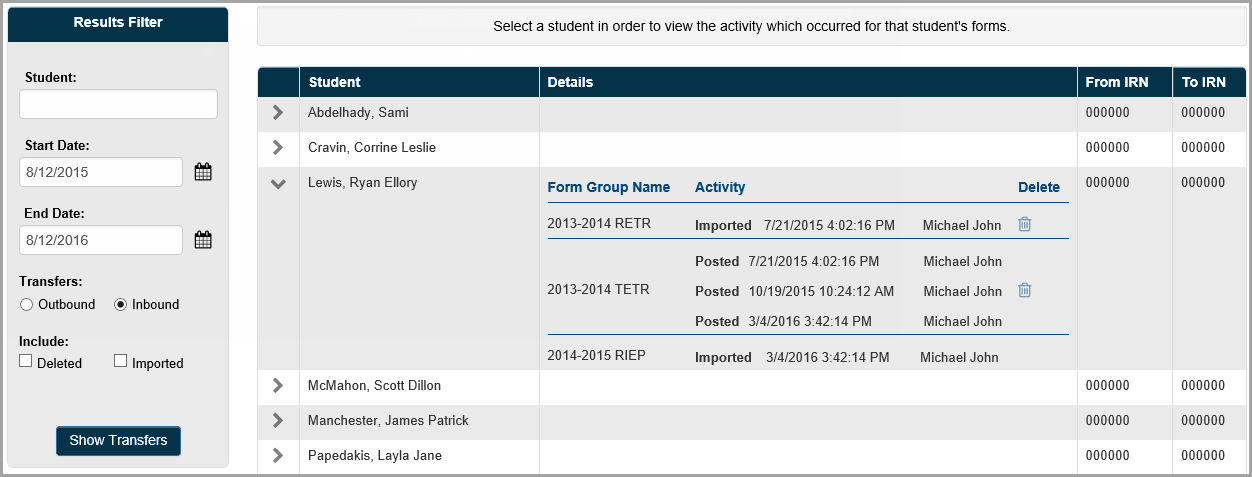
The following information about the transfer activity displays below the student name:
•Name of the task transferred
•Date and time the transfer occurred
•User who performed the transfer
•Status of the transfer
The following table describes the transfer statuses that display in the transfer history details for a student.
Transfer Status
Status |
Description |
|---|---|
Posted |
The forms have been posted to the destination district. •For students transferred into your district, you can import forms that display as Posted. •For students transferred out of your district, Posted indicates that the forms are available for the administrator at the destination district to import. |
Imported |
The forms have been imported into SpecialServices Classic. |
Deleted |
The forms have been deleted and are not available for import into SpecialServices Classic. |
es
Navigation: SpecialServices > District Transfers > Transfer Status & Reports
You can delete any tasks mistakenly sent into your district or transferred out of your district from the Transfer Status & Reports screen.
1.On the Transfer Status & Reports screen, in the Results Filter area, search for the transfer status records you want to delete using one or both of the following methods:
•In the Student name field, enter the student’s name.
•In the Start Date and End Date fields, enter the start and end dates within which the transfer occurred.
2.Select one of the following Show Transfers options:
•Transfers: Outbound – Lists the students whose tasks have been sent to another district.
•Transfers: Inbound – Lists the students whose tasks have been transferred into your district.
3.Click Show Transfers.
The transfer status records that meet the criteria you entered display.
4.In
the row of the student whose transfer status you want to delete, click
 .
.
The transfer status information displays below the student’s name.
5.In
the row of the transfer status you want to delete, click  .
.
In the row of the form set you deleted, a Deleted activity type displays in the Activity column with the date and time as well as the name of the user who deleted the transfer status.
The task no longer displays on the Transfer Student or Import Forms screen (depending on the option you selected in step 2).