Upload an Attachment to an Intervention
Navigation: DataMap > Interventions > Student Interventions
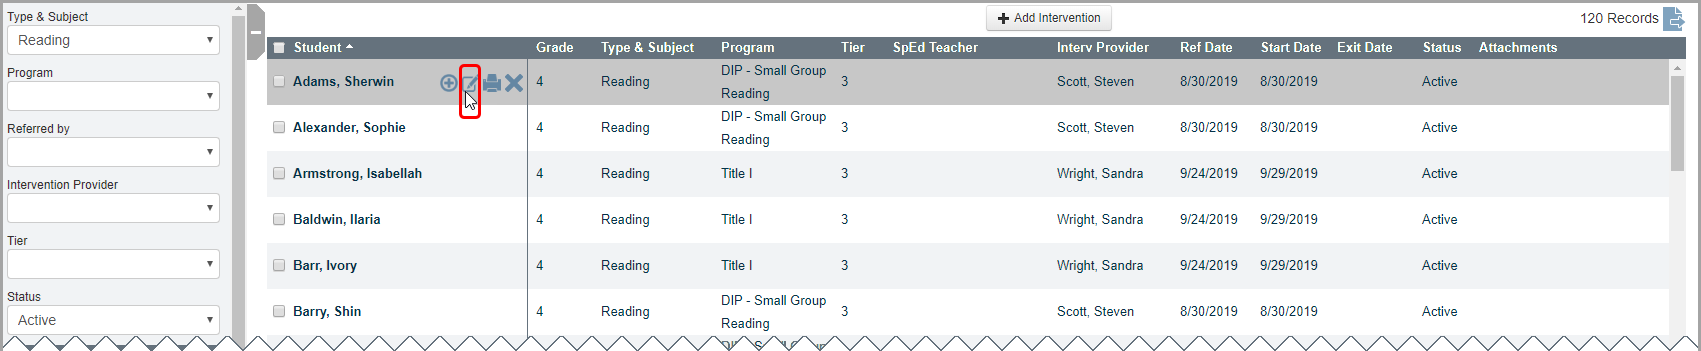
1.On the Student Interventions screen, in the row of the intervention to which you want to add an attachment, hover your cursor until icons display beside the student’s name.
2.Click ![]() .
.
The Edit Student Intervention screen General tab displays.
3.Click the Attachments tab.
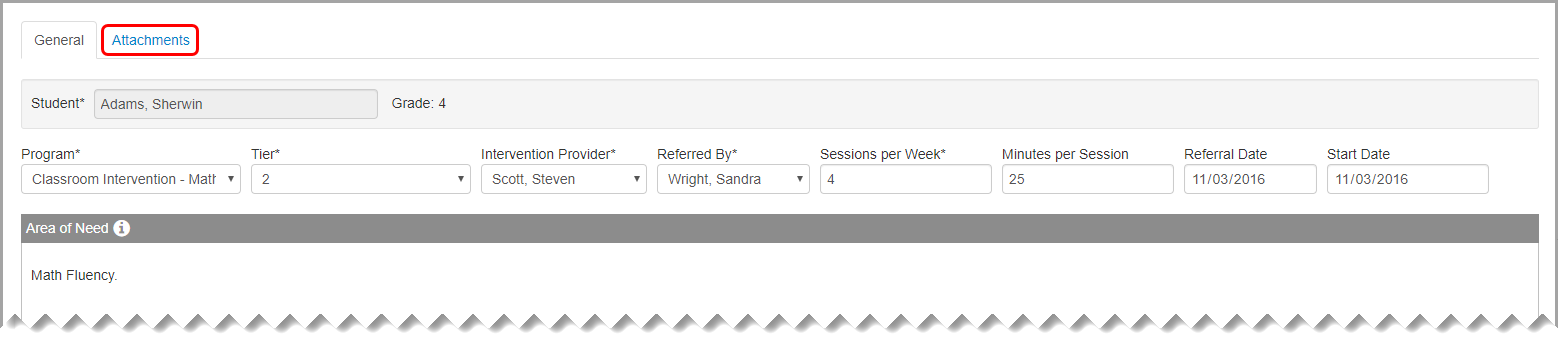
The Attachments tab displays.
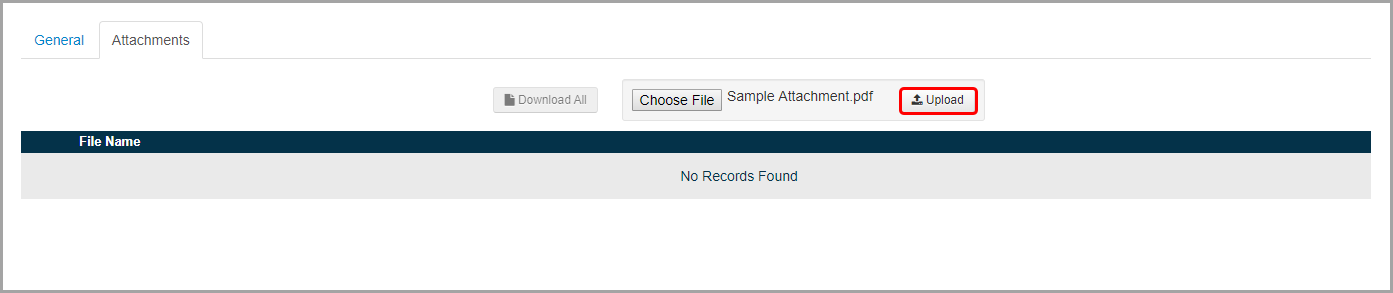
4.On the Attachments tab, click Choose File to locate and select the file you want to attach.
5.Click Upload.
Note: Attachments are restricted to 10 MB, and only the following file types are accepted:
|
•.bmp |
•.jpg |
•.ppt |
|---|---|---|
|
•.csv |
•.jpeg |
•.pptx |
|
•.doc |
•.odt |
•.tiff |
|
•.docx |
•.ods |
•.txt |
|
•.gif |
|
•.xls |
|
•.jfif |
•.png |
•.xlsx |
The attached file now displays below File Name, and an indicator with the number of attachments now displays on the Attachments tab.
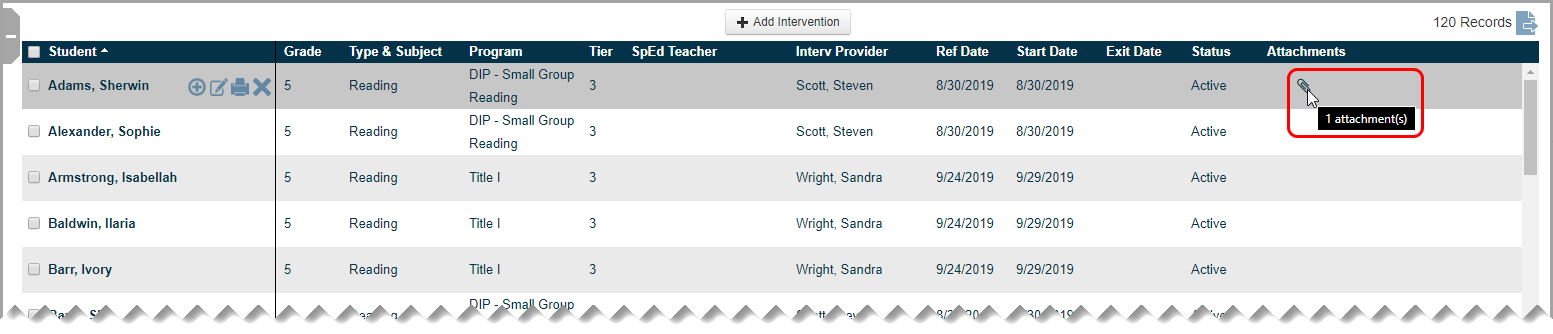
Note: On the Student Interventions screen, in the Attachments column for the applicable intervention, ![]() displays. Hover your cursor over the icon to view a tooltip that indicates the number of attachments for that intervention.
displays. Hover your cursor over the icon to view a tooltip that indicates the number of attachments for that intervention.